Resultados de busca
302 results found with an empty search
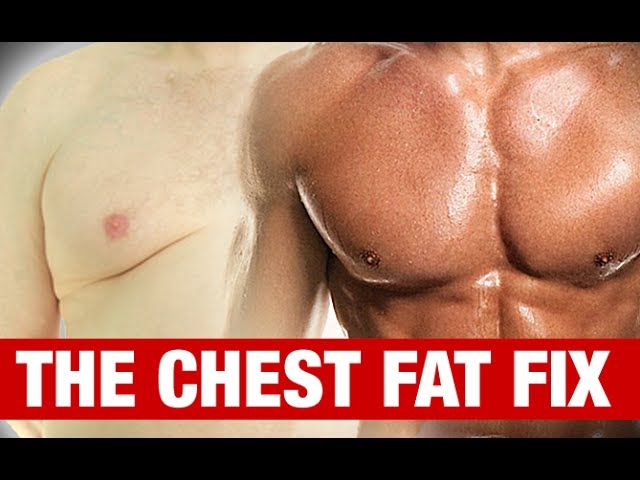
- How to Reduce Man Boobs (Gynecomastia vs Fat): Causes, Training & Diet
If you're grappling with the challenge of 'how to fix man boobs', know that you're not alone. This condition, while rarely discussed openly, is a common concern for many men. Also known as gynecomastia, man boobs can be a source of embarrassment and frustration, impacting everything from wardrobe choices to self-esteem. But there's good news: with the right strategies, you can tackle this issue head-on. In this comprehensive guide, we'll explore the multifaceted approaches to addressing and reducing man boobs. We'll delve into the underlying causes of excess chest fat and glandular tissue development, and provide actionable advice on how to rebalance your hormones naturally, refine your diet for optimal health, and select the most effective workout routines to redefine your chest. Whether you're looking for preventive tips or practical solutions to an existing condition, our aim is to arm you with knowledge and confidence. Let's embark on this journey towards a more toned and sculpted chest, leaving the concern of how to fix man boobs firmly in the past. Understanding Man Boobs: Causes and Solutions (Credits: ATHLEAN-X™) Gynecomastia, commonly referred to as "man boobs," is a condition that affects many men, leading to the development of excess breast tissue. It's a source of discomfort and self-consciousness, but understanding the underlying causes and implementing the right solutions can make a significant difference. Man boobs primarily stem from hormonal imbalances, particularly when the estrogen levels in the body are high relative to testosterone. This can occur naturally during different life stages, such as puberty or aging. However, it can also be the result of lifestyle factors, such as obesity, which increases the production of estrogen, medication side effects, or the use of certain drugs. The first step in addressing man boobs is to consult with a healthcare professional to determine the exact cause. In some cases, medication or surgery may be recommended, especially if the condition is a result of glandular tissue growth. However, for many, lifestyle changes such as diet, exercise, and avoiding certain medications or substances can provide a natural and effective solution. In addition to medical interventions, there are specific exercises and dietary adjustments that can help reduce the appearance of man boobs. Strength training, especially exercises that target the chest and upper body, can help by improving muscle tone and reducing overall body fat. Emphasizing a balanced diet with a caloric deficit can also aid in fat loss, potentially reducing fatty tissue around the chest area. Tailoring Your Diet to Combat Man Boobs (credits: Ryan Humiston) Diet plays an essential role in managing body composition and can be particularly effective in reducing excess fat in the chest area. A strategic approach to nutrition can support hormonal balance and weight management. To tackle man boobs through diet, focus on creating a sustainable caloric deficit. This means consuming fewer calories than you burn, which encourages the body to use stored fat for energy. Incorporate lean proteins, whole grains, and plenty of fruits and vegetables to ensure you're getting a full spectrum of nutrients while maintaining lower calorie intake. Certain foods can also help regulate hormones. For example, cruciferous vegetables like broccoli and cauliflower contain compounds that may assist in balancing estrogen levels. Likewise, foods rich in healthy fats, such as avocados and nuts, can support testosterone production when consumed in moderation. It's also wise to limit the intake of foods and substances that can negatively impact your hormonal balance. Processed foods, excessive alcohol, and products with high sugar content can all contribute to weight gain and hormonal disruption. By adjusting your diet, you can create an environment that's conducive to reducing man boobs. Effective Exercise Strategies to Reduce Man Boobs (credits: Superhuman Troy) While targeted chest exercises won't eliminate breast tissue, they can improve the appearance of your chest by building muscle and reducing overall body fat. Combining cardiovascular and strength training exercises can yield the best results. Cardiovascular exercises, such as running, cycling, or swimming, are effective for burning calories and shedding fat. High-intensity interval training (HIIT) can be particularly beneficial for those looking to maximize fat loss in a shorter period due to its afterburn effect, which increases calorie burn even after the workout. Strength training should be a key component of your exercise regimen. Focus on compound movements like push-ups, bench presses, and rows, which engage the chest muscles along with other major muscle groups. These exercises help in building a solid muscular foundation, which can make the chest appear firmer and more toned. Consistency is crucial. Establishing a regular workout routine that you can stick to over the long term will help in gradually reducing the appearance of man boobs. Over time, as you lose fat and gain muscle, you'll notice a significant improvement in the shape and tone of your chest. Conclusion Man boobs are a common issue that can be addressed through a combination of lifestyle changes, exercise, diet, and, when necessary, medical treatment. By understanding the causes and implementing a holistic approach to your health and fitness, you can significantly reduce the appearance of man boobs. Remember to consult with healthcare professionals, stay committed to your goals, and be patient with your progress. With time and effort, you can achieve a chest that you're confident and comfortable with.
- Incline Smith Machine Press: Form, Angles, Grip, Benefits & Mistakes
The Incline Smith Machine Press is a powerful and versatile exercise that has gained popularity among fitness enthusiasts and professional athletes alike. This comprehensive guide will delve into every aspect of this chest-building powerhouse, providing you with the knowledge and techniques to maximize your upper pectoral development. Whether you're a beginner looking to incorporate this exercise into your routine or an experienced lifter aiming to refine your technique, this guide offers valuable insights for all fitness levels. We'll explore the proper form, variations, programming strategies, and much more to help you harness the full potential of the Incline Smith Machine Press. Get ready to transform your chest workouts and achieve the sculpted upper pectorals you've always desired. Let's dive into the world of the Incline Smith Machine Press and unlock your chest's true potential! Table of Contents: I ntroduction to the Incline Smith Machine Press Anatomy and Muscles Worked Proper Form and Technique Variations of the Exercise Programming the Incline Smith Machine Press Incline Smith Machine Press for Different Fitness Goals Comparing to Other Chest Exercises Nutrition for Upper Chest Development Conclusion: Maximizing Your Results In this guide, we'll cover each of these topics in detail, providing you with a comprehensive understanding of the Incline Smith Machine Press. From the basics of proper form to advanced techniques for breaking through plateaus, you'll find everything you need to master this essential chest exercise. Let's begin our journey to building a stronger, more defined upper chest with the Incline Smith Machine Press! Introduction to the Incline Smith Machine Press The Incline Smith Machine Press stands as a cornerstone exercise in the realm of upper chest development, offering a unique blend of stability and targeted muscle engagement. This powerful movement has gained traction among fitness enthusiasts and professional bodybuilders alike, cementing its place in chest-focused workout routines worldwide. At its core, the Incline Smith Machine Press is a variation of the traditional bench press, performed on a Smith machine with the bench set at an incline angle. This specific setup allows for a more concentrated focus on the upper portion of the pectoral muscles, making it an invaluable tool for those seeking to build a well-rounded and aesthetically pleasing chest. The origins of this exercise can be traced back to the invention of the Smith machine itself, created by Jack LaLanne in the 1950s. Since then, the Incline Smith Machine Press has evolved, becoming a staple in gyms across the globe. Its rise to prominence can be attributed to the unique benefits it offers over free-weight alternatives. One of the primary advantages of the Incline Smith Machine Press is the enhanced stability it provides. The fixed vertical path of the bar allows lifters to focus solely on pressing the weight, without the need to balance or stabilize the bar. This feature makes it an excellent choice for beginners learning proper form, as well as advanced lifters looking to push their limits in a controlled environment. Moreover, the Incline Smith Machine Press offers unparalleled isolation of the upper chest muscles. The incline angle, typically set between 30 to 45 degrees, shifts the emphasis to the clavicular head of the pectoralis major, an area often underdeveloped in many lifters. This targeted approach can lead to more balanced chest development and improved overall upper body aesthetics. Incorporating the Incline Smith Machine Press into your workout routine can yield numerous benefits. Firstly, it can significantly enhance upper chest strength and size, contributing to a more defined and muscular appearance. Secondly, the exercise can improve overall pressing power, which translates to better performance in other chest exercises and functional movements. Additionally, the Incline Smith Machine Press can be an excellent tool for breaking through plateaus in chest development. The fixed path of the bar allows for consistent progressive overload, a key factor in continuous muscle growth and strength gains. This feature makes it easier to track progress and make incremental increases in weight over time. For those concerned about shoulder health, the Incline Smith Machine Press can be a shoulder-friendly alternative to traditional incline barbell presses. The guided motion of the Smith machine can reduce stress on the shoulder joint, making it a suitable option for individuals with shoulder issues or those looking to prevent future problems. As we delve deeper into this comprehensive guide, we'll explore the intricate details of proper form, variations, programming strategies, and much more. Whether you're a seasoned lifter looking to refine your technique or a newcomer eager to incorporate this powerful exercise into your routine, this guide will equip you with the knowledge and tools to maximize your results with the Incline Smith Machine Press. Stay tuned as we uncover the secrets to mastering this essential chest exercise and unlock your upper pectoral potential. The journey to a stronger, more defined upper chest begins here, with the Incline Smith Machine Press as your guide and ally in the pursuit of physical excellence. Anatomy and Muscles Worked in the Incline Smith Machine Press Understanding the anatomy and muscles engaged during the Incline Smith Machine Press is crucial for maximizing its effectiveness and appreciating its role in comprehensive chest development. This exercise primarily targets the upper chest but also involves several other muscle groups, making it a compound movement with far-reaching benefits. The star of the show in the Incline Smith Machine Press is undoubtedly the pectoralis major, specifically its clavicular head. This upper portion of the chest muscle originates from the clavicle and inserts into the humerus. The incline angle of the bench in this exercise places a greater emphasis on this part of the muscle, leading to more pronounced upper chest development. This targeted activation is what sets the Incline Smith Machine Press apart from flat bench variations, making it indispensable for those seeking a well-rounded chest appearance. While the upper chest takes center stage, it's important to note that the entire pectoralis major is engaged during this exercise. The sternal head, which makes up the bulk of the lower and middle chest, also contributes significantly to the pressing motion. This comprehensive activation ensures that while the upper chest is emphasized, overall chest development is not neglected. The anterior deltoids, or front shoulders, play a crucial supporting role in the Incline Smith Machine Press. As the angle of the press increases, so does the involvement of the anterior deltoids. This synergistic action not only aids in the pressing movement but also contributes to shoulder development, enhancing the overall appearance of the upper body. Triceps brachii, the muscles at the back of the upper arm, are heavily involved in the Incline Smith Machine Press. They are responsible for the extension of the elbow joint, which is essential for completing the pressing motion. The triceps' engagement in this exercise can lead to increased arm size and strength, complementing the chest development. It's worth noting that the Incline Smith Machine Press also engages several stabilizing muscles. The serratus anterior, located on the sides of the upper ribs, works to protract the scapula during the pressing motion. This engagement can contribute to improved shoulder stability and a more defined appearance of the upper body. The biceps brachii, while not primary movers, act as dynamic stabilizers during the eccentric (lowering) phase of the movement. This subtle engagement can contribute to overall arm development and improved control during the exercise. Core muscles, including the rectus abdominis and obliques, are activated isometrically to maintain stability throughout the movement. This core engagement is particularly pronounced in the Incline Smith Machine Press due to the angle of the body on the incline bench. Compared to the flat bench press, the Incline Smith Machine Press shifts more emphasis to the upper chest and anterior deltoids. Electromyography (EMG) studies have shown increased activation of the clavicular head of the pectoralis major during incline pressing movements compared to flat or decline variations. This makes the Incline Smith Machine Press an essential tool for targeted upper chest development. Understanding this muscular involvement allows for more strategic exercise programming. For instance, pairing the Incline Smith Machine Press with exercises that target the lower chest can ensure balanced pectoral development. Similarly, being aware of the triceps' involvement can inform decisions about arm training volume and frequency. The unique anatomy of the upper chest, with its fibers running more diagonally compared to the lower chest, responds particularly well to the angle and movement pattern of the Incline Smith Machine Press. This anatomical alignment allows for optimal muscle fiber recruitment and tension, potentially leading to superior muscle growth and strength gains in this often underdeveloped area. As we progress through this guide, keep in mind the complex interplay of these muscle groups during the Incline Smith Machine Press. This understanding will inform proper technique, help in selecting complementary exercises, and ultimately lead to more effective and targeted chest development. The Incline Smith Machine Press is not just an exercise; it's a powerful tool for sculpting a well-balanced and impressive upper body, rooted in a deep understanding of human anatomy and biomechanics. Proper Form and Technique for the Incline Smith Machine Press Mastering the proper form and technique of the Incline Smith Machine Press is paramount for maximizing its benefits and minimizing the risk of injury. This section will provide a detailed, step-by-step guide to executing this exercise with precision, ensuring you get the most out of every repetition. Setting up the Smith Machine for the incline press is the crucial first step. Begin by adjusting the bench to an incline angle between 30 to 45 degrees. This range has been shown to optimally target the upper chest fibers while still engaging the entire pectoralis major. The exact angle can be personalized based on individual comfort and goals, with a steeper incline shifting more emphasis to the anterior deltoids. Position the Smith machine bar so that it aligns with the upper portion of your chest when you're lying on the incline bench. This setup ensures that the bar path will be in line with the fiber direction of the upper pectoral muscles, maximizing engagement and reducing strain on the shoulder joints. As you approach the bench, take a moment to consider your grip width. A grip slightly wider than shoulder-width is generally recommended for the Incline Smith Machine Press. This width allows for optimal chest activation while maintaining a natural and comfortable arm position. However, grip width can be adjusted slightly to target different areas of the chest or to accommodate individual body proportions. Lie back on the incline bench, ensuring your eyes are aligned with the bar. Plant your feet firmly on the ground, creating a stable base. Some lifters prefer to place their feet on the bench for increased stability, but this is a matter of personal preference and comfort. Unrack the bar by rotating your wrists to disengage the safety locks. Lower the bar slowly and under control to your upper chest, around the clavicle area. The descent should be smooth and controlled, taking about 2-3 seconds. This controlled eccentric phase is crucial for muscle engagement and growth. As the bar touches your chest, pause briefly to eliminate momentum and maintain tension in the chest muscles. This pause, lasting about a second, can significantly enhance muscle fiber recruitment and contribute to greater strength gains over time. Initiate the pressing motion by driving the bar up and slightly back towards the rack. The bar path should follow a slight arc, moving back towards your head as it ascends. This arc mimics the natural pressing motion of the chest muscles and allows for optimal force production. Throughout the movement, focus on squeezing your chest muscles. This mind-muscle connection is crucial for maximizing muscle activation and growth. Visualize your pectoral muscles contracting and expanding with each repetition. Breathing technique is often overlooked but is crucial for proper execution of the Incline Smith Machine Press. Inhale deeply as you lower the bar, and exhale forcefully as you press it up. This breathing pattern helps maintain core stability and can enhance overall performance. One common mistake to avoid is arching your lower back excessively. While a slight natural arch is acceptable, excessive arching can lead to lower back strain and reduced chest engagement. Keep your lower back in contact with the bench throughout the movement. Another pitfall to watch out for is bouncing the bar off your chest. This not only reduces the effectiveness of the exercise but also increases the risk of injury. Always maintain control of the bar throughout the entire range of motion. For those new to the Incline Smith Machine Press, it's advisable to start with lighter weights to perfect the form before progressing to heavier loads. Remember, proper technique is far more important than the amount of weight lifted when it comes to muscle development and injury prevention. As you become more comfortable with the basic movement, you can incorporate advanced techniques such as paused reps, where you hold the bar at the bottom position for 2-3 seconds before pressing up. This technique can enhance muscle fiber recruitment and improve overall strength. It's also worth noting that the Smith machine's fixed bar path, while beneficial for stability, can feel unnatural to some lifters. Take the time to find a comfortable position and bar path that allows for a full range of motion without causing discomfort in the shoulders or wrists. By focusing on proper form and technique in the Incline Smith Machine Press, you set the foundation for impressive upper chest development. Each repetition performed with precision brings you closer to your goals of a stronger, more defined upper chest. As we progress through this guide, keep these technical points in mind, as they form the basis for all variations and advanced applications of this powerful exercise. Variations of the Incline Smith Machine Press The Incline Smith Machine Press, while powerful in its standard form, offers a variety of variations that can enhance your chest workout and target different aspects of muscle development. These variations not only add diversity to your training regimen but also allow for continued progress and muscle confusion, essential elements for ongoing growth and strength gains. The Close-Grip Incline Smith Machine Press is a variation that shifts more emphasis to the triceps while still engaging the upper chest. To perform this variation, simply narrow your grip to about shoulder-width or slightly less. This adjustment increases the workload on the triceps, making it an excellent compound movement for both chest and arm development. The close-grip variation is particularly beneficial for those looking to improve their lockout strength in pressing movements or add mass to their triceps. Conversely, the Wide-Grip Incline Smith Machine Press places greater emphasis on the outer portions of the upper chest. By widening your grip beyond shoulder-width, you increase the stretch on the pectoral muscles at the bottom of the movement. This variation can be particularly effective for developing chest width and improving the overall aesthetics of the upper body. However, it's crucial to maintain proper form and avoid excessive widening of the grip, which could lead to shoulder strain. For those seeking to address muscle imbalances or improve unilateral strength, the Single-Arm Incline Smith Machine Press is an excellent option. This variation involves pressing the bar with one arm at a time, allowing for focused work on each side of the chest independently. It's an challenging variation that not only targets the chest but also engages core muscles for stability. When performing single-arm presses, ensure the unused arm is either resting at your side or gripping the bench for support. The Reverse-Grip Incline Smith Machine Press offers a unique stimulus to the upper chest and anterior deltoids. By supinating your hands so that your palms face towards your face, you change the angle of stress on the chest muscles and increase activation of the upper chest fibers. This grip also tends to be more comfortable for those with wrist or shoulder issues. The reverse grip variation requires careful execution and may feel awkward at first, so it's advisable to start with lighter weights when incorporating this variation. For those looking to increase time under tension, the Tempo Incline Smith Machine Press is an excellent variation. This involves manipulating the speed of both the eccentric and concentric phases of the lift. For example, you might lower the bar for a count of four seconds, pause for two seconds at the bottom, and then explosively press up. This variation can enhance muscle growth by increasing metabolic stress and mechanical tension on the muscle fibers. The Partial Rep Incline Smith Machine Press is another advanced variation that can help break through plateaus. This involves performing the exercise through a limited range of motion, often focusing on either the top or bottom half of the movement. Partial reps can help overload specific portions of the strength curve and can be particularly useful for developing lockout strength or improving performance in the stretched position. For those seeking to maximize hypertrophy, the Drop Set Incline Smith Machine Press can be an intense and effective variation. This involves performing a set to near failure, then immediately reducing the weight and continuing for additional repetitions. This technique can push muscle fibers to their limit and stimulate significant growth. The Paused Incline Smith Machine Press involves holding the bar stationary on your chest for a predetermined count (usually 1-3 seconds) before pressing it back up. This variation eliminates the stretch reflex and forces the chest muscles to generate force from a dead stop, which can improve overall pressing strength and power. For a more dynamic approach, the Explosive Incline Smith Machine Press focuses on bar speed. While maintaining control, the goal is to press the bar as explosively as possible. This variation can improve power output and is particularly beneficial for athletes in sports requiring upper body power. Lastly, the Resistance Band Incline Smith Machine Press adds accommodating resistance to the exercise. By attaching resistance bands to the bar, you create a variable resistance profile that increases as you press up. This variation can help improve lockout strength and provide a unique stimulus to the muscles. Each of these variations of the Incline Smith Machine Press offers its own set of benefits and challenges. Incorporating them strategically into your training program can help prevent plateaus, target specific weaknesses, and provide the variety necessary for continued progress. As with any new exercise variation, it's important to start with lighter weights to familiarize yourself with the movement pattern before progressing to heavier loads. By exploring these variations, you can customize your Incline Smith Machine Press routine to align perfectly with your specific goals, whether they be strength, hypertrophy, or improved athletic performance. The versatility of the Incline Smith Machine Press, combined with these variations, makes it an indispensable tool in any serious chest development program. Programming the Incline Smith Machine Press in Your Workout Effectively programming the Incline Smith Machine Press into your workout routine is crucial for maximizing its benefits and achieving your fitness goals. Whether you're aiming for strength, hypertrophy, or overall chest development, strategic implementation of this exercise can significantly enhance your results. For strength-focused athletes, the Incline Smith Machine Press can be programmed as a primary movement in your chest or push day routine. A typical strength-building protocol might involve 3-5 sets of 3-6 repetitions with heavy loads, around 85-90% of your one-repetition maximum (1RM). This low-rep, high-intensity approach stimulates neural adaptations and maximal force production. Rest periods between sets should be longer, typically 2-3 minutes, to allow for adequate recovery and maintenance of intensity across sets. Those prioritizing muscle hypertrophy should consider a moderate rep range of 8-12 repetitions for 3-4 sets. This rep range has been shown to be optimal for muscle growth, balancing mechanical tension and metabolic stress. The weight used should be challenging, typically around 70-80% of your 1RM. Rest periods can be shorter, around 60-90 seconds, to maintain metabolic stress on the muscles. For endurance and muscular definition, higher rep ranges of 12-15 or even up to 20 repetitions can be effective. This approach, using lighter weights (around 60-70% of 1RM), can improve muscular endurance and create a significant pump in the chest muscles. Shorter rest periods of 30-60 seconds between sets can enhance the cardiovascular benefits of this training style. Frequency of the Incline Smith Machine Press in your program depends on your overall training split and recovery capacity. For a typical bodybuilding-style split, incorporating this exercise 1-2 times per week is often sufficient. If you're following an upper/lower or push/pull/legs split, you might perform the Incline Smith Machine Press on each push or upper body day, which could amount to 2-3 times per week. Periodization is a key concept in programming the Incline Smith Machine Press for long-term progress. A linear periodization model might start with higher rep ranges and gradually decrease reps while increasing weight over several weeks. For example: Week 1-3: 3 sets of 12-15 reps Week 4-6: 4 sets of 8-10 reps Week 7-9: 5 sets of 5-6 reps Alternatively, undulating periodization varies the rep ranges and intensities more frequently, even within the same week. This approach can provide varied stimuli to the muscles and prevent adaptation plateaus. The placement of the Incline Smith Machine Press within your workout is also important. As a compound movement targeting a large muscle group, it's often best performed early in the workout when energy levels are highest. This allows for maximum effort and weight to be used. However, if you're using it as an accessory movement to complement barbell or dumbbell presses, it can be effectively placed later in the workout. For a comprehensive chest development program, consider pairing the Incline Smith Machine Press with complementary exercises. A sample chest workout might look like this: Incline Smith Machine Press: 4 sets of 8-10 reps Flat Dumbbell Press: 3 sets of 10-12 reps Cable Flyes: 3 sets of 12-15 reps Push-ups: 2 sets to failure This combination targets the chest from multiple angles and with varied movement patterns, promoting balanced development. Progressive overload is crucial for continued progress with the Incline Smith Machine Press. This can be achieved by gradually increasing the weight, adding more reps or sets, decreasing rest periods, or improving the quality of each repetition. Keep a detailed log of your workouts to track progress and inform future programming decisions. Deload weeks should be programmed every 4-6 weeks to allow for recovery and prevent overtraining. During a deload week, reduce the volume and/or intensity of the Incline Smith Machine Press by about 40-50%. This gives your body time to recover and can lead to improved performance when you return to regular training. For athletes in specific sports, the Incline Smith Machine Press can be programmed to align with their sport's demands. For example, a boxer might focus on explosive repetitions to mimic punching power, while a swimmer might prioritize higher rep ranges for muscular endurance. Remember that individual response to training can vary, so it's important to listen to your body and adjust your programming accordingly. Pay attention to recovery, sleep, and nutrition, as these factors significantly impact your ability to progress in the Incline Smith Machine Press. By thoughtfully programming the Incline Smith Machine Press, you can ensure consistent progress, prevent plateaus, and achieve your upper chest development goals. Whether you're a beginner establishing a foundation of strength or an advanced lifter fine-tuning your physique, strategic implementation of this exercise can be a game-changer in your fitness journey. Incline Smith Machine Press for Different Fitness Goals The Incline Smith Machine Press is a versatile exercise that can be adapted to suit a wide range of fitness goals. Whether you're aiming for strength, hypertrophy, endurance, or sport-specific performance, this exercise can be tailored to meet your needs. Let's explore how to optimize the Incline Smith Machine Press for different fitness objectives. For strength building, the Incline Smith Machine Press offers a stable platform to push heavy weights safely. When strength is the primary goal, focus on lower repetition ranges, typically 3-6 reps per set, with heavier weights around 85-90% of your one-rep maximum (1RM). The fixed path of the Smith machine allows for consistent progressive overload, crucial for strength gains. Incorporate techniques like cluster sets or heavy negatives to further challenge your strength. For example, perform 5 sets of 3 reps with a 3-second negative phase, resting 2-3 minutes between sets. This approach maximizes neural adaptations and increases your ability to recruit high-threshold motor units. Hypertrophy, or muscle growth, is perhaps where the Incline Smith Machine Press truly shines. To optimize for hypertrophy, aim for moderate rep ranges of 8-12 per set, using weights around 70-80% of your 1RM. This rep range balances mechanical tension and metabolic stress, two key factors in muscle growth. Implement techniques like drop sets or rest-pause sets to increase time under tension and metabolic stress. For instance, perform 4 sets of 10 reps, followed by a drop set where you reduce the weight by 20% and perform as many reps as possible. This approach ensures maximum muscle fiber recruitment and stimulates the release of muscle-building hormones. For those focusing on muscular endurance, higher repetition ranges with the Incline Smith Machine Press can be highly effective. Aim for 15-20 reps per set, or even higher, using lighter weights around 50-60% of your 1RM. This approach improves the muscle's ability to perform work over extended periods and can enhance definition. Consider incorporating supersets or circuit training with the Incline Smith Machine Press to further challenge your endurance. For example, perform 3 sets of 20 reps on the Incline Smith Machine Press, immediately followed by 20 push-ups, with minimal rest between exercises. Athletes looking to improve sport-specific performance can tailor the Incline Smith Machine Press to their needs. For explosive power, focus on moving the weight as quickly as possible in the concentric phase while maintaining control. This can benefit athletes in sports like boxing or shot put. For sports requiring muscular endurance, like swimming or rowing, higher rep ranges with moderate weights can be beneficial. Incorporate sport-specific angles or movement patterns to make the exercise more relevant to your athletic demands. For overall fitness and body composition improvements, a mixed approach can be effective. Alternate between strength-focused weeks (lower reps, higher weight) and volume-focused weeks (higher reps, moderate weight). This variation prevents adaptation and targets different aspects of fitness. Include the Incline Smith Machine Press in circuit training or HIIT workouts for a cardiovascular benefit alongside strength training. Those recovering from injuries or with specific limitations can also benefit from the Incline Smith Machine Press. The fixed path of the bar reduces the need for stabilization, making it a safer option for those with shoulder issues. Start with very light weights and focus on perfect form and pain-free movement. Gradually increase the load as strength and confidence improve. For bodybuilders or physique competitors, the Incline Smith Machine Press is invaluable for sculpting the upper chest. Focus on mind-muscle connection and controlled movements to maximize muscle engagement. Incorporate techniques like partial reps at the end of a set or isometric holds at different points in the range of motion to further stress the muscle fibers. Powerlifters can use the Incline Smith Machine Press as an accessory movement to improve their bench press. Focus on explosive concentric movements and slow, controlled eccentrics to build strength and power in the upper chest and front deltoids, which can translate to improved performance in the competition bench press. For general health and functional fitness, the Incline Smith Machine Press contributes to upper body pushing strength, important for daily activities. Incorporate it into a well-rounded program that includes exercises for all major muscle groups. Focus on proper form and controlled movements rather than maximal weights. Regardless of your specific fitness goal, proper progression is key with the Incline Smith Machine Press. Gradually increase the weight, reps, or sets over time to continue challenging your muscles and making progress. Keep detailed records of your workouts to track progress and inform future training decisions. Remember, the Incline Smith Machine Press should be part of a comprehensive training program. Combine it with other chest exercises, as well as exercises for opposing muscle groups, to ensure balanced development and reduce the risk of injury. By tailoring the Incline Smith Machine Press to your specific fitness goals, you can maximize its effectiveness and accelerate your progress. Whether you're looking to build strength, increase muscle size, improve endurance, or enhance athletic performance, this versatile exercise can be a cornerstone of your training regimen. The key is to align the exercise parameters – weight, reps, sets, and techniques – with your specific objectives, and to consistently challenge yourself within the framework of a well-designed program. Comparing Incline Smith Machine Press to Other Chest Exercises The Incline Smith Machine Press, while a powerful exercise in its own right, exists within a broader spectrum of chest exercises. Understanding how it compares to other popular chest movements can help you make informed decisions about its place in your workout routine. Let's explore how the Incline Smith Machine Press stacks up against other chest exercises, highlighting its unique benefits and potential drawbacks. Comparing the Incline Smith Machine Press to the traditional Incline Barbell Press reveals several key differences. The Smith machine's fixed path provides more stability, which can be beneficial for beginners or those recovering from injuries. This stability allows lifters to focus purely on pressing power without worrying about balancing the bar. However, this same feature means that the Incline Smith Machine Press engages fewer stabilizer muscles compared to its free-weight counterpart. The barbell version requires more core engagement and overall body control, which can be beneficial for functional strength development. Another significant difference is the potential for slightly heavier loads with the Smith machine due to its guided path. This can be advantageous for progressive overload, especially for those focused on hypertrophy. However, the fixed path may not align perfectly with everyone's natural pressing arc, which could potentially lead to joint stress if not properly adjusted. When compared to the Incline Dumbbell Press, the Incline Smith Machine Press offers a different set of advantages and limitations. Dumbbells allow for a greater range of motion and more natural movement patterns, which can lead to better muscle activation and joint-friendly pressing. They also address muscle imbalances more effectively, as each arm works independently. The Smith machine version, while more restricted in movement, allows for heavier loads to be lifted safely, which can be beneficial for strength development. The Incline Smith Machine Press also differs from cable-based chest exercises like the Incline Cable Fly. While both offer constant tension throughout the movement, the pressing motion of the Smith machine more closely mimics natural chest movements in daily life and sports. Cable exercises, however, provide unique angles of resistance that can target the chest muscles differently, especially at the peak contraction. Compared to bodyweight exercises like push-ups or dips, the Incline Smith Machine Press allows for more precise control over resistance levels. This makes it easier to progressively overload the muscles, which is crucial for continued strength and size gains. However, bodyweight exercises often provide greater core engagement and can be more accessible for home workouts. One unique aspect of the Incline Smith Machine Press is its ability to isolate the upper chest more effectively than many other exercises. The fixed path and incline angle create an optimal environment for targeting the clavicular head of the pectoralis major. This makes it particularly valuable for those looking to improve upper chest development, an area often lagging in many lifters. In terms of muscle activation, electromyography (EMG) studies have shown that the Incline Smith Machine Press can provide comparable upper chest activation to the Incline Barbell Press. However, the overall muscle activation, particularly in stabilizer muscles, tends to be lower due to the machine's fixed path. The Incline Smith Machine Press also offers unique benefits in terms of safety and the ability to train to failure. The presence of safety catches on most Smith machines allows lifters to push their limits with less risk compared to free-weight exercises. This can be particularly beneficial for high-intensity techniques like drop sets or forced reps. When it comes to sports-specific training, the Incline Smith Machine Press may be less transferable than free-weight alternatives due to its fixed path. Sports typically require multi-directional strength and stability, which are better trained with free weights. However, for sports that involve a pressing motion in a fixed plane (like certain swimming strokes), the Smith machine version can still be valuable. For those concerned with time efficiency, the Incline Smith Machine Press can be advantageous. The ease of changing weights and the reduced need for spotters can make it a quicker option compared to setting up for barbell or dumbbell presses, especially in a busy gym environment. It's worth noting that the Incline Smith Machine Press may not be suitable for everyone. Individuals with certain shoulder issues might find the fixed path uncomfortable or restrictive. In such cases, free-weight alternatives that allow for more natural movement patterns might be preferable. In conclusion, while the Incline Smith Machine Press offers unique benefits in terms of stability, safety, and the ability to handle heavier loads, it should not be seen as a complete replacement for other chest exercises. Rather, it's a valuable tool that can complement a well-rounded chest training program. The ideal approach often involves incorporating a variety of exercises, including the Incline Smith Machine Press, to target the chest muscles from multiple angles and with different types of resistance. This comprehensive approach ensures balanced development, reduces the risk of overuse injuries, and keeps workouts engaging and effective. Safety Considerations and Injury Prevention While the Incline Smith Machine Press is generally considered a safer alternative to free-weight pressing exercises, it's crucial to approach it with proper safety considerations and injury prevention strategies. Understanding and implementing these measures can significantly reduce the risk of injury and ensure long-term progress in your chest development journey. Proper warm-up is paramount before engaging in any Incline Smith Machine Press session. Begin with light cardiovascular activity to increase blood flow to the muscles. This could be 5-10 minutes of jogging, jumping jacks, or rowing. Follow this with dynamic stretches focusing on the chest, shoulders, and triceps. Arm circles, shoulder rolls, and light resistance band pulls can help prepare the upper body for the pressing movement. Next, perform a specific warm-up for the Incline Smith Machine Press. Start with very light weights, performing 12-15 repetitions to further warm up the muscles and joints. Gradually increase the weight over 2-3 warm-up sets, reducing the reps as you go. This progressive warm-up not only prepares your body physically but also helps Next, perform a specific warm-up for the Incline Smith Machine Press. Start with very light weights, performing 12-15 repetitions to further warm up the muscles and joints. Gradually increase the weight over 2-3 warm-up sets, reducing the reps as you go. This progressive warm-up not only prepares your body physically but also helps you mentally focus on the exercise technique. Proper form is crucial for injury prevention in the Incline Smith Machine Press. Maintain a neutral spine throughout the movement, avoiding excessive arching of the lower back. Keep your feet flat on the floor or bench for stability. Engage your core muscles to support your spine and maintain overall body tension. When lowering the bar, control the descent and avoid bouncing it off your chest. This controlled eccentric phase not only reduces injury risk but also enhances muscle engagement. One of the most critical safety aspects of the Incline Smith Machine Press is setting the safety stops correctly. Position them just below your chest level when you're lying on the bench. This ensures that if you fail a rep, the bar won't crush you. Always test the safety stops with an unloaded bar before starting your working sets. Breathing technique plays a significant role in safety and performance. Inhale deeply as you lower the bar and exhale forcefully as you press it up. This breathing pattern helps maintain intra-abdominal pressure, stabilizing your core and protecting your spine. Avoid holding your breath throughout the entire repetition, as this can lead to dangerous spikes in blood pressure. When it comes to selecting the appropriate weight, err on the side of caution, especially if you're new to the exercise. It's better to start lighter and perfect your form before progressing to heavier loads. Gradually increase the weight as you become more comfortable with the movement and your strength improves. Remember, consistency and proper form are more important for long-term progress than lifting heavy weights with poor technique. Pay close attention to your body's signals during the Incline Smith Machine Press. If you feel any sharp pain, particularly in the shoulders or chest, stop the exercise immediately. Distinguish between the normal discomfort of muscle fatigue and potential injury pain. Ignoring warning signs can lead to serious injuries that may set back your training for weeks or months. Proper shoulder positioning is crucial in the Incline Smith Machine Press. Keep your shoulders retracted and depressed throughout the movement. This stable shoulder position helps protect the rotator cuff and reduces the risk of impingement. If you feel your shoulders rolling forward during the press, it's a sign that the weight may be too heavy or your form is breaking down. Incorporating mobility work and stretching into your routine can significantly reduce injury risk. Focus on exercises that improve shoulder mobility and thoracic spine extension. Foam rolling your upper back and chest can help alleviate muscle tension and improve your range of motion in the Incline Smith Machine Press. Balancing your training program is essential for injury prevention. Ensure you're not overemphasizing pressing movements at the expense of pulling exercises. A proper balance between pushing and pulling exercises helps maintain shoulder health and prevents muscular imbalances that can lead to injury. Recovery is a crucial aspect of injury prevention often overlooked by enthusiastic lifters. Allow adequate rest between Incline Smith Machine Press sessions. For most individuals, training the chest 2-3 times per week with at least 48 hours between sessions is sufficient. This rest period allows for muscle repair and growth, reducing the risk of overuse injuries. Proper nutrition and hydration play a significant role in injury prevention. Ensure you're consuming enough protein to support muscle repair and growth. Stay well-hydrated, especially during your workouts, as dehydration can increase the risk of muscle strains and cramps. If you're returning to the Incline Smith Machine Press after an injury or a long break, take a conservative approach. Start with very light weights and focus on reestablishing proper form and movement patterns. Gradually increase the intensity over several weeks to allow your body to readapt to the exercise stress. For those with a history of shoulder issues, consider using a slightly narrower grip on the Incline Smith Machine Press. This can reduce stress on the shoulder joint while still effectively targeting the chest muscles. Always consult with a healthcare professional or a qualified trainer if you have pre-existing injuries or conditions before incorporating the Incline Smith Machine Press into your routine. Remember, the goal of the Incline Smith Machine Press is to build strength and muscle, not to test your limits every session. Incorporate deload weeks into your training program where you reduce the weight and volume. These planned periods of reduced intensity allow your body to recover and can prevent overuse injuries. By following these comprehensive safety guidelines and injury prevention strategies, you can enjoy the benefits of the Incline Smith Machine Press while minimizing the risk of setbacks. Prioritizing safety not only protects you in the short term but also ensures you can continue making progress in your fitness journey for years to come. The Incline Smith Machine Press, when performed correctly and safely, remains an excellent tool for building impressive upper chest strength and muscle mass. Advanced Techniques for the Incline Smith Machine Press As you progress in your Incline Smith Machine Press journey, incorporating advanced techniques can help break through plateaus and stimulate new muscle growth. These methods are designed to challenge your muscles in novel ways, enhancing both strength and hypertrophy. However, it's crucial to approach these techniques with caution and proper preparation. Drop sets are a powerful technique to increase muscle fatigue and stimulate growth. Begin with your normal working weight for the Incline Smith Machine Press. After reaching near failure, quickly reduce the weight by 20-30% and continue pressing to failure again. You can repeat this process 2-3 times, creating a cascade of muscle fatigue. This technique floods the muscle with blood, potentially enhancing nutrient delivery and metabolic stress, key factors in muscle hypertrophy. Partial reps focus on specific portions of the Incline Smith Machine Press movement. You might perform reps in just the top half of the movement to emphasize lockout strength, or focus on the bottom half to improve your press off the chest. Partial reps allow you to handle heavier weights in a limited range of motion, potentially leading to strength gains that transfer to your full-range pressing. Isometric holds introduce a static component to the Incline Smith Machine Press. Hold the bar at various points in the range of motion for 5-10 seconds. This technique can improve mind-muscle connection and strengthen sticking points in your press. For example, holding the bar an inch off your chest for 10 seconds before completing the press can significantly challenge your chest muscles. Tempo manipulation involves changing the speed of different phases of the Incline Smith Machine Press. A common approach is to slow down the eccentric (lowering) phase, taking 3-4 seconds to lower the bar, then explosively pressing it up. This increased time under tension can lead to greater muscle damage and subsequent growth. Alternatively, you can focus on an explosive concentric phase to improve power output. Cluster sets are an advanced technique that allows you to handle near-maximal weights for more total reps. Perform 2-3 reps, rest for 10-15 seconds, then repeat for a total of 3-4 clusters. This method allows you to maintain high intensity throughout the set, potentially leading to greater strength gains. Cluster sets are particularly effective for breaking through strength plateaus in the Incline Smith Machine Press. The mechanical drop set involves changing the exercise variation to target the muscles from different angles as fatigue sets in. Start with the standard Incline Smith Machine Press, then move to a flat Smith Machine Press, and finally to a decline Smith Machine Press, all without rest in between. This technique ensures complete muscle fiber recruitment across the entire chest. Rest-pause sets can increase the total volume of your Incline Smith Machine Press workout without extending its duration. Perform a set to near failure, rest for 15-20 seconds, then perform additional reps. Repeat this process 2-3 times. This technique allows you to push past your normal rep limits, potentially stimulating greater muscle growth. Pre-exhaustion is a technique where you perform an isolation exercise for the chest, like cable flyes, immediately before the Incline Smith Machine Press. This pre-fatigues the chest muscles, ensuring they are the limiting factor in the press, rather than the triceps or shoulders. This can lead to greater chest muscle activation and growth. Accommodating resistance involves adding bands or chains to the Incline Smith Machine Press. This creates a variable resistance profile, with the exercise becoming harder as you press the weight up. This technique can help improve lockout strength and provide a novel stimulus to the muscles. The one-and-a-half rep technique involves performing a full rep of the Incline Smith Machine Press, followed by a half rep, counting as one total rep. This increases time under tension and can be particularly effective for targeting the upper chest at its peak contraction point. Eccentric overload training focuses on the lowering phase of the Incline Smith Machine Press. Use a weight that's 10-20% heavier than your normal working weight, and have a spotter assist you in pressing the weight up. Then, lower the weight slowly and under control on your own. This technique can lead to significant strength gains and muscle growth due to the high tension placed on the muscles during the eccentric phase. When implementing these advanced techniques, it's crucial to use them judiciously. Incorporate one or two techniques into your Incline Smith Machine Press routine at a time, and cycle them over several weeks. This approach prevents overtraining and ensures continued progress. Always prioritize proper form and safety, especially when trying new and challenging techniques. Remember, these advanced techniques for the Incline Smith Machine Press are intense and should be used sparingly. They're best suited for intermediate to advanced lifters who have mastered the basic form of the exercise. Beginners should focus on perfecting their technique and building a solid strength base before attempting these methods. By intelligently incorporating these advanced techniques into your Incline Smith Machine Press routine, you can continue to challenge your muscles, break through plateaus, and achieve new levels of chest development. The key is to use these methods strategically, always listening to your body and adjusting as needed. With patience and consistency, these advanced techniques can take your Incline Smith Machine Press performance and chest development to new heights. Nutrition to Support Upper Chest Development Proper nutrition plays a crucial role in maximizing the results of your Incline Smith Machine Press workouts and overall upper chest development. A well-structured nutritional plan supports muscle growth, aids in recovery, and provides the energy necessary for intense training sessions. Let's explore the key nutritional components that can enhance your upper chest development when combined with a consistent Incline Smith Machine Press routine. Protein intake is paramount for muscle growth and repair. Aim for 1.6 to 2.2 grams of protein per kilogram of body weight daily. High-quality protein sources such as lean meats, fish, eggs, dairy, and plant-based options like legumes and quinoa should form the cornerstone of your diet. Distribute your protein intake evenly throughout the day to maintain a positive protein balance and support continuous muscle protein synthesis. Consider consuming a protein-rich meal or shake within 30 minutes after your Incline Smith Machine Press workout to kickstart the recovery process. Carbohydrates are essential for fueling your Incline Smith Machine Press sessions and replenishing glycogen stores post-workout. Complex carbohydrates like whole grains, sweet potatoes, and oats provide sustained energy and should make up the majority of your carb intake. Include some simple carbohydrates immediately before and after your workout to provide quick energy and aid in recovery. Aim for 3-5 grams of carbohydrates per kilogram of body weight daily, adjusting based on your activity level and body composition goals. Healthy fats are crucial for hormone production, including testosterone, which plays a significant role in muscle growth. Include sources of omega-3 fatty acids like fatty fish, flaxseeds, and walnuts in your diet. Monounsaturated fats from avocados, nuts, and olive oil also support overall health and recovery. Aim for about 0.5-1 gram of fat per kilogram of body weight daily. Meal timing can significantly impact your Incline Smith Machine Press performance and recovery. Consume a balanced meal containing protein and carbohydrates 2-3 hours before your workout to ensure adequate energy levels. Post-workout, aim to eat a meal rich in protein and carbohydrates within 1-2 hours to support muscle recovery and glycogen replenishment. Hydration is often overlooked but is crucial for optimal performance in the Incline Smith Machine Press. Dehydration can lead to decreased strength and increased fatigue. Aim to drink at least 3-4 liters of water daily, increasing this amount on training days. Consider adding electrolytes to your water during intense workouts to maintain proper fluid balance. Micronutrients play a vital role in muscle growth and recovery. Ensure your diet is rich in vitamins and minerals, particularly vitamin D, calcium, and magnesium, which are crucial for muscle function and bone health. Consume a variety of colorful fruits and vegetables to obtain a wide range of antioxidants that can aid in recovery from intense Incline Smith Machine Press sessions. Creatine monohydrate is one of the most researched and effective supplements for enhancing strength and muscle growth. It can be particularly beneficial for exercises like the Incline Smith Machine Press, where power output is crucial. Consider supplementing with 3-5 grams of creatine daily to support your upper chest development goals. Branched-chain amino acids (BCAAs) can be beneficial, especially when training in a fasted state or during long, intense workouts. BCAAs can help reduce muscle breakdown and support muscle protein synthesis. Consider consuming 5-10 grams of BCAAs before or during your Incline Smith Machine Press workout. Beta-alanine is another supplement that can enhance performance in the Incline Smith Machine Press, particularly when performing higher rep ranges. It helps buffer lactic acid buildup, potentially allowing you to perform more reps before fatigue sets in. A typical dose is 3-5 grams daily. Caffeine can be a powerful ergogenic aid, potentially improving strength and power output in exercises like the Incline Smith Machine Press. Consider consuming 200-400mg of caffeine about 30 minutes before your workout for optimal effects. However, be mindful of your individual tolerance and avoid consuming caffeine too close to bedtime. While focusing on these nutritional strategies, it's crucial to maintain a slight caloric surplus if your goal is to build muscle mass in your upper chest. Aim for a surplus of 300-500 calories above your maintenance level. This provides the energy necessary for muscle growth without excessive fat gain. Regularly assess your progress and adjust your caloric intake as needed. Remember, nutrition is highly individual. What works best for one person may not be optimal for another. Experiment with different nutritional strategies and pay attention to how your body responds. Keep a food diary and track your progress in the Incline Smith Machine Press to identify the nutritional approach that yields the best results for you. Lastly, consistency is key in both nutrition and training. The most effective nutritional plan is one that you can stick to long-term. Focus on developing sustainable eating habits that support your Incline Smith Machine Press performance and overall fitness goals. With the right nutritional support, you can maximize the muscle-building potential of your Incline Smith Machine Press workouts and achieve impressive upper chest development. Overcoming Plateaus in the Incline Smith Machine Press Plateaus are an inevitable part of any strength training journey, and the Incline Smith Machine Press is no exception. These periods of stagnation can be frustrating, but with the right strategies, you can break through and continue making progress. Let's explore effective methods to overcome plateaus in the Incline Smith Machine Press and keep your upper chest development on track. Progressive overload is the cornerstone of continuous improvement in strength training. When you hit a plateau in the Incline Smith Machine Press, it's time to reassess your approach to progressive overload. Instead of focusing solely on increasing weight, consider other variables. Increase the number of repetitions, add an extra set, or decrease rest periods between sets. These subtle changes can provide the stimulus needed to spark new growth and strength gains. Altering your grip width on the Incline Smith Machine Press can target different areas of the chest and involve the muscles in slightly different ways. If you've been using a standard grip, try widening or narrowing your hand placement. A wider grip tends to emphasize the outer chest, while a narrower grip shifts more focus to the inner chest and triceps. This variation can help overcome sticking points and stimulate new muscle fibers. Incorporating pause reps into your Incline Smith Machine Press routine can be highly effective in breaking through plateaus. Pause for 1-2 seconds at the bottom of each rep, eliminating the stretch reflex and forcing your muscles to generate force from a dead stop. This technique enhances strength in the most challenging part of the lift and can translate to overall improvements in your pressing power. Tempo manipulation is another powerful tool for overcoming plateaus. Slow down the eccentric (lowering) phase of the Incline Smith Machine Press, taking 3-4 seconds to lower the bar. This increased time under tension can stimulate new muscle growth and improve your control throughout the movement. Alternatively, focus on explosive concentric movements to develop power and overcome sticking points. Implementing a deload week can be crucial when facing a plateau. Reduce the weight and volume of your Incline Smith Machine Press by about 40-50% for a week. This period of reduced stress allows your body to fully recover and can lead to supercompensation, where you return stronger after the deload. Many lifters find they can break through plateaus immediately following a well-timed deload. Addressing weak points in the Incline Smith Machine Press can help overcome plateaus. If you struggle at the bottom of the press, incorporate paused reps or pin presses to build strength in that position. For lockout issues, focus on board presses or partial reps in the top range of motion. By strengthening these specific areas, you can improve your overall pressing power. Varying your rep ranges can provide a new stimulus and help break through plateaus. If you've been focusing on low-rep, heavy sets, switch to higher-rep sets with moderate weight for a few weeks. This change can improve muscular endurance and provide a different type of stress to the muscles, potentially leading to new growth and strength gains when you return to your usual rep ranges. Incorporating unilateral work can address muscle imbalances that may be holding back your Incline Smith Machine Press progress. Use dumbbells to perform incline presses one arm at a time. This can help identify and correct strength discrepancies between sides and improve overall pressing strength. Plyometric exercises can enhance the explosive power needed to overcome plateaus in the Incline Smith Machine Press. Incorporate exercises like plyo push-ups or medicine ball chest throws into your routine. These explosive movements can improve your ability to generate force quickly, translating to improved performance in the Incline Smith Machine Press. Mental techniques can be just as important as physical ones when overcoming plateaus. Visualization and positive self-talk can help you approach challenging weights with confidence. Spend time visualizing successful lifts and use affirmations to reinforce your belief in your ability to progress. Reviewing and refining your technique is crucial when facing a plateau. Often, small form issues can limit progress. Film yourself performing the Incline Smith Machine Press and analyze your form, or work with a qualified coach to identify areas for improvement. Sometimes, a minor adjustment in technique can lead to significant improvements in performance. Nutrition plays a vital role in overcoming plateaus. Ensure you're consuming enough calories and protein to support muscle growth and recovery. Consider cycling your caloric intake, implementing periods of slight surplus to support growth, followed by periods of maintenance. Sleep and recovery are often overlooked factors in breaking through plateaus. Aim for 7-9 hours of quality sleep per night and manage your overall stress levels. Improved recovery can lead to better performance and continued progress in the Incline Smith Machine Press. Lastly, patience and persistence are key when facing plateaus. Remember that progress is not always linear. Stay consistent with your training, implement these strategies systematically, and trust in the process. With time and effort, you can overcome plateaus in the Incline Smith Machine Press and continue your journey towards impressive upper chest development. By implementing these strategies and maintaining a positive, persistent attitude, you can effectively overcome plateaus in the Incline Smith Machine Press. Remember, plateaus are not permanent roadblocks but rather opportunities for reassessment and growth. With the right approach, you can break through these barriers and achieve new levels of strength and muscle development in your upper chest. Incline Smith Machine Press for Special Populations The Incline Smith Machine Press, while a highly effective exercise for many, requires special considerations when incorporated into the training routines of specific populations. Understanding how to modify and adapt this exercise for different groups ensures safe and effective training for everyone. Let's explore how the Incline Smith Machine Press can be tailored for various special populations. For beginners, the Incline Smith Machine Press offers a great introduction to chest training. The fixed path of the Smith machine provides stability, allowing novices to focus on the pressing movement without worrying about balancing a free barbell. Start with light weights and focus on proper form. Beginners should prioritize learning the correct movement pattern over lifting heavy weights. Implement a higher rep range, such as 12-15 repetitions, to build muscular endurance and perfect technique before progressing to heavier loads. Older adults can benefit significantly from the Incline Smith Machine Press, but with some modifications. The stability of the Smith machine reduces the risk of injury, making it a safer option for those with balance issues or reduced mobility. For this population, focus on controlled movements and moderate rep ranges (8-12 repetitions) to maintain muscle mass and bone density. Ensure the bench angle isn't too steep to avoid excessive shoulder stress. Regular practice of the Incline Smith Machine Press can help older adults maintain upper body strength, crucial for daily activities and overall quality of life. Athletes in specific sports can use the Incline Smith Machine Press to enhance performance. For instance, swimmers can benefit from the upper chest strength developed by this exercise, which translates to more powerful strokes. Boxers and martial artists can improve their punching power. Tailor the exercise to mimic sport-specific movements. For example, explosive presses can be beneficial for athletes requiring quick, powerful upper body movements. Incorporate sport-specific rep ranges and tempos that align with the demands of the particular sport. Individuals with lower back issues can find the Incline Smith Machine Press a suitable alternative to traditional bench pressing. The incline position and back support of the bench can reduce stress on the lower back. Ensure proper setup with the lower back firmly against the bench. These individuals should focus on controlled movements and avoid using momentum, which could strain the back. Consider using a slightly higher incline angle to further reduce lower back involvement. For those with shoulder injuries or impingements, the Incline Smith Machine Press requires careful implementation. The fixed path of the Smith machine can sometimes exacerbate shoulder issues if not properly adjusted. Experiment with different grip widths and incline angles to find a comfortable position that doesn't cause pain. Often, a slightly narrower grip and a lower incline angle can be more shoulder-friendly. Always prioritize pain-free movement over weight lifted. Incorporating rotator cuff strengthening exercises alongside the Incline Smith Machine Press can improve overall shoulder health. Women, particularly those new to strength training, can greatly benefit from the Incline Smith Machine Press. This exercise helps develop upper body strength and can contribute to improved posture and breast aesthetics. For women concerned about "bulking up," emphasize that the Incline Smith Machine Press, when combined with proper nutrition, leads to a toned and defined upper chest rather than excessive muscle mass. Focus on moderate weights and higher repetitions (10-15 reps) for muscle endurance and definition. Individuals recovering from chest or shoulder surgeries should approach the Incline Smith Machine Press with caution and under the guidance of a physiotherapist or qualified trainer. Start with very light weights or even just the bar to reestablish proper movement patterns. Focus on pain-free range of motion and gradually increase load as strength and mobility improve. The Smith machine's stability can be particularly beneficial during rehabilitation, allowing for controlled, guided movements. For powerlifters and strength athletes, the Incline Smith Machine Press can serve as an accessory exercise to improve bench press performance. Use it to target the upper chest and overcome sticking points in the traditional bench press. Incorporate variations like paused reps or overloading the top portion of the movement to address specific weaknesses. However, ensure that the Incline Smith Machine Press doesn't completely replace free weight training, as the stabilization required in competition lifts is crucial. Obese or overweight individuals can find the Incline Smith Machine Press more comfortable than traditional bench pressing. The incline position can make it easier to breathe compared to lying flat, which is beneficial for those carrying extra weight. Start with a higher incline angle if necessary and gradually lower it as comfort and strength improve. Focus on controlled movements and proper breathing techniques. Individuals with limited mobility or those using wheelchairs can still benefit from a modified version of the Incline Smith Machine Press. If possible, perform the exercise from a secured wheelchair or specialized equipment. The Smith machine's fixed path can provide the necessary support for those with limited trunk control. Work with a qualified trainer to develop safe and effective modifications based on individual capabilities. For individuals with respiratory issues, the incline position of this exercise can be advantageous as it allows for easier breathing compared to flat bench pressing. Emphasize controlled breathing techniques, exhaling during the pressing phase and inhaling during the lowering phase. Monitor exertion levels closely and allow for longer rest periods between sets if needed. Young athletes and teenagers should focus on proper form and technique with the Incline Smith Machine Press before adding significant weight. The stability of the Smith machine makes it an excellent teaching tool for proper pressing mechanics. Emphasize the importance of full range of motion and controlled movements. For this group, bodyweight exercises and light resistance training should be prioritized before progressing to heavier loads on the Smith machine. Remember, regardless of the special population, individual assessment and personalized programming are crucial. What works for one person may not be suitable for another, even within the same demographic. Always consult with healthcare professionals or qualified fitness experts when introducing the Incline Smith Machine Press to special populations. By carefully considering the unique needs and limitations of each group, the Incline Smith Machine Press can be a safe, effective, and beneficial exercise for a wide range of individuals, contributing to improved upper body strength, muscle development, and overall fitness. Equipment and Accessories for the Incline Smith Machine Press The Incline Smith Machine Press, while primarily centered around the Smith machine itself, can be enhanced and optimized with various equipment and accessories. Understanding and utilizing these tools can significantly improve your performance, safety, and overall experience with this exercise. Let's explore the essential equipment and beneficial accessories for maximizing your Incline Smith Machine Press workouts. The Smith machine is the cornerstone equipment for this exercise. When selecting a Smith machine for incline pressing, look for one with smooth, well-maintained guide rods and a bar that glides effortlessly. The machine should have multiple lock-out points for safety and to accommodate different pressing ranges. Some advanced Smith machines offer counterbalanced systems that reduce the bar's weight, which can be beneficial for beginners or those returning from injury. An adjustable incline bench is crucial for the Incline Smith Machine Press. Look for a bench with multiple incline settings, typically ranging from 15 to 60 degrees. The ability to adjust the incline allows you to target different areas of the upper chest and find the most comfortable and effective angle for your body type. Ensure the bench is sturdy, with a wide base for stability, and has a non-slip surface to prevent sliding during the exercise. Weight plates are essential for progressive overload in the Incline Smith Machine Press. A variety of plate sizes allows for precise weight adjustments. Olympic-sized plates (2-inch center hole) are standard for most Smith machines. Consider investing in fractional plates (1.25 lbs or less) for micro-loading, which can be particularly useful when working through plateaus or making small, gradual increases in weight. Proper footwear is often overlooked but is crucial for maintaining a stable base during the Incline Smith Machine Press. Opt for flat-soled shoes with good traction, such as weightlifting shoes or minimalist training shoes. These provide a solid connection with the ground, enhancing overall stability and power transfer during the press. Wrist wraps can provide additional support and stability for your wrists during heavy Incline Smith Machine Presses. They help maintain proper wrist alignment and can be particularly beneficial if you have a history of wrist discomfort or when handling heavier loads. Choose wraps with adjustable tightness to customize the level of support. A lifting belt can be a valuable accessory, especially when pressing heavy weights. While not necessary for every set, a belt can help increase intra-abdominal pressure, providing additional core stability during challenging lifts. Opt for a belt that's about 4 inches wide and made of sturdy material like leather or heavy-duty nylon. Resistance bands can add variety to your Incline Smith Machine Press routine. By attaching bands to the bar, you create accommodating resistance, increasing the challenge as you press the weight up. This can be particularly effective for developing explosive strength and overcoming sticking points in your press. Micro-loading plates, typically ranging from 0.25 to 1 pound, allow for very small weight increments. These are invaluable for making consistent progress, especially as you approach your strength limits. Micro-loading can help you continue progressing when standard 2.5 or 5-pound jumps become too challenging. A spotter platform or step can be useful for your training partner when providing assistance during heavy lifts or forced reps. This elevated position allows the spotter to safely and effectively assist you throughout the range of motion of the Incline Smith Machine Press. Grip accessories like fat grips or towels wrapped around the bar can increase the challenge to your forearms and grip strength during the Incline Smith Machine Press. This can be beneficial for overall upper body development and can translate to improved performance in other lifting exercises. A foam roller or massage ball can be valuable for pre and post-workout muscle care. Use these tools to release tension in the chest, shoulders, and upper back before your Incline Smith Machine Press session. Post-workout, they can aid in recovery by promoting blood flow and reducing muscle soreness. A reliable weight lifting chalk can improve your grip on the bar, especially during heavy sets or high-volume training. Chalk absorbs sweat and reduces slippage, allowing you to focus on pressing power rather than maintaining your grip. A workout log or smartphone app for tracking your Incline Smith Machine Press progress is essential. Consistently recording your sets, reps, and weights allows you to monitor progress over time and make informed decisions about progressive overload. Consider using a metronome or tempo trainer app to control the speed of your repetitions. This can be particularly useful when implementing tempo training or when focusing on time under tension in your Incline Smith Machine Press. Resistance chains are another tool for adding variable resistance to the Incline Smith Machine Press. As you press the bar up, more links come off the ground, increasing the weight. This can help develop strength through the entire range of motion and is particularly effective for improving lockout strength. A mirror or video recording setup can be invaluable for checking and improving your form. Being able to see yourself perform the Incline Smith Machine Press in real-time or reviewing recorded sets can help you identify and correct form issues. Finally, proper gym attire, including a well-fitting t-shirt or tank top, can prevent the bar from catching on loose clothing during the press. Comfortable, breathable clothing allows for unrestricted movement and helps maintain focus on the exercise. Remember, while these accessories can enhance your Incline Smith Machine Press experience, they are not all necessary for everyone. Choose the equipment and accessories that align with your specific goals, training style, and comfort level. Properly selected and utilized equipment can significantly improve the safety, effectiveness, and enjoyment of your Incline Smith Machine Press workouts, contributing to better overall results in your upper chest development journey. Measuring Progress in the Incline Smith Machine Press Tracking progress in the Incline Smith Machine Press is crucial for continuous improvement and motivation. Effective measurement allows you to gauge the effectiveness of your training program, identify areas for improvement, and celebrate milestones. Let's explore various methods and metrics for measuring progress in this key upper chest exercise. The most straightforward method of tracking progress in the Incline Smith Machine Press is by monitoring the increase in weight lifted. Keep a detailed log of the weight used for each set and the number of repetitions completed. Over time, you should see a gradual increase in The most straightforward method of tracking progress in the Incline Smith Machine Press is by monitoring the increase in weight lifted. Keep a detailed log of the weight used for each set and the number of repetitions completed. Over time, you should see a gradual increase in the weight you can handle for your working sets. This is a clear indicator of strength gains. However, it's important to ensure that form isn't compromised as the weight increases. Volume is another crucial metric to track. Calculate your total volume by multiplying the weight lifted by the number of reps and sets. For example, if you perform 3 sets of 8 reps at 100 pounds, your total volume is 2400 pounds (3 x 8 x 100). Increasing your total volume over time, either through more weight, reps, or sets, is a sign of progress in both strength and muscular endurance. One-rep max (1RM) testing or estimation can provide a clear measure of your maximum strength in the Incline Smith Machine Press. While direct 1RM testing can be risky and is not recommended for everyone, you can use calculators or apps that estimate your 1RM based on the weight you can lift for multiple repetitions. Tracking changes in your estimated 1RM over time gives you a good indication of strength improvements. Rate of perceived exertion (RPE) is a subjective measure of how difficult an exercise feels. Using a scale from 1-10, with 10 being maximum effort, rate each set of the Incline Smith Machine Press. If you find that you can perform the same weight and reps at a lower RPE over time, it's a sign of increased strength and endurance. Bar speed or power output can be an excellent indicator of progress, especially for athletes. Some advanced gym equipment or attachable devices can measure the speed at which you move the bar. An increase in bar speed with the same weight indicates improvements in power and strength. Time under tension (TUT) is another valuable metric. This refers to the total time your muscles are under strain during a set. You can increase TUT by slowing down your reps or adding pauses. If you can maintain the same weight and reps with increased TUT, it's a sign of improved muscular endurance and control. Tracking your recovery time between sets can also indicate progress. If you find that you need less rest time between sets to maintain the same performance, it's a sign of improved work capacity and conditioning. Body composition changes, while not directly related to the Incline Smith Machine Press, can be an indicator of overall progress in your chest development. Regular measurements of chest circumference or body fat percentage can provide insights into muscle growth and fat loss. Photo or video documentation can be a powerful visual tool for tracking progress. Take regular photos of your upper chest area or videos of your Incline Smith Machine Press performance. This can help you notice changes in muscle definition and improvements in form that might not be apparent day-to-day. Performance in related exercises can indirectly measure progress in the Incline Smith Machine Press. Improvements in exercises like the flat bench press, push-ups, or dumbbell flyes can indicate overall chest strength and development, which likely translates to progress in the Incline Smith Machine Press. Consistency in form is another important aspect to measure. As you progress, you should be able to maintain proper technique with heavier weights or for more repetitions. This indicates not just strength gains, but also improvements in muscle control and stability. Tracking your mind-muscle connection can provide qualitative data on your progress. If you find it easier to feel your upper chest working during the Incline Smith Machine Press, it's a sign of improved neuromuscular efficiency. For those using advanced training techniques, track your performance in variations of the Incline Smith Machine Press. Improvements in pause reps, partial reps, or tempo variations can indicate overall progress in strength and muscle control. Consider using technology like accelerometers or velocity-based training devices to get precise data on bar speed and power output. These tools can provide detailed insights into your performance and help you optimize your training. Finally, don't neglect subjective measures of progress. How do you feel during and after your Incline Smith Machine Press sessions? Are you more confident approaching heavier weights? Do you feel less fatigued after your workouts? These subjective experiences can be valuable indicators of progress. Remember, progress is not always linear. There may be periods of rapid improvement followed by plateaus. The key is to track multiple metrics over time to get a comprehensive view of your progress. Use this data to adjust your training program as needed, ensuring continued improvement in your Incline Smith Machine Press performance and overall upper chest development. By consistently measuring and analyzing these various aspects of your Incline Smith Machine Press performance, you can gain a comprehensive understanding of your progress. This information allows you to make informed decisions about your training, celebrate your achievements, and stay motivated on your fitness journey. Remember, the most effective progress tracking method is one that you can consistently maintain and that provides meaningful data for your specific goals. Common Questions About the Incline Smith Machine Press As with any popular exercise, the Incline Smith Machine Press generates numerous questions from fitness enthusiasts and professionals alike. Addressing these common queries can provide valuable insights and clarify misconceptions about this effective upper chest exercise. Let's explore some of the most frequently asked questions about the Incline Smith Machine Press. Is the Incline Smith Machine Press as effective as the free weight incline bench press? While both exercises target the upper chest, they have distinct characteristics. The Smith Machine version offers more stability, allowing you to focus purely on pressing power. This can be beneficial for isolating the chest muscles and handling heavier loads safely. However, the free weight version engages more stabilizer muscles and may have greater carryover to functional strength. Both can be effective when used appropriately in a well-rounded program. What's the optimal incline angle for the Incline Smith Machine Press? The ideal angle typically falls between 30 to 45 degrees. This range maximizes upper chest activation while still engaging the entire pectoral muscle. However, the optimal angle can vary based on individual body mechanics and goals. Experiment within this range to find what feels most effective for you. How often should I incorporate the Incline Smith Machine Press into my routine? For most individuals, performing the Incline Smith Machine Press 1-2 times per week is sufficient. This frequency allows for adequate recovery while still promoting strength and muscle gains. More advanced lifters might increase frequency to 2-3 times per week, adjusting volume and intensity accordingly. Can the Incline Smith Machine Press replace the flat bench press in my workout? While the Incline Smith Machine Press is an excellent exercise for upper chest development, it shouldn't completely replace the flat bench press. Each exercise targets the chest muscles from different angles. A comprehensive chest workout typically includes both incline and flat pressing movements for balanced development. Is the Incline Smith Machine Press safe for beginners? Yes, when performed correctly, the Incline Smith Machine Press can be very safe for beginners. The fixed path of the bar reduces the need for stabilization, allowing novices to focus on the pressing movement. Start with light weights to master proper form before progressing to heavier loads. How do I avoid shoulder pain during the Incline Smith Machine Press? To minimize shoulder strain, ensure proper form: keep your shoulders retracted and depressed, avoid flaring your elbows excessively, and don't lower the bar too far down your chest. Experiment with grip width and incline angle to find a comfortable position. If pain persists, consult a fitness professional or healthcare provider. What's the best rep range for the Incline Smith Machine Press? The optimal rep range depends on your goals. For strength, aim for 3-6 reps. For muscle hypertrophy, 8-12 reps are typically recommended. For muscular endurance, 15-20 reps can be effective. Varying your rep ranges can provide comprehensive development. Can women benefit from the Incline Smith Machine Press? Absolutely. The Incline Smith Machine Press is an excellent exercise for women looking to develop upper body strength and shape their chest muscles. It can contribute to improved posture and overall upper body aesthetics. How do I break through a plateau in the Incline Smith Machine Press? To overcome plateaus, try varying your rep ranges, implementing progressive overload, incorporating pause reps or tempo changes, or using advanced techniques like drop sets. Also, ensure you're allowing adequate recovery time and supporting your training with proper nutrition. Is it normal to feel the Incline Smith Machine Press more in my shoulders than my chest? While some shoulder engagement is normal, if you're feeling it primarily in your shoulders, you may need to adjust your form. Focus on retracting your shoulder blades, keeping your elbows at about a 45-degree angle to your torso, and ensure you're not bringing the bar too high on your chest. Can the Incline Smith Machine Press help improve my bench press? Yes, the Incline Smith Machine Press can be a valuable accessory exercise to improve your bench press. It strengthens the upper chest and front deltoids, which can translate to improved performance in the flat bench press, especially in the top portion of the lift. How does the Incline Smith Machine Press affect overall chest development? The Incline Smith Machine Press primarily targets the upper portion of the pectoralis major, which is often underdeveloped compared to the middle and lower chest. Including this exercise in your routine can lead to more balanced and aesthetically pleasing chest development. Is it necessary to use a spotter for the Incline Smith Machine Press? One advantage of the Smith Machine is that it has safety catches, reducing the need for a spotter. However, for very heavy lifts or when training to failure, having a spotter can provide additional safety and allow you to push your limits more confidently. How do I ensure I'm using the full range of motion in the Incline Smith Machine Press? To use a full range of motion, lower the bar until it lightly touches your upper chest, then press it back up until your arms are fully extended, but without locking out your elbows. Be mindful not to bounce the bar off your chest or use momentum. Can I use the Incline Smith Machine Press if I have lower back issues? The incline position in this exercise can be more comfortable for those with lower back issues compared to flat bench pressing. However, ensure your lower back stays in contact with the bench throughout the movement. If you experience discomfort, consult a healthcare professional. By addressing these common questions, we can enhance understanding of the Incline Smith Machine Press and its role in a comprehensive fitness program. Remember, while general guidelines are helpful, individual factors such as fitness level, goals, and any pre-existing conditions should always be considered when incorporating this exercise into your routine. When in doubt, consult with a qualified fitness professional to ensure you're performing the Incline Smith Machine Press safely and effectively for your specific needs. Conclusion: Maximizing Your Results with the Incline Smith Machine Press As we conclude this comprehensive guide to the Incline Smith Machine Press, it's clear that this exercise is a powerful tool for upper chest development and overall upper body strength. By understanding its mechanics, benefits, and proper execution, you can harness the full potential of this movement to transform your chest workouts and achieve impressive results. The Incline Smith Machine Press offers a unique combination of stability and targeted muscle engagement, making it suitable for a wide range of fitness levels and goals. Whether you're a beginner looking to build a foundation of chest strength, an intermediate lifter aiming to break through plateaus, or an advanced athlete seeking to fine-tune your upper chest development, this exercise has something to offer. Key takeaways from this guide include the importance of proper form and technique. Maintaining a stable base, retracting your shoulder blades, and focusing on a controlled range of motion are crucial for maximizing muscle activation and minimizing the risk of injury. Remember that the angle of the incline bench plays a significant role in targeting different areas of the upper chest, so don't be afraid to experiment with various angles to find what works best for your body and goals. Progression is vital for continued growth and improvement. Implement the principles of progressive overload by gradually increasing weight, reps, or sets over time. Utilize the various advanced techniques discussed, such as drop sets, pause reps, and tempo variations, to continually challenge your muscles and prevent adaptation plateaus. Nutrition and recovery are equally important components of your success with the Incline Smith Machine Press. Ensure you're fueling your body with adequate protein, carbohydrates, and healthy fats to support muscle growth and recovery. Prioritize sleep and manage stress to optimize your body's ability to adapt and grow stronger. Remember that the Incline Smith Machine Press, while effective, should be part of a balanced chest training program. Combine it with other chest exercises, including flat and decline variations, as well as exercises for opposing muscle groups to ensure overall upper body balance and development. For those dealing with special considerations, such as injuries or specific fitness goals, don't hesitate to modify the exercise or seek guidance from a qualified professional. The versatility of the Smith Machine allows for numerous adaptations to suit individual needs. Tracking your progress is essential for long-term success. Use the methods discussed to monitor your improvements in strength, muscle growth, and overall performance. Celebrate your achievements, no matter how small, and use setbacks as learning opportunities to refine your approach. As you continue your fitness journey with the Incline Smith Machine Press, stay curious and open to learning. The field of fitness is constantly evolving, with new research and techniques emerging regularly. Stay informed about the latest developments and be willing to adjust your approach as you gain more experience and knowledge. Lastly, remember that consistency is key. The most effective workout plan is one that you can stick to long-term. Make the Incline Smith Machine Press a regular part of your chest training routine, but also listen to your body and allow for adequate rest and recovery. By applying the knowledge and strategies outlined in this guide, you're well-equipped to maximize your results with the Incline Smith Machine Press. Whether your goal is to build a stronger, more defined upper chest, improve your overall pressing strength, or enhance your athletic performance, this exercise can play a crucial role in your success. Embrace the challenge, stay dedicated to your goals, and enjoy the process of sculpting your upper chest with the Incline Smith Machine Press. Your journey to a more powerful, aesthetically pleasing chest starts now. Remember, every rep brings you closer to your goals, so approach each session with focus, intensity, and a commitment to excellence. Here's to your success and the impressive upper chest development that awaits you! SEE MORE:⤵ Incline Fly Exercise: Complete Guide Upper Body Workout: The Ultimate Guide Pump Up Your Pecs: Unleash the Best Chest Workouts! Cable Flyes: Your Ultimate Guide! Push-Ups Unleashed: Your Ultimate Guide to Crushing It! Barbell Bench Press: Unleash Your Inner Hulk! Best Leg Workout 10 Best Chest Excercise 6 wall excercise you need to know Muscular endurance: Step by Step The Quest for the Heaviest Bench Press: Unleash Your Inner Strengtht 10 Benefitis of Anavar Best Leg Workout 10 Best Chest Excercise 6 wall excercise you need to know Muscular endurance: Step by Step
- Proper Form, Setup, Muscles Worked, Variations & PR Tips
In the realm of strength training and bodybuilding, few exercises command as much respect and attention as the bench press. Often hailed as the king of chest exercises, the bench press has long been a cornerstone of upper body development, a true test of strength, and a fundamental movement in countless workout routines. Whether you're a seasoned powerlifter, an aspiring bodybuilder, or simply someone looking to build a stronger, more defined upper body, mastering the bench press can be a game-changer in your fitness journey. This comprehensive guide delves deep into the world of bench pressing, offering you everything from the basics to advanced techniques. We'll explore the intricate anatomy behind this powerful movement, discuss its numerous benefits, and provide detailed instructions on how to perform the bench press with perfect form. Whether you're just starting out or looking to break through a plateau, this article has something for everyone. As we journey through the various aspects of the bench press, you'll discover how this exercise can be adapted to different fitness levels and goals. We'll explore common mistakes and how to avoid them, compare the bench press to other chest exercises, and even look at how it can be tailored for specific sports and activities. You'll also gain insights from powerlifters and strength coaches, learning the tips and tricks that can take your bench press to the next level. By the end of this guide, you'll have a thorough understanding of the bench press and be equipped with the knowledge to maximize your upper body strength, muscle growth, and overall fitness. So, whether you're looking to boost your athletic performance, build an impressive chest, or simply become stronger in your daily life, let's dive into the world of bench pressing and unlock your upper body potential. Table of Contents: I ntroduction to the Bench Press Anatomy and Muscles Worked in the Bench Press Benefits of Incorporating Bench Press into Your Routine Proper Form and Technique for the Bench Press Variations of the Bench Press Advanced Bench Press Techniques Programming the Bench Press in Your Workout Bench Press for Different Fitness Goals Nutrition to Support Bench Press Performance Expert Tips from Powerlifters and Strength Coaches Conclusion: Mastering the Bench Press for Upper Body Power Let's embark on this journey to master the bench press and transform your upper body strength, muscle development, and overall fitness! Introduction to the Bench Press The bench press stands as a towering figure in the world of strength training and bodybuilding, often referred to as the king of chest exercises. This powerful compound movement has been a cornerstone of upper body development for decades, captivating the attention of fitness enthusiasts, athletes, and strength competitors alike. The bench press not only serves as a fundamental exercise for building chest strength and muscle mass but also plays a crucial role in overall upper body power and functional fitness. Originating in the 1950s, the bench press quickly gained popularity in powerlifting circles and bodybuilding communities. Its ability to effectively target multiple muscle groups simultaneously made it an efficient and effective exercise for those seeking to build impressive upper body strength and aesthetics. Today, the bench press remains a staple in gyms worldwide, serving as a benchmark for upper body strength and a key component in countless workout routines. The significance of the bench press extends beyond mere muscle building. It's a movement that translates well to many real-world activities and sports, enhancing pushing power that's useful in everything from moving furniture to excelling in contact sports. Moreover, the bench press has become a cultural icon, with the question "How much do you bench?" often used as a quick gauge of one's strength and fitness level. As we delve deeper into this comprehensive guide, we'll explore every aspect of the bench press, from its biomechanics to advanced techniques, ensuring that readers of all levels can benefit from this powerful exercise. Whether you're a beginner looking to start your strength journey or an experienced lifter aiming to break through plateaus, mastering the bench press can be a game-changer in your fitness arsenal. Anatomy and Muscles Worked in the Bench Press Understanding the anatomy involved in the bench press is crucial for maximizing its benefits and performing the exercise safely and effectively. The bench press is a compound movement that engages multiple muscle groups simultaneously, making it an incredibly efficient exercise for upper body development. The primary muscle targeted during the bench press is the pectoralis major, commonly known as the chest muscle. This large, fan-shaped muscle covers much of the upper chest and is responsible for horizontal adduction of the arm, which is the primary movement in the bench press. The bench press effectively targets both the sternal (lower) and clavicular (upper) heads of the pectoralis major, contributing to overall chest development and strength. While the chest is the star of the show, the anterior deltoids (front shoulders) play a significant supporting role in the bench press. These muscles assist in the pressing movement, particularly in the latter part of the lift as the bar moves away from the chest. Strong anterior deltoids are crucial for a powerful bench press and contribute to that sought-after shoulder definition. The triceps brachii, located on the back of the upper arm, are another key player in the bench press. These muscles are responsible for elbow extension, which is essential for locking out the weight at the top of the movement. The triceps become particularly engaged during the second half of the pressing motion and are crucial for completing the lift. While not primary movers, several other muscle groups play important stabilizing roles during the bench press. The biceps brachii, while not actively shortening, work isometrically to stabilize the elbow joint. The forearm muscles, including the brachioradialis and flexor carpi radialis, are engaged in gripping the bar securely throughout the movement. Core muscles, including the rectus abdominis, obliques, and transverse abdominis, are constantly engaged during the bench press to stabilize the torso and maintain proper form. A strong core is essential for transferring power from the lower body to the upper body during the lift. From a biomechanical perspective, the bench press involves several joint actions. The primary movement occurs at the shoulder joint, where horizontal adduction takes place as the upper arm moves towards the midline of the body. Simultaneously, elbow extension occurs as the forearm moves away from the upper arm, straightening the elbow joint. Understanding this anatomy and biomechanics is key to performing the bench press correctly and safely. It helps in maintaining proper form, focusing on the mind-muscle connection, and avoiding compensatory movements that might reduce the effectiveness of the exercise or lead to injury. By engaging so many muscle groups simultaneously, the bench press offers a comprehensive upper body workout that translates well to real-world movements and athletic performance. This makes it not just an exercise for aesthetic improvement, but a fundamental movement for enhancing overall functional fitness and upper body strength. Benefits of Incorporating Bench Press into Your Routine Incorporating the bench press into your workout routine offers a multitude of benefits that extend far beyond mere chest development. This powerhouse exercise provides a comprehensive upper body workout while simultaneously improving various aspects of your overall fitness and athletic performance. First and foremost, the bench press is unparalleled in its ability to develop upper body strength. By targeting the chest, shoulders, and triceps simultaneously, the bench press builds a strong and balanced upper body. This strength development translates directly to improved performance in activities such as pushing, throwing, and any sport that requires powerful upper body movements. Muscle hypertrophy, or muscle growth, is another significant benefit of regular bench pressing. The bench press is particularly effective for building muscle mass in the chest, shoulders, and triceps. The high mechanical tension and metabolic stress induced by heavy bench pressing create the perfect environment for muscle growth, contributing to that coveted V-taper physique. The bench press also plays a crucial role in improving bone density, particularly in the upper body. As a weight-bearing exercise, it stimulates bone formation, helping to prevent conditions like osteoporosis and reducing the risk of fractures. This benefit is especially important as we age, making the bench press a valuable exercise for long-term health and fitness. From a functional fitness perspective, the bench press enhances pushing power that's useful in many real-world scenarios. Whether you're pushing a heavy door, performing CPR, or playing sports that require upper body strength, the power developed through bench pressing can be invaluable. The bench press also contributes significantly to improved posture. Strong chest muscles, balanced with back exercises, can help pull the shoulders back, counteracting the forward slouch that's common in our desk-bound society. This improved posture not only looks better but can also help alleviate back pain and reduce the risk of shoulder injuries. For athletes, the bench press is a fundamental exercise for developing explosive upper body power. This translates to better performance in sports like football, basketball, and martial arts, where the ability to generate force quickly with the upper body is crucial. The bench press also offers mental benefits. As a compound exercise that allows for heavy loading, it provides a great platform for setting and achieving strength goals. The sense of accomplishment from increasing your bench press numbers can boost confidence and motivation, carrying over into other areas of life. Moreover, the bench press is an excellent exercise for burning calories and supporting overall weight management. As a compound movement that engages multiple large muscle groups, it's more metabolically demanding than isolation exercises, helping to boost overall calorie burn both during and after your workout. Lastly, the versatility of the bench press makes it accessible to people of all fitness levels. It can be modified with different equipment (barbells, dumbbells, machines) and variations (incline, decline, close-grip) to suit individual needs and goals. This adaptability ensures that the bench press can remain a staple in your routine as you progress in your fitness journey. By incorporating the bench press into your routine, you're not just building a stronger chest; you're enhancing your overall upper body strength, improving your posture, boosting your athletic performance, and contributing to long-term bone health. Whether your goals are related to strength, aesthetics, or general health and fitness, the bench press has something valuable to offer. Proper Form and Technique for the Bench Press Mastering the proper form and technique for the bench press is crucial for maximizing its benefits while minimizing the risk of injury. Let's break down the movement into its key components, ensuring you have a comprehensive understanding of how to perform the bench press correctly. Setup and Body Positioning: Begin by lying on your back on a flat bench with your eyes aligned with the barbell. Plant your feet firmly on the ground, creating a stable base. Your buttocks should remain in contact with the bench throughout the movement. Arch your lower back slightly to maintain its natural curve, but avoid excessive arching, which can lead to injury. Grip and Hand Placement: Grasp the barbell with a grip slightly wider than shoulder-width. The exact width can vary based on individual anatomy and goals, but generally, your forearms should be vertical when the bar is on your chest. Wrap your thumbs around the bar for safety, avoiding the "thumbless" grip. Unracking the Bar: Before lifting, take a deep breath and brace your core. Unrack the bar by straightening your arms, then move it horizontally until it's directly over your chest. This is your starting position. The Descent: Lower the bar to your chest in a controlled manner. The bar path should be slightly diagonal, touching your chest at about nipple level. As you lower the weight, focus on retracting your shoulder blades, which helps engage your back muscles and provides a stable platform for pressing. The Press: After a brief pause at the bottom (without bouncing the bar off your chest), press the bar back up to the starting position. The bar path should mirror the descent, moving slightly towards your head as it rises. Drive through your feet and engage your leg muscles to create full-body tension during the press. Breathing and Bracing: Proper breathing is crucial for maintaining stability and power throughout the bench press. Inhale deeply before unracking the bar, hold your breath as you lower the weight, and exhale forcefully as you press the bar back up. This technique, known as the Valsalva maneuver, helps maintain core stability during the lift. Elbow Position: Keep your elbows at about a 45-degree angle to your torso as you lower the bar. Flaring your elbows out to 90 degrees can put unnecessary stress on your shoulders, while tucking them too close to your body can reduce chest engagement. Head and Neck Position: Keep your head in contact with the bench throughout the movement. Avoid the temptation to lift your head as you press, as this can strain your neck and compromise your stability. Wrist Alignment: Keep your wrists straight and aligned with your forearms. Bending your wrists backwards can lead to discomfort and reduced force transfer. Full Range of Motion: Unless you're performing a specific partial-range variation, aim for a full range of motion. The bar should touch your chest at the bottom of the movement and your arms should be fully extended (but not hyperextended) at the top. Re-racking the Bar: At the end of your set, move the bar back horizontally until it's over the rack uprights, then lower it onto the supports. Always use a spotter when lifting heavy weights to ensure safety. Common form mistakes to avoid include bouncing the bar off your chest, failing to maintain a stable body position, and inconsistent bar path. It's always better to use lighter weights with perfect form than to sacrifice technique for heavier loads. Remember, proper form is crucial in the bench press. It's better to perform fewer repetitions with perfect technique than to sacrifice form for higher numbers. As you practice and become more comfortable with the movement, you can gradually increase the weight and number of repetitions. By mastering the proper form and technique of the bench press, you'll be able to fully harness the power of this exercise, building strength in your upper body, improving your overall fitness, and reducing the risk of injury. Practice regularly, focus on your form, and you'll soon see the remarkable benefits that the bench press can bring to your fitness routine. Variations of the Bench Press While the standard barbell bench press is an excellent exercise, there are numerous variations that can add diversity to your workout routine, target muscles slightly differently, or accommodate different fitness levels and goals. Let's explore some of the most effective variations of the bench press. Barbell Bench Press Variations: The barbell bench press itself comes in several forms. The flat bench press is the standard version, targeting the entire chest evenly. The incline bench press, performed on a bench angled between 15 and 45 degrees, shifts the focus to the upper chest and engages the front deltoids more. The decline bench press, with the head lower than the feet, emphasizes the lower chest. Each of these variations can be valuable for developing a well-rounded chest. Dumbbell Bench Press: Using dumbbells instead of a barbell allows for a greater range of motion and can help address muscle imbalances between sides. Dumbbell bench presses can be performed on flat, incline, or decline benches, mirroring the barbell variations. The increased stabilization required when using dumbbells can lead to greater muscle activation and improved coordination. Close-Grip Bench Press: This variation involves gripping the barbell with hands closer together than shoulder-width. The close-grip bench press places more emphasis on the triceps while still engaging the chest and shoulders. It's an excellent exercise for improving lockout strength in the standard bench press and for developing the triceps. Wide-Grip Bench Press: Conversely, taking a grip wider than shoulder-width can increase the focus on the outer portions of the chest. This variation can be particularly beneficial for bodybuilders looking to enhance the width and overall development of their chest muscles. Floor Press: Performed lying on the floor instead of a bench, the floor press limits the range of motion, reducing shoulder strain and emphasizing the lockout portion of the press. This variation is excellent for developing triceps strength and can be particularly useful for those with shoulder issues or as a tool to overcome sticking points in the regular bench press. These variations of the bench press offer numerous benefits: Targeting Muscles Differently: Each variation emphasizes slightly different aspects of the chest, shoulders, and triceps. For example, incline presses focus more on the upper chest, while close-grip presses target the triceps more intensely. Accommodating Different Fitness Levels: Beginners might find dumbbell presses more manageable for learning the movement pattern, while advanced lifters can challenge themselves with variations like the close-grip or wide-grip bench press. Preventing Boredom and Plateaus: Rotating through different bench press variations can keep your workouts interesting and prevent your muscles from adapting to a single movement pattern, potentially leading to better long-term progress. Improving Overall Upper Body Development: By incorporating various bench press variations, you can ensure comprehensive development of your chest, shoulders, and triceps, leading to better overall upper body strength and aesthetics. When incorporating these variations into your routine, it's important to start with the basic movement pattern and progress gradually. Master the traditional flat barbell bench press before moving on to more challenging variations. Always prioritize proper form over the amount of weight lifted. By exploring these different bench press variations, you can create a more diverse and effective upper body workout routine, targeting your chest, shoulders, and triceps from multiple angles and continuing to challenge your muscles in new ways. This variety not only keeps your workouts interesting but also ensures comprehensive upper body development, contributing to improved strength, muscle growth, and overall functional fitness. Advanced Bench Press Techniques For those who have mastered the basic bench press and its common variations, there are numerous advanced techniques that can further challenge your strength, muscle growth, and overall fitness. These advanced bench press techniques are designed to push your limits, break through plateaus, and enhance your overall pressing power. Let's explore some of these challenging variations: Paused Bench Press: This technique involves pausing the bar on your chest for a count of 1-3 seconds before pressing it back up. The pause eliminates the stretch reflex, forcing your muscles to generate force from a dead stop. This variation is excellent for improving starting strength and is commonly used in powerlifting training. Paused bench presses can significantly increase your regular bench press numbers by strengthening the most challenging part of the lift. Tempo Bench Press: Manipulating the tempo of your bench press can significantly increase its difficulty and effectiveness. For example, you might use a 4-2-1 tempo, where you lower the bar for four seconds, pause for two seconds at the bottom, and then explosively press for one second. Tempo bench presses increase time under tension, a key factor in muscle growth, and can improve your control and stability throughout the movement. Band-Resisted Bench Press: This advanced technique involves attaching resistance bands to the barbell and anchoring them to the floor or rack. The bands add increasing resistance as you press the bar up, making the top portion of the lift more challenging. This variation is excellent for developing explosive pressing power and overcoming sticking points at lockout. Chain Bench Press: Similar to band-resisted presses, chain bench presses involve draping chains over the barbell. As you press the bar up, more chain links lift off the floor, progressively increasing the weight. This technique helps develop explosive strength and power, particularly in the lockout portion of the lift. Board Press: This variation involves placing one or more wooden boards on your chest, limiting the range of motion of the bench press. Board presses allow you to overload specific portions of the lift, typically the mid-range or lockout. They're particularly useful for addressing sticking points and developing overall pressing strength. Spoto Press: Named after powerlifter Eric Spoto, this technique involves lowering the bar to just above your chest, holding it there for a pause, and then pressing back up without touching your chest. This variation eliminates the touch-and-go aspect of regular bench pressing, forcing you to maintain tension throughout the movement and improving your control and stability. Eccentric Overload: This advanced technique involves lowering more weight than you can lift concentrically. Typically performed with a partner or specialized equipment, you lower a supramaximal weight slowly and under control, then have assistance in pressing it back up. Eccentric overload can lead to significant strength gains and muscle growth due to the high mechanical tension involved. These advanced bench press techniques offer several benefits: Breaking Through Plateaus: When progress stalls on the regular bench press, these variations can provide new stimuli to spark further strength and muscle gains. Improving Weak Points: Many of these techniques allow you to focus on specific portions of the lift, helping to address individual weaknesses in your bench press. Enhancing Mind-Muscle Connection: The increased difficulty and novel stimuli of these variations can improve your overall body awareness and control during the bench press. Developing Explosive Power: Techniques like band and chain bench presses are excellent for developing the ability to generate force quickly, which is crucial for many sports and activities. When incorporating these advanced bench press techniques into your routine, it's important to progress gradually and always prioritize proper form. These variations are more demanding and may increase the risk of injury if not performed correctly. Here are some tips for safely integrating advanced bench press techniques: Start with lighter weights when first attempting these variations. Ensure you have mastered proper form in the standard bench press before attempting these advanced techniques. Use these advanced techniques sparingly at first, perhaps as a finisher to your regular bench press workout or as part of a specialized training block. Listen to your body and be prepared to regress to easier variations if you feel your form slipping. Consider working with a qualified strength coach when first attempting these advanced techniques. By incorporating these advanced bench press techniques into your workout routine, you can continue to challenge your upper body, break through plateaus, and achieve new levels of strength and muscle development. Remember, the key to progress is consistent, gradual challenge combined with proper form and adequate recovery. With patience and persistence, these advanced bench press variations can take your upper body training to new heights. Programming the Bench Press in Your Workout Effectively incorporating the bench press into your workout routine requires careful consideration of frequency, volume, and complementary exercises. The optimal approach can vary based on your fitness goals, whether they're centered around strength, hypertrophy, athletic performance, or overall conditioning. Frequency Recommendations: For most individuals, training the bench press 2-3 times per week is sufficient to see progress while allowing adequate recovery time. If you're new to bench pressing or find it particularly challenging, start with twice a week and gradually increase the frequency as you build strength and improve your technique. More advanced lifters or those focusing specifically on upper body development might incorporate bench press into their workouts up to 4 times per week, but this high frequency should be approached cautiously to avoid overtraining. Volume Considerations: The number of sets and repetitions you perform will depend on your current ability level and goals: For strength focus: Aim for 3-5 sets of 3-5 repetitions with heavier weights. For hypertrophy (muscle growth): Try 3-4 sets of 8-12 repetitions with moderate weights. For endurance and conditioning: Perform 2-3 sets of 12-15 repetitions with lighter weights. Remember, quality is more important than quantity with bench pressing. It's better to perform fewer reps with perfect form than to sacrifice technique for higher numbers. Incorporating Bench Press with Other Exercises: The bench press can be effectively paired with other exercises to create a comprehensive upper body workout. Consider the following strategies: Pair bench press with a pulling exercise like rows or pull-ups for balanced upper body development. Superset bench press with a lower body exercise for an efficient full-body session. Use bench press as your main lift, followed by accessory exercises for the chest, shoulders, and triceps. When programming the bench press, consider the following tips: Place bench press early in your workout when you're fresh, especially if strength is your primary goal. If you're performing bench press after other upper body exercises, you may need to reduce the weight or number of repetitions due to fatigue. Don't neglect unilateral work. Include single-arm dumbbell presses to address any strength imbalances between sides. Vary the types of bench presses you perform to target your muscles from different angles and prevent adaptation. Progressive Overload: To continue making progress with bench press, apply the principle of progressive overload: Gradually increase the weight you're using over time. Increase the number of repetitions or sets. Decrease rest times between sets to increase the intensity. Progress to more challenging bench press variations as you master the basic movement. Sample Bench Press Workout Plans: Upper Body Strength Focus: Barbell Bench Press: 4 sets of 5 reps Incline Dumbbell Press: 3 sets of 8 reps Close-Grip Bench Press: 3 sets of 6 reps Bent-Over Rows: 3 sets of 8 reps Full Body Workout Including Bench Press: Barbell Bench Press: 3 sets of 8 reps Squats: 3 sets of 8 reps Pull-Ups: 3 sets to failure Plank: 3 sets of 30-60 seconds Chest-Focused Workout: Flat Barbell Bench Press: 3 sets of 6-8 reps Incline Dumbbell Press: 3 sets of 8-10 reps Decline Bench Press: 3 sets of 10-12 reps Cable Flyes: 3 sets of 12-15 reps Remember, these are just sample plans. Your specific routine should be tailored to your fitness level, goals, and overall program structure. It's always beneficial to consult with a fitness professional when designing a workout plan that includes bench press, especially if you're new to the exercise or have any pre-existing conditions. By thoughtfully programming the bench press into your routine and progressively challenging yourself, you'll be well on your way to developing a strong, well-defined upper body while improving your overall pressing strength and muscular development. The key is to find the right balance of frequency, volume, and intensity that aligns with your specific goals and recovery capacity. Bench Press for Different Fitness Goals The bench press is a versatile exercise that can be adapted to suit various fitness goals, from building raw strength to enhancing muscular endurance. Understanding how to tailor your bench press training to your specific objectives is key to maximizing the benefits of this powerful exercise. Strength-Focused Bench Press Training: For those primarily interested in building upper body strength, the focus should be on performing bench presses with heavier weights and lower repetitions. Here's how to structure your bench press training for strength gains: Use a weight that's challenging for 3-5 repetitions. Aim for 3-5 sets per workout. Rest periods between sets should be longer, typically 2-3 minutes, to allow for full recovery. Incorporate variations like paused bench press or board press to address sticking points. Focus on progressive overload by gradually increasing the weight over time. A sample strength-focused bench press workout might look like this: Barbell Bench Press: 5 sets of 3 reps at 85% of 1RM Paused Bench Press: 3 sets of 3 reps at 80% of 1RM Close-Grip Bench Press: 3 sets of 5 reps at 75% of 1RM Hypertrophy (Muscle Growth) Bench Press Workouts: If your goal is to build muscle mass in your chest, shoulders, and triceps, your bench press training should focus on moderate weights with higher repetitions to increase time under tension. Here's how to structure your bench press training for hypertrophy: Use a weight that allows for 8-12 repetitions per set. Aim for 3-4 sets per bench press variation. Focus on slow, controlled movements, especially during the eccentric (lowering) phase. Incorporate a variety of bench press angles (flat, incline, decline) to target the muscles from different angles. Keep rest periods shorter, typically 60-90 seconds between sets. A sample hypertrophy-focused bench press workout might include: Flat Barbell Bench Press: 4 sets of 10 reps Incline Dumbbell Press: 3 sets of 12 reps Decline Bench Press: 3 sets of 10 reps Cable Flyes: 3 sets of 15 reps Endurance and Conditioning with Bench Press: For those looking to improve muscular endurance or overall conditioning, bench press training should involve higher repetitions with lighter weights. Here's how to structure your bench press training for endurance: Use lighter weights that allow for 15-20 repetitions or even more. Perform higher total volume with more sets or by incorporating bench press into circuit training. Minimize rest between sets to keep your heart rate elevated. Consider including variations like dumbbell bench press or push-ups for added variety and challenge. A sample endurance-focused bench press workout might look like this: Barbell Bench Press: 3 sets of 20 reps Dumbbell Bench Press: 3 sets of 15 reps Push-Ups: 3 sets to failure Bench Press Machine: 2 sets of 25 reps Sport-Specific Bench Press Applications: For athletes looking to enhance their performance in specific sports, bench press training can be tailored to mimic sport-specific movements: Football players might focus on explosive bench press movements to improve blocking power. Boxers or martial artists could incorporate speed bench press to enhance punching power. Basketball players might benefit from alternating dumbbell bench press to improve unilateral strength for shooting and passing. A sample sport-specific bench press workout for a football player might include: Bench Press: 4 sets of 5 reps with explosive concentric phase Alternating Dumbbell Bench Press: 3 sets of 8 reps per arm Medicine Ball Chest Pass: 3 sets of 10 throws Regardless of your specific fitness goal, there are a few key principles to keep in mind when incorporating bench press into your training: Progressive Overload: Gradually increase the difficulty of your bench press training over time, whether that's by adding weight, increasing repetitions, or progressing to more challenging variations. Proper Form: Always prioritize maintaining proper form over increasing weight or repetitions. Poor form can lead to injury and reduce the effectiveness of the exercise. Balance: Ensure you're training both pressing and pulling movements to maintain muscular balance and prevent injuries. Recovery: Allow adequate rest between bench press-focused workouts to prevent overtraining and allow for muscle recovery and growth. Variety: Incorporate different bench press variations to target your muscles from multiple angles and prevent adaptation. By tailoring your bench press training to your specific fitness goals, you can maximize the benefits of this versatile exercise. Whether you're aiming to build strength, increase muscle mass, improve endurance, or enhance sport-specific performance, the bench press can be a powerful tool in your fitness arsenal. Remember to listen to your body, progress gradually, and enjoy the process of becoming stronger and more capable through your bench press training. Bench Press for Different Fitness Levels The bench press is a versatile exercise that can be adapted to suit various fitness levels, from beginners just starting their strength training journey to advanced lifters pushing the limits of their strength. Let's explore how to approach the bench press at different fitness levels. For Beginners: If you're new to strength training, the focus should be on learning proper form and building a foundation of strength. Start with lighter weights or even just the barbell to master the movement pattern. Here are some tips for beginners: Begin with the empty barbell to learn the proper range of motion and technique. Focus on maintaining a stable body position and consistent bar path. Perform higher repetitions (10-15) to build muscular endurance and reinforce proper form. Consider starting with dumbbell bench press or machine chest press to develop stability and confidence before progressing to the barbell. Aim for 2-3 sets of bench press, 2-3 times per week, allowing for adequate recovery between sessions. A beginner bench press workout might look like this: Barbell Bench Press: 3 sets of 10-12 reps with light weight Dumbbell Bench Press: 2 sets of 12-15 reps Push-Ups: 2 sets to failure For Intermediate Lifters: As you progress in your strength journey, you can start to increase the weight and complexity of your bench press training. Intermediate lifters should focus on progressive overload and introducing variations to continue making gains. Here's how to approach bench press at this level: Incorporate a mix of strength-focused (lower reps, higher weight) and hypertrophy-focused (moderate reps, moderate weight) training. Begin to experiment with bench press variations like incline, decline, and close-grip bench press. Introduce paused reps to improve starting strength and eliminate momentum. Aim for 3-4 sets of bench press, 2-3 times per week, with varying rep ranges. An intermediate bench press workout might include: Barbell Bench Press: 4 sets of 6-8 reps Incline Dumbbell Press: 3 sets of 8-10 reps Close-Grip Bench Press: 3 sets of 8-10 reps For Advanced Lifters: Advanced lifters should focus on optimizing their bench press performance through specialized techniques and programming. At this level, you're likely pushing significant weights and need to be mindful of recovery and injury prevention. Here's how to approach bench press as an advanced lifter: Implement periodization in your training, cycling between phases of higher volume and higher intensity. Incorporate advanced techniques like board presses, band-resisted bench press, or chain bench press to overcome sticking points. Use a variety of rep ranges, from low-rep strength work to higher-rep hypertrophy and endurance work. Consider specialized bench press programs like Smolov Jr. for bench or incorporate overreaching phases for continued progress. Pay close attention to recovery, as the demands on your body are higher at this level. An advanced bench press workout might look like this: Barbell Bench Press: 5 sets of 3 reps at 85% 1RM Paused Bench Press: 3 sets of 5 reps at 75% 1RM Incline Bench Press: 4 sets of 6-8 reps Dumbbell Flyes: 3 sets of 10-12 reps Regardless of your fitness level, there are a few key principles to keep in mind: Progressive Overload: Continuously challenge yourself by gradually increasing the weight, reps, or sets over time. Proper Form: Always prioritize maintaining proper form over lifting heavier weights. This is crucial for both effectiveness and injury prevention. Recovery: Ensure adequate rest between bench press sessions to allow for muscle recovery and growth. Balanced Training: Don't neglect other muscle groups or opposing movements. Balance your pressing work with pulling exercises for overall upper body development. Remember, progress is not always linear. There will be times when you need to deload or maintain your current level before pushing forward again. Listen to your body, be patient with your progress, and enjoy the journey of becoming stronger and more proficient in the bench press. Common Mistakes in Bench Press Execution Even experienced lifters can fall prey to common mistakes when performing the bench press. Identifying and correcting these errors is crucial for maximizing the benefits of the exercise and preventing potential injuries. Let's explore some of the most frequent bench press mistakes and how to avoid them: Bouncing the Bar Off the Chest: This is perhaps the most common mistake, especially among beginners eager to lift heavier weights. Bouncing the bar off the chest uses momentum rather than muscle power and can lead to injury. Instead, lower the bar in a controlled manner, pause briefly at the chest, then press up using your muscles, not momentum. Flaring the Elbows: Keeping your elbows flared out at a 90-degree angle to your torso puts unnecessary stress on the shoulder joints. To correct this, think about tucking your elbows slightly as you lower the bar. Aim for about a 45-degree angle between your upper arms and torso. Arching the Back Excessively: While a slight arch in the lower back is normal and can be beneficial, excessive arching can lead to back pain and reduces the effectiveness of the exercise. Maintain a natural arch in your lower back, keeping your buttocks in contact with the bench throughout the movement. Inconsistent Bar Path: The bar should follow a slight diagonal path, touching your chest at about nipple level and ending up over your shoulders at the top of the movement. Many lifters allow the bar to drift towards their face or feet, which can reduce power and put unnecessary stress on the shoulders. Lifting the Head Off the Bench: Raising your head to watch the bar can strain your neck and disrupt your overall form. Keep your head in contact with the bench throughout the entire movement, focusing on a point on the ceiling if needed. Uneven Bar Movement: This often occurs due to muscle imbalances or poor coordination. Focus on pressing the bar evenly with both arms. If you notice one side lagging, consider incorporating unilateral exercises like dumbbell presses to address imbalances. Failing to Engage the Leg Drive: Your legs play a crucial role in stabilizing your body during the bench press. Plant your feet firmly on the ground and use leg drive to create a stable base. This not only improves your stability but can also increase your pressing power. Using an Excessively Wide Grip: While a wide grip can emphasize the chest muscles, an overly wide grip can put undue stress on the shoulders and limit your range of motion. Your grip should typically be just outside shoulder-width, with your forearms perpendicular to the bar at the bottom of the movement. Neglecting to Retract the Shoulder Blades: Failing to pull your shoulder blades back and down can lead to shoulder instability and reduced power. Before unracking the bar, squeeze your shoulder blades together and maintain this position throughout the lift. Holding Your Breath Incorrectly: Proper breathing is crucial for stability and power. Many lifters either hold their breath throughout the entire movement or breathe at the wrong times. Instead, take a deep breath before lowering the bar, hold it as you lower and begin to press, then exhale forcefully as you complete the press. Rushing the Negative (Eccentric) Phase: Lowering the bar too quickly reduces the time under tension and can lead to loss of control. Focus on a controlled descent, taking about 1-2 seconds to lower the bar to your chest. Failing to Warm Up Properly: Jumping straight into heavy bench presses without an adequate warm-up increases your risk of injury and reduces performance. Always start with lighter weights and gradually work up to your working sets. By being aware of these common mistakes and actively working to avoid them, you can significantly improve your bench press technique, increase your strength gains, and reduce your risk of injury. Remember, proper form should always take precedence over the amount of weight lifted. If you're unsure about your form, consider working with a qualified trainer or coach who can provide personalized feedback and corrections. Bench Press for Specific Sports and Activities The bench press is not just a bodybuilding or powerlifting exercise; it has significant applications across various sports and physical activities. Understanding how to tailor your bench press training to specific sports can greatly enhance athletic performance. Let's explore how the bench press can be adapted for different sports and activities: Football: For football players, especially linemen, the bench press is crucial for developing the pushing strength needed for blocking. Football-specific bench press training might include: Explosive bench press: Focus on moving the bar as quickly as possible during the concentric phase to mimic the explosive nature of blocking. Board presses: These can help develop strength in the specific range of motion used in blocking. High-volume training: To build the muscular endurance needed for sustained performance throughout a game. A football-specific bench press workout might look like this: Explosive Bench Press: 5 sets of 3 reps at 70% 1RM, focusing on bar speed 2-Board Press: 4 sets of 5 reps Bench Press: 3 sets of 12-15 reps for endurance Basketball: While not typically associated with bench press, basketball players can benefit from the upper body strength and power it develops for activities like boxing out and passing. Basketball-specific bench press training might include: Alternating dumbbell bench press: To develop unilateral strength for shooting and passing. Medicine ball chest passes: To translate bench press strength into explosive, sport-specific movements. A basketball-focused bench press workout could include: Alternating Dumbbell Bench Press: 4 sets of 8 reps per arm Barbell Bench Press: 3 sets of 6-8 reps Medicine Ball Chest Pass: 3 sets of 10 explosive throws Boxing and Martial Arts: For combat sports, the bench press can help develop the pushing power needed for strikes. Training should focus on: Speed bench press: Using lighter weights and focusing on moving the bar as quickly as possible. Plyometric push-ups: To develop explosive pushing power that translates to punching speed. A boxing-specific bench press workout might include: Speed Bench Press: 6 sets of 3 reps at 50% 1RM, focusing on bar speed Bench Press: 3 sets of 8-10 reps at moderate weight Plyometric Push-Ups: 3 sets of 5-8 reps Swimming: Swimmers can benefit from the upper body and core strength developed through bench pressing. Focus should be on: Higher rep ranges to build muscular endurance. Incorporating dumbbell work to address any muscle imbalances. A swimming-focused bench press workout could look like: Barbell Bench Press: 3 sets of 12-15 reps Alternating Dumbbell Bench Press: 3 sets of 10 reps per arm Push-Ups: 2 sets to failure Rugby: Rugby players require a combination of strength and endurance. Bench press training for rugby might include: Heavy bench press for overall strength development. Higher rep work for muscular endurance. Explosive variations to mimic the dynamic nature of the sport. A rugby-specific bench press workout might include: Heavy Bench Press: 4 sets of 5 reps Speed Bench Press: 3 sets of 5 reps at 60% 1RM, focusing on bar speed Bench Press: 2 sets of 15-20 reps for endurance Gymnastics: While not typically associated with heavy lifting, gymnasts can benefit from the upper body and core strength developed through bench pressing. Focus should be on: Bodyweight variations like push-ups and dips. Dumbbell work for balanced muscle development. A gymnastics-focused upper body workout might include: Dumbbell Bench Press: 3 sets of 8-10 reps Push-Ups: 3 sets to failure Dips: 3 sets to failure Regardless of the sport, it's important to remember that bench press should be part of a well-rounded strength training program. It should be balanced with pulling exercises and sport-specific training. Always consider the specific demands of your sport and how bench press can complement your overall training regimen. When incorporating bench press into sport-specific training, consider the following: Movement Patterns: Analyze the specific pushing movements in your sport and try to mimic these in your bench press training. Energy Systems: Adjust your rep ranges and rest periods to match the energy system demands of your sport. Periodization: Structure your bench press training to peak at the right time for your competitive season. Injury Prevention: Use bench press to strengthen supporting muscles and correct imbalances that might lead to sport-specific injuries. By tailoring your bench press training to your specific sport or activity, you can develop the strength, power, and endurance needed to excel in your chosen field. Remember to always maintain proper form and gradually progress in your training to avoid injury and maximize the benefits of this powerful exercise. Nutrition to Support Bench Press Performance Proper nutrition plays a crucial role in supporting and enhancing your bench press performance. Whether your goal is to increase strength, build muscle mass, or improve endurance, your dietary habits can significantly impact your results. Let's explore the key nutritional considerations for optimizing your bench press performance: Protein Intake: Protein is essential for muscle repair and growth, which is crucial for improving your bench press strength over time. Aim for a protein intake of about 1.6 to 2.2 grams per kilogram of body weight daily. Good sources of protein include lean meats, fish, eggs, dairy products, and plant-based options like legumes and tofu. Consider spreading your protein intake evenly throughout the day to maximize muscle protein synthesis. Carbohydrates for Energy: Carbohydrates are your body's primary source of energy, especially for high-intensity exercises like the bench press. Ensure you're consuming adequate carbohydrates to fuel your workouts and support recovery. Complex carbohydrates like whole grains, fruits, and vegetables should form the bulk of your carb intake, providing sustained energy and essential nutrients. Healthy Fats: While often overlooked, healthy fats play a crucial role in hormone production, including testosterone, which is important for strength and muscle growth. Include sources of healthy fats in your diet, such as avocados, nuts, seeds, olive oil, and fatty fish. Hydration: Proper hydration is critical for optimal performance in any exercise, including the bench press. Even mild dehydration can negatively impact your strength and endurance. Aim to drink water consistently throughout the day, and consider electrolyte-rich drinks for longer, more intense training sessions. Pre-Workout Nutrition: What you eat before your workout can significantly impact your bench press performance. Aim to have a meal containing both carbohydrates and protein about 2-3 hours before your workout. This could be something like chicken with brown rice and vegetables. If you're training early in the morning, a lighter snack about 30 minutes before your workout, such as a banana with peanut butter, can provide quick energy. Intra-Workout Nutrition: For longer training sessions, especially those lasting more than 90 minutes, consider intra-workout nutrition. This could be as simple as sipping on a sports drink to maintain energy levels and hydration. Post-Workout Nutrition: After your bench press session, focus on replenishing energy stores and providing nutrients for muscle recovery. Consume a meal or shake containing both protein and carbohydrates within 30 minutes to an hour after your workout. A protein shake with a piece of fruit or a chicken and rice bowl are good options. Creatine Supplementation: Creatine monohydrate is one of the most researched and effective supplements for improving strength and power output. It can be particularly beneficial for exercises like the bench press. Consider taking 3-5 grams of creatine daily to support your strength training efforts. Beta-Alanine: This amino acid has been shown to improve muscular endurance, which can be beneficial if you're doing higher rep bench press work. A typical dose is 2-5 grams per day. Caffeine: Consuming caffeine before your workout can increase alertness, reduce perception of effort, and potentially improve strength performance. If you choose to use caffeine, start with a low dose (about 200mg) about 30 minutes before your workout. Vitamin D and Zinc: These micronutrients play important roles in testosterone production and overall health. Ensure you're getting adequate amounts through your diet or consider supplementation if you're deficient. Timing Your Meals: While total daily intake is most important, timing your meals can optimize your bench press performance. Try to have a balanced meal 2-3 hours before your workout, and a post-workout meal within an hour after training. Caloric Intake: Your overall caloric intake should align with your goals. If you're aiming to build muscle and increase your bench press numbers, you may need to be in a slight caloric surplus. If you're trying to maintain strength while losing body fat, a slight caloric deficit with adequate protein can help. Consistency is Key: Remember that nutrition to support bench press performance isn't just about what you eat on training days. Consistent, balanced nutrition throughout the week is crucial for long-term progress and recovery. Individual Needs: Everyone's nutritional needs are slightly different based on factors like body composition, training intensity, and overall goals. Consider working with a registered dietitian who specializes in sports nutrition to create a personalized plan. By paying attention to your nutrition and fueling your body properly, you can significantly enhance your bench press performance and overall strength gains. Remember, nutrition is just one piece of the puzzle – it should work in conjunction with proper training, adequate rest, and consistent effort to help you achieve your bench press goals. Expert Tips from Powerlifters and Strength Coaches To truly master the bench press, it's valuable to learn from those who have achieved exceptional results in this lift. Here, we've compiled expert tips from renowned powerlifters and strength coaches to help you take your bench press to the next level: Focus on Leg Drive: Many novice lifters underestimate the importance of leg drive in the bench press. Jennifer Thompson, world record holder in the bench press, emphasizes the importance of using leg drive to create a stable base and generate more power. She recommends practicing with submaximal weights to perfect your leg drive technique before applying it to heavier lifts. Master the Setup: Dave Tate, powerlifter and founder of EliteFTS, stresses the importance of a consistent setup routine. He advises lifters to develop a step-by-step process for setting up on the bench, including foot placement, shoulder blade retraction, and hand positioning. Practicing this routine until it becomes second nature can lead to more consistent and powerful lifts. Utilize Paused Reps: Boris Sheiko, renowned Russian powerlifting coach, recommends incorporating paused reps into your training regimen. Pausing at the bottom of the lift eliminates the stretch reflex and forces you to generate power from a dead stop, which can translate to improved strength in competition-style bench presses. Focus on Bar Path: Mike Tuscherer, founder of Reactive Training Systems, emphasizes the importance of an optimal bar path. He suggests that the most efficient path is not straight up and down, but slightly diagonal, starting at the lower chest and ending over the shoulders at the top of the lift. Improve Your Arch: While excessive arching can be detrimental, a proper arch can significantly improve your bench press. Powerlifter Jen Sinkler recommends practicing the arch position separately from the bench press to improve flexibility and strength in this position. Strengthen Your Triceps: Mark Bell, powerlifter and inventor of the Slingshot, emphasizes the importance of strong triceps for a big bench press. He recommends exercises like close-grip bench press, skull crushers, and band pushdowns to build tricep strength. Use Visualization Techniques: Legendary powerlifter Ed Coan advocates for the power of mental preparation. He suggests visualizing successful lifts before attempting them, focusing on perfect form and the feeling of completing the lift successfully. Vary Your Training: Louie Simmons, founder of Westside Barbell, is known for his conjugate method of training. He recommends varying your bench press training with different bars, bands, and chains to continually challenge your muscles and prevent stagnation. Focus on Technique at Lighter Weights: Chad Wesley Smith, founder of Juggernaut Training Systems, emphasizes the importance of perfecting technique with submaximal weights. He suggests spending time working with 70-80% of your max to refine your form before attempting near-maximal lifts. Incorporate Overload Techniques: Josh Bryant, world-record-holding bench presser, recommends using overload techniques like board presses or the Slingshot to handle supramaximal weights and improve your lockout strength. Don't Neglect Back Training: Many top powerlifters, including Chris Duffin, stress the importance of a strong back for a big bench press. Exercises like rows, pull-ups, and face pulls can improve your bench press by providing a stable base to press from. Perfect Your Grip: Kirill Sarychev, who has bench pressed over 335 kg raw, emphasizes the importance of grip strength and positioning. He recommends experimenting with different grip widths to find what works best for your body type and focusing on grip-specific training. Prioritize Recovery: Mike Israetel, PhD in Sport Physiology and co-founder of Renaissance Periodization, stresses the importance of proper recovery. He advises lifters to pay attention to sleep, nutrition, and managing overall training volume to continue making progress in the bench press. Use Accommodating Resistance: Westside Barbell coach Matt Wenning recommends using bands and chains in your bench press training. These tools provide accommodating resistance, increasing the weight as you reach the stronger part of the lift, helping to build explosive strength through the entire range of motion. Focus on Full-Body Tension: World champion powerlifter Brett Gibbs emphasizes the importance of creating and maintaining full-body tension throughout the lift. He recommends practicing this tension even with lighter weights to make it second nature during max attempts. Remember, while these tips come from elite performers, it's important to adapt them to your own level and goals. Not every tip will work for every lifter, so experiment to find what works best for you. Always prioritize proper form and safety in your training, and consider working with a qualified coach to help implement these advanced techniques effectively. Conclusion: Mastering the Bench Press for Upper Body Power As we conclude this comprehensive guide to the bench press, it's clear that this exercise is far more than just a test of brute strength. The bench press is a complex, multi-faceted movement that engages numerous muscle groups, requires precise technique, and can be adapted to suit a wide range of fitness goals and sport-specific needs. We've explored the intricate anatomy behind the bench press, delving into the primary muscles worked and the biomechanics of the movement. Understanding this foundational knowledge is crucial for performing the exercise effectively and safely, and for appreciating why the bench press is such a powerful tool for upper body development. The benefits of incorporating the bench press into your routine are numerous and significant. From building raw strength and muscle mass to improving athletic performance and functional fitness, the bench press offers a unique combination of benefits that few other exercises can match. We've seen how it can be tailored to various fitness goals, whether you're aiming for maximal strength, muscular hypertrophy, or improved endurance. Proper form and technique are paramount in the bench press, and we've provided a detailed breakdown of how to execute the movement correctly. Remember, maintaining proper form not only maximizes the effectiveness of the exercise but also significantly reduces the risk of injury. The common mistakes we've outlined are important to be aware of and actively work to avoid. We've explored various bench press variations and advanced techniques, providing options to keep your training fresh and challenging, regardless of your experience level. From basic variations like incline and decline bench press to more advanced techniques like paused reps and band-resisted presses, there's always a new challenge to tackle in your bench press journey. The importance of proper programming cannot be overstated. We've provided guidelines on how to incorporate the bench press into your workout routine effectively, considering factors like frequency, volume, and intensity. Remember that the key to long-term progress is consistent, progressive overload combined with adequate recovery. We've also examined how the bench press can be adapted for different sports and activities, highlighting its versatility as a training tool. Whether you're a football player looking to improve your blocking power or a boxer aiming to increase your punching strength, the bench press can be tailored to support your specific athletic goals. Nutrition plays a crucial role in supporting bench press performance, and we've outlined key nutritional strategies to fuel your training and recovery. Remember that what you eat is just as important as how you train when it comes to making progress in the gym. The expert tips we've gathered from powerlifters and strength coaches provide valuable insights that can help take your bench press to the next level. These seasoned professionals have spent years refining their techniques and strategies, and their advice can be invaluable in your own strength journey. As you move forward with your bench press training, remember that progress takes time and consistency. Celebrate your small victories along the way, whether it's perfecting your form, adding a few pounds to your max, or simply feeling stronger in your day-to-day activities. The bench press is not just about the numbers you can lift – it's about the strength, confidence, and improved quality of life that come with dedicated training. Keep in mind that while the bench press is an excellent exercise, it should be part of a balanced training program that includes a variety of movements and exercises. Balance your pressing work with pulling exercises, and don't neglect other aspects of fitness like cardiovascular health and flexibility. Lastly, always prioritize safety in your training. Use proper equipment, work with a spotter when lifting heavy weights, and listen to your body. If something doesn't feel right, it's better to take a step back and reassess rather than risk injury. The journey to mastering the bench press is ongoing – there's always room for improvement, refinement, and new challenges. Embrace this journey, stay consistent, and you'll reap the rewards of increased strength, improved physique, and enhanced overall fitness. Here's to your continued success in the gym and beyond! SEE MORE:⤵ Incline Fly Exercise: Complete Guide Upper Body Workout: The Ultimate Guide Pump Up Your Pecs: Unleash the Best Chest Workouts! Cable Flyes: Your Ultimate Guide! Push-Ups Unleashed: Your Ultimate Guide to Crushing It! Barbell Bench Press: Unleash Your Inner Hulk! Best Leg Workout 10 Best Chest Excercise 6 wall excercise you need to know Muscular endurance: Step by Step
- Cable Rear Delt Fly: Form, Benefits, Variations & Mistakes
Unlock the potential of your posterior deltoids with the Cable Rear Delt Fly, a cornerstone exercise for shoulder health and aesthetics. Often overshadowed by more popular front and side delt exercises, the Cable Rear Delt Fly is the unsung hero that can provide balance and symmetry to your physique. In this comprehensive guide, we delve deep into the mechanics, benefits, and execution of this pivotal movement. With a focus on form, function, and finesse, we'll explore how the Cable Rear Delt Fly not only enhances muscle definition but also fortifies shoulder stability and function. From gym novices to seasoned athletes, it's time to turn the spotlight on one of the most effective exercises for achieving a well-rounded shoulder workout. What is the Cable Rear Delt Fly? Credits: Luke Hoffman The Cable Rear Delt Fly is a resistance training exercise that targets the rear deltoids, the often-neglected muscles at the back of the shoulder. Performed using a cable machine, it involves pulling the handles outward, away from the midline of the body, and engaging the rear deltoids in a flying motion. Isolating the rear deltoids can be challenging, but the Cable Rear Delt Fly provides a movement that specifically targets these muscles, promoting balanced shoulder development and improved posture. It’s an essential exercise for those looking to enhance the overall appearance and strength of their shoulders. This exercise is commonly integrated into upper body or shoulder-specific workout routines. It's versatile enough to serve as a warm-up for shoulder activation or as a muscle-defining finisher. The Cable Rear Delt Fly is adaptable to various fitness levels, making it a staple in both beginner and advanced training programs. The Purpose of the Cable Rear Delt Fly Credits: BullFit The primary purpose of the Cable Rear Delt Fly is to develop the posterior aspect of the shoulder muscles. This development is not just important for bodybuilders aiming for a 3D shoulder look but also for anyone interested in maintaining a balanced and functional upper body. By strengthening the rear deltoids, the Cable Rear Delt Fly contributes significantly to the stability of the shoulder girdle. This stability is crucial for the prevention of injuries, especially for athletes involved in overhead sports or occupations requiring repetitive arm movements. In today's forward-leaning society, where many individuals spend hours hunched over computers, muscular imbalances are common. The Cable Rear Delt Fly serves to counteract these imbalances by strengthening the muscles that are often weakened by poor posture. Muscles Worked by the Cable Rear Delt Fly Primary Muscle Group: Rear Deltoids As the name suggests, the Cable Rear Delt Fly primarily targets the rear deltoids. These muscles are key players in shoulder horizontal abduction and are essential for movements that require you to move your arms away from your body. Engaging Supporting Muscles Secondary muscles engaged during the exercise include the rhomboids and middle trapezius. These muscles contribute to retracting the shoulder blades, making the Cable Rear Delt Fly a comprehensive exercise for the upper back as well. Rotator Cuff Activation The rotator cuff muscles also play a supportive role in this exercise, as they are involved in the stabilization of the shoulder joint throughout the movement. This engagement helps to strengthen the rotator cuff muscles, which are vital for shoulder health. How to Perform the Cable Rear Delt Fly Credits: Labrada Nutrition Setting Up the Machine To perform the Cable Rear Delt Fly, start by adjusting the pulleys on a cable machine to shoulder height. Select an appropriate weight that allows you to perform the exercise with proper form while still challenging your muscles. Executing the Movement Grasp the handles with opposite hands (right hand to left pulley and vice versa) and step into a staggered stance for stability. With a slight bend in your elbows, pull the handles outwards and back, keeping your chest up and core engaged. Form and Precision Maintaining proper form is crucial. The movement should be slow and controlled, with a focus on feeling the rear deltoids working. Avoid using momentum to swing the weights, as this can lead to injury and reduce the effectiveness of the exercise. 5. Variations of the Cable Rear Delt Fly The seated variation helps to stabilize the body and isolate the rear deltoids further. It eliminates the assistance from the lower body, ensuring the rear deltoids are doing the bulk of the work. Performing the exercise with one arm at a time allows for increased concentration on each rear deltoid. It also helps in identifying and correcting any muscle imbalances between the two sides. Using an incline bench to perform the Cable Rear Delt Fly changes the angle of pull and can help target the rear deltoids differently. This variation can be beneficial for those looking to add diversity to their shoulder training. Conclusion The Cable Rear Delt Fly is not just another shoulder exercise; it's a critical component of a well-rounded strength program. Through this guide, we've highlighted the significance of the rear deltoids for both aesthetics and function. Incorporating the Cable Rear Delt Fly into your routine can lead to impressive gains in shoulder strength, improved posture, and a balanced physique. Remember, the journey to robust shoulders is a combination of consistent effort, proper technique, and progressive overload. With the Cable Rear Delt Fly in your arsenal, you're well on your way to unlocking the full potential of your posterior deltoids.
- Push Press vs Smith Machine Press: Which Is Better for Strength & Size?
Welcome, fellow fitness enthusiasts, to the battleground of shoulder training, where two formidable contenders, the Push Press and the Smith Machine Press, await their moment of appraisal. In this all-encompassing guide, we embark on a journey through the intricacies, advantages, and crucial considerations of each exercise. The burning question that propels us forward: which of these exercises claims the title of the ultimate shoulder sculptor? Shoulder development is an art, and the tools we choose can significantly impact the masterpiece we sculpt. As we delve into the specifics of the Push Press and the Smith Machine Press, our aim is to unravel the secrets behind each, empowering you to make an informed choice tailored to your fitness goals and preferences. So, let the clash of the titans commence as we navigate the landscape of shoulder sculpting and seek the answer to this enduring question. Understanding the Push Press: (credits: Catalyst Athletics) Benefits and Techniques: Explosive Power Generation: Dynamic Movement: The Push Press is characterized by a dynamic, upward thrust, tapping into explosive power. Athletic Performance: Its dynamic nature not only builds strength but also enhances overall athletic performance. Full-Body Activation: Leg Drive Contribution: Integral to the Push Press is the incorporation of leg drive, activating major muscle groups. Caloric Burn: This comprehensive activation induces a higher caloric expenditure, contributing to effective fat burning. Functional Strength Development: Real-Life Applications: The Push Press mirrors real-life movements, making it applicable to daily activities. Core Engagement: Stabilizing the core during the movement contributes to functional strength development. The Push Press emerges as a dynamic powerhouse, not merely confined to shoulder development. Its explosive nature engages the entire body, from the legs to the core, fostering functional strength and athletic prowess. As we unravel its intricacies, consider how the Push Press aligns with your fitness goals and the sculpting of a well-rounded physique. Exploring the Smith Machine Press: (credits: Renaissance Periodization ) Advantages and Considerations: Controlled and Guided Movement: Stability: The Smith Machine offers a stable and guided path, providing a controlled environment for the exercise. Reduced Injury Risk: The controlled movement minimizes the risk of injuries associated with improper form, promoting a safer workout. Isolation and Targeted Muscle Engagement: Isolation Focus: The Smith Machine Press excels in isolating shoulder muscles, offering a targeted approach to development. Reduced Momentum: By minimizing momentum, the exercise places focused emphasis on the shoulders, optimizing muscle engagement. Adaptability to Different Fitness Levels: Accessible to Beginners: The guided nature of the Smith Machine makes it accessible for beginners, allowing them to familiarize themselves with the movement. Progression Opportunities: As proficiency increases, the Smith Machine Press can be progressively loaded, presenting continuous challenges for individuals at various fitness levels. The Smith Machine Press emerges as a controlled sculptor, emphasizing precision and isolation in shoulder training. Its guided movement and isolation focus make it an accessible choice for those new to fitness, while its progression opportunities cater to the evolving strength levels of seasoned enthusiasts. Consider how the Smith Machine Press aligns with your individual fitness journey and contributes to the development of strong, well-defined shoulders. Comparing and Contrasting Highlighting Differences and Similarities: Range of Motion: Push Press: Greater Range of Motion: The Push Press incorporates a dynamic dip and drive, allowing for a broader range of motion. Dynamic Elements: The dip and drive contribute to the exercise's dynamic nature, enhancing flexibility and engagement. Smith Machine Press: Limited Vertical Plane: The Smith Machine Press operates within a guided vertical plane, limiting the overall range of motion. Controlled Path: While controlled, the movement is confined to a more vertical trajectory, offering stability but with reduced freedom of motion. Muscle Engagement: Push Press: Broader Muscle Engagement: Engages a spectrum of muscles, including the legs, core, and shoulders. Dynamic Synergy: The combination of leg drive and upper body activation fosters comprehensive muscle engagement. Smith Machine Press: Isolated Shoulder Engagement: Primarily isolates the shoulders, intensifying the focus on shoulder muscles. Reduced Involvement of Other Muscle Groups: The controlled path minimizes engagement from other muscle groups, emphasizing shoulder development. Customization and Adaptability: Push Press: Skill and Balance Requirement: Demands more skill and balance, making it suitable for those seeking a dynamic and challenging exercise. Versatile for Varied Goals: Its dynamic nature allows for versatility, catering to individuals with different fitness goals. Smith Machine Press: Controlled Environment: Provides a controlled and guided environment, making it accessible for beginners. Ideal for Targeted Training: Suited for individuals looking to isolate and target the shoulders specifically, with a focus on controlled movements. As we weigh the nuances of the Push Press and the Smith Machine Press, it becomes evident that each exercise brings its unique attributes to the table. The choice between the two depends on your fitness goals, experience level, and the specific challenges you seek in your shoulder training regimen. Conclusion: Making the Choice As we bring this epic showdown to a close, the decision between the Push Press and the Smith Machine Press ultimately rests on the pillars of your fitness goals, experience level, and personal inclinations. Each exercise unveils its unique merits, and the "best" one is the one that seamlessly aligns with your aspirations and the sculpting of your shoulders. Embrace the spirit of experimentation. Dive into both exercises, feel the nuances, and understand how each resonates with your body. Consider weaving a tapestry of variety by incorporating both into your routine or alternating between them. The journey to optimal shoulder sculpting may very well lie in the fusion of these dynamic exercises. We invite you to be a voice in our fitness community. Share your experiences and insights in the comments below. Whether you champion the explosive power of the Push Press or appreciate the controlled precision of the Smith Machine Press, your perspective enriches the collective wisdom of our fitness family. Stay tuned for more revelations on refining your workout routines and conquering your fitness goals. Until then, may your lifts be strong, your shoulders sculpted, and your fitness journey ever inspiring! Happy lifting!
- Dumbbell Upright Row: Safe Form, Benefits, Alternatives & Muscles Worked
The dumbbell upright row is a multifaceted exercise that targets multiple muscle groups, making it a valuable addition to any strength training or bodybuilding regimen. This compound movement primarily engages the shoulders, specifically the lateral deltoids, but it also works the trapezius muscles in the upper back and the biceps to a lesser extent. Its effectiveness in building muscle and enhancing shoulder definition makes the dumbbell upright row a popular choice among fitness enthusiasts looking to sculpt a strong, visually appealing upper body. This introduction will delve into the mechanics, benefits, and strategic incorporation of the dumbbell upright row into your workout routine, highlighting its significance in achieving balanced muscle development and improved upper body strength. Understanding the mechanics of the dumbbell upright row is crucial for performing the exercise correctly and reaping its full benefits while minimizing the risk of injury. The exercise involves lifting dumbbells vertically along the front of the body to approximately collarbone height, leading to intense activation of the shoulder and upper back muscles. Proper form and technique are paramount in ensuring that the exercise targets the intended muscle groups effectively. This section will explore the step-by-step execution of the dumbbell upright row, emphasizing the importance of posture, grip, and movement control for an efficient and safe workout. The versatility of the dumbbell upright row allows for variations that can accommodate different skill levels and fitness goals. Adjustments in grip width, weight selection, and movement range can significantly alter the exercise's focus, making it customizable to target specific aspects of the shoulder muscles or to fit into various workout plans. Whether you're a beginner looking to build foundational upper body strength or an experienced athlete aiming to refine muscle definition, understanding how to tailor the dumbbell upright row to meet your needs is essential for maximizing its effectiveness. Incorporating the dumbbell upright row into your workout routine offers numerous benefits beyond muscle growth and strength enhancement. This exercise can improve functional strength, contributing to better performance in both daily activities and athletic endeavors that require upper body power and coordination. Additionally, the dumbbell upright row can help correct muscular imbalances and enhance posture by strengthening the shoulder and upper back muscles, promoting a more aligned and balanced physique. Despite its many advantages, the dumbbell upright row is sometimes overlooked in favor of more traditional shoulder exercises. However, its unique ability to simultaneously engage multiple muscle groups and its adaptability to various training goals make it an exercise worthy of inclusion in any comprehensive upper body workout. As we delve deeper into the specifics of the dumbbell upright row, including proper form, common mistakes to avoid, and tips for effective implementation, it's clear that this exercise deserves a prominent place in your fitness regimen for achieving a strong, well-defined upper body. Anatomy of the Upright Row: The dumbbell upright row is a compound exercise that intricately involves various muscle groups, making it a staple in strength and conditioning programs. This exercise is renowned for its efficiency in targeting the upper body, specifically focusing on the shoulders, traps, and biceps. Understanding the anatomy involved in the dumbbell upright row is crucial for maximizing its benefits and ensuring a safe, effective workout. This detailed exploration will shed light on the muscle groups activated during the movement, the biomechanics of the exercise, and the importance of proper form to prevent injury. Primarily, the dumbbell upright row emphasizes the development of the deltoid muscles, with a particular focus on the lateral (middle) deltoids. These muscles are key contributors to shoulder abduction, which is the action of lifting your arms away from the body. By targeting the lateral deltoids, the dumbbell upright row helps in sculpting broader, more defined shoulders, contributing to a more pronounced V-shape torso that many athletes and fitness enthusiasts aspire to achieve. In addition to the lateral deltoids, the anterior (front) deltoids also receive significant stimulation during the exercise. Although not the primary focus, the anterior deltoids assist in lifting the dumbbells, especially as they approach the higher phase of the row. This complementary engagement ensures a balanced development of the shoulder muscles, enhancing both the aesthetic and functional aspects of upper body strength. The trapezius muscle, particularly its upper and middle fibers, is another major beneficiary of the dumbbell upright row. The traps extend from the neck to the mid-back, and their development is crucial for a strong, muscular back. The upright row motion engages the traps, contributing to their growth and aiding in the stabilization of the shoulders and neck. This engagement is vital for maintaining good posture and reducing the risk of shoulder injuries. The biceps brachii, while not the primary target, are involved in the dumbbell upright row as well. This muscle group assists in the elbow flexion component of the exercise, helping to lift the weights as the arms are drawn upwards. The involvement of the biceps adds a complementary aspect to the workout, allowing for a more comprehensive upper body routine that incorporates both pulling and lifting movements. Proper form and technique are paramount when performing the dumbbell upright row to activate these muscle groups effectively while minimizing the risk of injury. Incorrect form, such as lifting the weights too high or using excessive weight, can lead to strain on the shoulder joint and the rotator cuff muscles. These small muscles are crucial for stabilizing the shoulder and can be easily injured if the exercise is not performed correctly. To execute the dumbbell upright row safely, it is essential to maintain a neutral spine and avoid jerking or swinging the weights. The movement should be controlled and deliberate, with the focus on engaging the targeted muscle groups through the full range of motion. Adjusting the grip width can also help to reduce stress on the shoulders; a wider grip tends to be more comfortable and places less strain on the shoulder joint. Incorporating the dumbbell upright row into a balanced workout routine can significantly enhance upper body strength and aesthetics. However, it's important to complement this exercise with movements that target the posterior deltoids and other muscles of the back to ensure balanced muscle development and prevent postural imbalances. Exercises such as the bent-over row, face pulls, and reverse flyes can provide this balance, creating a well-rounded upper body workout. In conclusion, the anatomy involved in the dumbbell upright row is complex, engaging multiple muscle groups that contribute to upper body strength and appearance. Understanding the muscles activated and the importance of proper form can help practitioners maximize the benefits of this exercise while minimizing the risk of injury. When performed correctly and as part of a comprehensive workout plan, the dumbbell upright row is an effective tool for developing a strong, balanced, and aesthetically pleasing upper body. How To do a Dumbbell Upright Row The dumbbell upright row is a versatile and effective exercise that targets multiple muscle groups in the upper body, including the shoulders, upper back, and traps. This exercise is particularly beneficial for those looking to enhance their upper body strength and aesthetics. Performing the dumbbell upright row correctly is crucial to maximize its benefits and minimize the risk of injury. This guide will provide a detailed step-by-step approach to executing the dumbbell upright row with proper form and technique. To begin, select the appropriate weight of dumbbells. It's important to start with a weight that allows you to maintain proper form throughout the exercise while still challenging your muscles. Holding a dumbbell in each hand, stand with your feet shoulder-width apart. This stance will provide a stable base for the movement and help to engage your core throughout the exercise. With the dumbbells at your sides, grip them with your palms facing your body. This grip will ensure that your arms are in the correct position to initiate the row. Keep your knees slightly bent to reduce the strain on your lower back and engage your core to support your spine. This initial position is crucial for a successful dumbbell upright row. Begin the movement by exhaling and lifting the dumbbells upwards towards your chin, leading with your elbows. Your elbows should always be higher than your forearms and wrists. This elbow-led lifting is key to properly engaging the targeted muscle groups, including the lateral and anterior deltoids, as well as the upper portions of the trapezius muscles. As you lift the dumbbells, keep them close to your body to maximize the engagement of your upper back muscles. The path of the dumbbells should resemble a straight line as much as possible. This close proximity to the body ensures that the exercise remains focused on the intended muscle groups and reduces the risk of straining your shoulders. Once the dumbbells reach the level of your collarbone, or just before your elbows reach a 90-degree angle, pause briefly. It's essential not to lift the weights too high, as doing so can place unnecessary stress on the shoulder joints. This momentary pause at the top of the movement allows for maximum muscle engagement. After pausing, slowly lower the dumbbells back to the starting position while inhaling. The descent should be controlled and deliberate, providing the muscles with a continuous tension that further enhances muscle growth and strength development. It is this controlled lowering phase, or eccentric phase, that often contributes significantly to muscle building and should not be rushed. Ensuring that you're lowering the weights with control is as important as the lifting phase, as it helps to prevent injury and maximizes the effectiveness of the exercise. Throughout the entire dumbbell upright row movement, it's critical to maintain proper posture. Your back should remain straight and your chest up, preventing any rounding of the shoulders or arching of the lower back. This posture not only helps in effectively targeting the intended muscle groups but also protects the spine and lower back from strain. Additionally, keeping a slight bend in your knees throughout the exercise can help in maintaining this proper form. Another key aspect to consider when performing the dumbbell upright row is the range of motion. While it's important to lift the weights to a point where your muscles are effectively engaged, exceeding your comfortable range of motion, especially in the shoulder joint, can lead to injuries. Listening to your body and understanding your limits is crucial in executing this exercise safely. Breathing technique also plays a significant role in the effectiveness of the dumbbell upright row. Inhaling as you lower the weights and exhaling as you lift not only helps in maintaining a rhythm but also ensures that your muscles are receiving adequate oxygenation during the workout. Proper breathing can also aid in stabilizing your core throughout the exercise, providing additional support to your upper body. To maximize the benefits of the dumbbell upright row and minimize the risk of injury, it's advisable to incorporate it into your workout routine in moderation. Given the exercise's intensity and the stress it places on the shoulder joints, it should be performed no more than twice a week, allowing ample recovery time for the muscles involved. Variations of the dumbbell upright row can also be introduced to target the muscles differently or to adapt the exercise to your fitness level. For instance, altering the grip width can change the focus of the muscle engagement, and performing the exercise with a single arm at a time can help in identifying and correcting muscular imbalances. In conclusion, the dumbbell upright row is a highly effective exercise for strengthening and sculpting the upper body. By following the detailed steps outlined above and paying close attention to form, technique, and safety precautions, you can safely incorporate this powerful movement into your fitness regimen. Whether you're looking to build muscle, enhance your physique, or simply improve your upper body strength, the dumbbell upright row can be a valuable addition to your workout routine, offering significant benefits when performed correctly. Variations for Dumbbell Upright Row The dumbbell upright row is a versatile exercise that targets the shoulders, traps, and upper back, making it a staple in many strength training routines. While the traditional dumbbell upright row is highly effective, incorporating variations can help to target the muscles differently, prevent boredom, and address specific training goals. This exploration will delve into several variations of the dumbbell upright row, each designed to enhance your workout and stimulate muscle growth and strength from various angles. One popular variation is the Wide-Grip Dumbbell Upright Row . By simply adjusting the width of your grip on the dumbbells, you can shift the focus more towards the lateral deltoids. A wider grip decreases the involvement of the trapezius and biceps, placing more emphasis on the shoulders. This variation is particularly beneficial for those looking to improve shoulder width and definition. Another effective variation is the Single-Arm Dumbbell Upright Row . Performing the upright row with one arm at a time allows for a greater range of motion, which can lead to increased muscle activation. Additionally, single-arm variations help to identify and correct muscular imbalances between the left and right sides of the body. This unilateral approach ensures that each shoulder is worked independently, fostering balanced strength and muscle development. The High Pull Dumbbell Upright Row introduces an element of power and speed into the movement. By pulling the dumbbells higher and faster, engaging in a slight jump or shrug at the top of the movement, you incorporate more explosive power, which can be beneficial for athletic performance. This variation not only targets the deltoids and traps but also engages the lower body, making it a more dynamic and full-body exercise. For those looking to increase core engagement, the Rotational Dumbbell Upright Row adds a twist to the traditional movement. As you lift the dumbbells, rotate your torso slightly to one side, then alternate sides with each rep. This rotational movement engages the obliques and other core muscles, in addition to the shoulders and upper back, enhancing core strength and stability. The Alternating Dumbbell Upright Row is a variation that focuses on alternating arms during the lift. This method increases the time under tension for each arm, intensifying the workout and improving muscular endurance. The alternating aspect also adds a coordination challenge, engaging the core and stabilizing muscles to maintain balance and form throughout the exercise. To focus more on the trapezius muscles, the Shrug Dumbbell Upright Row variation incorporates a shrug at the top of the rowing motion. After lifting the dumbbells towards your chin, elevate your shoulders in a shrug, holding the contraction for a moment before lowering the weights. This addition effectively targets the upper traps, enhancing the development of this key muscle group. Lastly, incorporating the Neutral Grip Dumbbell Upright Row can help reduce strain on the wrist and shoulder joints. By holding the dumbbells with palms facing each other (a neutral grip), there's less rotation required from the shoulder joint, making it a more joint-friendly option for those with shoulder issues. Incorporating these variations of the dumbbell upright row into your workout routine can provide comprehensive shoulder and upper body development, prevent training plateaus, and cater to individual fitness levels and goals. By understanding and applying these variations, you can keep your workouts fresh, challenging, and effective, ensuring continued progress and injury prevention. Incorporating into Your Routine: Make the most of the Dumbbell Upright Row by seamlessly integrating it into your workout routine. Tailor your approach based on your fitness level, gradually progressing to enhance strength and achieve optimal results: For Beginners: Repetition Range: Start with 3 sets of 10-12 repetitions. Moderate Weight: Choose a weight that allows you to maintain proper form throughout the entire set. Focus on Form: Emphasize correct form over lifting heavier weights initially to establish a strong foundation. Progression Over Time: Gradual Increase: As your strength and endurance improve, consider progressing to higher sets or repetitions. Weight Adjustment: Gradually increase the weight to continue challenging your muscles while maintaining controlled movements. Listen to Your Body: Pay attention to how your body responds and adjust your routine accordingly. Comprehensive Upper Body Workouts: Incorporate into Routines: Include the Dumbbell Upright Row as a staple in your upper body workouts. Supersets or Circuits: Pair it with other shoulder exercises or complementary movements to create supersets or circuit routines. Variety is Key: Introduce variations in grip, equipment, or the incorporation of other exercises to keep your routine diverse and engaging. By recommending an initial set and repetition range for beginners and emphasizing gradual progression, this approach ensures a balanced and effective integration of the Dumbbell Upright Row into your fitness routine. Tailor the specifics to your individual goals, and always prioritize proper form and consistency for long-term success in your upper body development journey. Conclusion: As we conclude our exploration of the Dumbbell Upright Row, let's recap the essential points that contribute to mastering this impactful exercise. Throughout this guide, we've emphasized the importance of proper form, muscle engagement, and variations to ensure a well-rounded approach to shoulder development. By understanding the anatomy involved, focusing on controlled movements, and exploring diverse grips and techniques, you're poised to extract the maximum benefit from the Dumbbell Upright Row. Now, as you embark on your fitness journey or refine your existing routine, we strongly encourage you to implement the Dumbbell Upright Row into your shoulder training regimen. This exercise isn't merely a singular movement but a gateway to well-rounded development, targeting the deltoids, traps, and upper back with precision. The versatility of the Dumbbell Upright Row shines through in its ability to adapt to various grips, single-arm variations, and integration into supersets or circuits. This adaptability not only keeps your workouts engaging but also adds a layer of challenge, contributing to sculpting a strong, defined upper body. In essence, the Dumbbell Upright Row is more than an exercise; it's a dynamic tool in your fitness arsenal. It's an invitation to explore the intricacies of your shoulder musculature, a call to refine your form, and a pathway to a sculpted, well-defined physique. So, seize the opportunity, embrace the challenge, and witness the transformation as you master the Dumbbell Upright Row on your journey to a stronger, more defined upper body. See More: ⤵ Mastering the Dumbbell Upright Row: A Comprehensive Guide Back and Shoulder Workout Routine Dumbbell Front Raise: Mastering the Art of Shoulder Training Barbell Overhead Shrugs: Maximize Your Shoulder Strength Front Raises: Your Comprehensive Guide Bent-Over Raises: Your Ultimate Guide Face Pulls: The Complete Guide Overhead Press: A Comprehensive Guide Delts Workout: Sculpting Strong and Shapely Shoulders Shoulder Workouts:The Ultimate Guide Lateral Raises: Elevate Your Shoulder Game with This Killer Move Shoulder Press: Your Ultimate Guide to Strong Shoulders Push Press: Complete Guide
- Front Raises: Form, Muscles Worked, Benefits & Safer Alternatives
Front Raises - those two words hold the potential to elevate your shoulder game and redefine your upper body strength. In this comprehensive guide, we delve deep into the world of Front Raises, an exercise that can become your secret weapon in achieving perfectly sculpted front deltoid muscles. Whether you're a fitness enthusiast looking to enhance your shoulder aesthetics or an athlete aiming for increased shoulder strength, mastering the art of Front Raises is your key to unlocking a powerful upper body. Front Raises aren't just another exercise; they are a pathway to achieving well-defined front shoulder muscles that command attention. In the pages that follow, we'll explore the nuances of this exercise, dissecting its form, discovering its benefits, and unveiling variations that cater to different fitness levels. So, if you're ready to strengthen your front shoulders, enhance your overall upper body strength, and embark on a journey of mastering Front Raises, let's begin. What Are Front Raises? Front Raises are a fundamental exercise in the world of shoulder workouts. They form the cornerstone of a well-rounded shoulder routine, specifically focusing on the front deltoid muscles. At its core, a Front Raise is a shoulder-targeted exercise that involves the controlled lifting of weights in front of you. This controlled movement primarily engages the front deltoid muscles, a key component in achieving balanced shoulder strength and aesthetics. Front Raises are incredibly versatile and can be performed using various tools, such as dumbbells or other weighted objects , making them accessible to fitness enthusiasts of all levels. T he versatility of this exercise allows for progressive resistance, helping you tailor your workouts to your specific goals and fitness level. Whether you're looking to build muscle, increase strength, or enhance shoulder stability, Front Raises can be adapted to fit your needs. Benefits of Front Raises: Front Raises offer a multitude of advantages that can significantly impact your shoulder health and overall fitness routine: Improved Front Shoulder Strength and Definition: By primarily targeting the front deltoid muscles, Front Raises lead to notable improvements in front shoulder strength. This exercise contributes to enhanced definition in the front shoulder area, giving your upper body a well-balanced and sculpted appearance. Enhanced Shoulder Aesthetics for a Well-Rounded Appearance: Incorporating Front Raises into your workout regimen helps create a harmonious and well-rounded shoulder aesthetic. Well-developed front deltoids complement the overall appearance of your shoulders, contributing to a more proportionate upper body. Injury Prevention by Strengthening the Front Deltoids: The front deltoid muscles play a crucial role in shoulder stability. Strengthening these muscles through Front Raises can help prevent injuries and imbalances within the shoulder joint, ensuring that you can pursue your fitness goals safely. Versatility in Shoulder Workouts: Front Raises are not limited to a single technique or tool. They can be adapted to suit various fitness levels and goals. Whether you're looking to add muscle mass, increase strength, or enhance your overall shoulder stability, Front Raises offer versatility in your shoulder workouts. Incorporating Front Raises into your fitness routine isn't just about achieving a more impressive front shoulder appearance; it's about bolstering your shoulder strength, preventing injuries, and embracing the versatility of this exercise for a well-rounded upper body. Proper Form and Technique: Achieving the full benefits of Front Raises hinges on executing this exercise with impeccable form and technique. Here's a comprehensive breakdown of the correct form and execution: Correct Stance: Begin with a stance that ensures stability. Stand with your feet shoulder-width apart to provide a solid base. Keep your knees slightly bent , which not only enhances your stability but also helps alleviate unnecessary strain on your lower back. Starting Position: Commence the exercise with your arms fully extended and weights in hand. Hold the weights with your arms hanging down in front of your thighs. Your palms should be facing your body. Lifting Motion: Initiate the movement by engaging your front deltoid muscles . Visualize lifting the weights with the power of your shoulders. Raise the weights forward and upward in a controlled manner. Aim to bring them to shoulder level, all while keeping a slight bend in your elbows . This slight bend ensures that the stress remains on the front deltoids. Maintain a steady and controlled pace throughout the exercise, ensuring that you feel a clear contraction in the front deltoid muscles at the top of the movement. Controlled Movements and Proper Breathing: Exhale as you exert force to lift the weights, primarily during the lifting phase. Inhale as you lower the weights back to the starting position, controlling the descent. Keep a consistent rhythm and avoid any sudden jerking or swinging motions. Caution Against Using Excessive Weight or Swinging: Avoid the temptation to use weights that are too heavy, as this can lead to compromised form and potential injury. Refrain from swinging your body to lift the weights. This not only reduces the effectiveness of the exercise but also increases the risk of strain on your lower back. By adhering to these guidelines for proper form and technique, you'll ensure that Front Raises are a safe and effective addition to your shoulder workout routine. Variations and Progressions: Front Raises offer a wealth of versatility, allowing you to tailor your workouts to your specific goals and fitness level. Here are some variations and progressions of Front Raises to consider: Alternating Front Raises (One Arm at a Time): Description: Instead of lifting both weights simultaneously, alternate between your left and right arms. This variation adds an element of balance and control to your workout. Benefits: Enhances stability and control, helps address muscle imbalances, and provides a different challenge to your front deltoids. Cable Front Raises for Constant Tension: Description: Perform Front Raises using a cable machine and a straight or rope attachment. This variation ensures constant tension throughout the exercise. Benefits: Engages the front deltoids with consistent resistance, helping with muscle endurance and definition. Seated Front Raises (Variation for Isolation): Description: Perform Front Raises while seated on a bench with back support. This isolates the front deltoids more effectively by eliminating any body movement. Benefits: Strict isolation of the front deltoids, enabling a deeper focus on muscle engagement and development. Increasing Weight and Repetitions as You Progress: Description: As you become more comfortable with Front Raises, gradually increase the weight you lift and the number of repetitions in your sets. This progressive overload helps promote muscle growth and strength. Each of these variations introduces a unique challenge to your Front Raises routine, making it an exciting and dynamic exercise to incorporate into your shoulder workouts. Remember to start with proper form and a weight that suits your current fitness level, gradually advancing as your strength and technique improve. Workout Routine: Warm-up: Begin with 5-10 minutes of light cardiovascular activity, such as jogging, cycling, or jumping jacks, to increase blood flow and prepare your body for exercise. Perform dynamic shoulder stretches to enhance flexibility and range of motion in the shoulder joints. Gradually increase the weight you plan to use for Front Raises during your warm-up sets. Workout: Front Raises (Dumbbell Version): Sets: 3 sets Repetitions: 10-12 repetitions per set Rest between sets: 60-90 seconds Execution: Follow proper form and technique for Front Raises, ensuring that you maintain controlled movements and proper breathing. Alternating Front Raises (One Arm at a Time): Sets: 2 sets Repetitions: 12-15 repetitions per set (per arm) Rest between sets: 60 seconds Execution: Alternate between your left and right arms, lifting one arm at a time while maintaining proper form and control. Cooldown: Perform static stretches for the shoulders, chest, and neck to improve flexibility and prevent muscle tightness. Spend 5-10 minutes performing light static stretching exercises for the entire body. Stay hydrated and refuel with a post-workout snack or meal to aid in recovery. Notes: Start with a weight that allows you to complete the recommended repetitions with proper form. Gradually increase the weight as you progress to continue challenging your muscles. Maintain a neutral spine and avoid overextension of the back during the exercise. Consult with a fitness professional or trainer if you are new to strength training to ensure you are using correct form. This sample workout routine provides a structured approach to incorporating Front Raises into your shoulder training. It targets the front deltoids effectively while allowing for variation and progression as you advance in your fitness journey. Conclusion: In concluding our comprehensive guide to Front Raises, it's vital to emphasize the key takeaways that will empower you on your journey to stronger, sculpted front shoulders. Key Takeaways: Form is Your Foundation: Proper form isn't just a suggestion; it's the bedrock of effective Front Raises. Ensuring impeccable form is paramount for maximizing results and minimizing the risk of injury. Safety is Non-Negotiable: Safety precautions should never be overlooked. Whether you're new to strength training or an experienced lifter, always prioritize proper warm-up, controlled movements, and attentive breathing during your Front Raises. Versatility is Your Ally: Front Raises aren't a one-size-fits-all exercise. They offer a wealth of versatility, allowing you to tailor your workouts to your specific goals and fitness level. Your Call to Action: The journey to stronger, more sculpted front shoulders begins with action. Incorporate Front Raises into your fitness routine, and experience the transformation firsthand. Begin with a weight that's comfortable for your current fitness level, and gradually progress as you grow stronger. We're here to support you on your fitness journey. Share your progress, questions, or experiences with Front Raises in the comments section below. Let's inspire and motivate each other to reach our fitness goals. Remember, with proper form, safety precautions, and dedication, Front Raises can be your secret weapon in achieving the front shoulders you've always desired. See More: ⤵ Mastering the Dumbbell Upright Row: A Comprehensive Guide Back and Shoulder Workout Routine Dumbbell Front Raise: Mastering the Art of Shoulder Training Barbell Overhead Shrugs: Maximize Your Shoulder Strength Front Raises: Your Comprehensive Guide Bent-Over Raises: Your Ultimate Guide Face Pulls: The Complete Guide Overhead Press: A Comprehensive Guide Delts Workout: Sculpting Strong and Shapely Shoulders Shoulder Workouts:The Ultimate Guide Lateral Raises: Elevate Your Shoulder Game with This Killer Move Shoulder Press: Your Ultimate Guide to Strong Shoulders Push Press: Complete Guide
- Bent‑Over Lateral Raise: Rear Delt Form, Benefits, Variations & Mistakes
Bent-Over Raises. These two words hold the key to unlocking a realm of shoulder strength and sculpting that can redefine your upper body. In this comprehensive guide, we're diving headfirst into the world of Bent-Over Raises, an exercise that can elevate your shoulder game to new heights. Whether you're a fitness enthusiast seeking to enhance your shoulder aesthetics or an athlete aiming to boost your overall strength, mastering the art of Bent-Over Raises is your ticket to a sculpted, powerful upper body. Bent-Over Raises, often regarded as a hidden gem in shoulder workouts, may not be as popular as some other exercises, but they pack a punch when it comes to targeting and strengthening the rear deltoid muscles. In the following pages, we'll explore the nuances of this exercise, dissecting its form, delving into its benefits, and unveiling variations that cater to different fitness levels. So, if you're ready to sculpt your shoulders, strengthen your rear deltoids, and gain an edge in your fitness journey, let's embark on a journey of mastering Bent-Over Raises. I. What Are Bent-Over Raises? Bent-Over Raises are a vital exercise in the realm of shoulder workouts. They are specifically designed to target the often-undertrained rear deltoid muscles, which are located at the back of the shoulders. What sets Bent-Over Raises apart is the forward bend at the waist that defines this exercise. To perform it, you'll lean forward with your back kept flat and lift a pair of dumbbells or other weighted objects. This unique posture places substantial emphasis on the rear deltoids, making it an essential addition to any shoulder-focused workout routine. Bent-Over Raises offer a distinct challenge that helps strengthen, tone, and define the rear deltoids. This exercise is particularly valuable for those seeking a balanced and well-sculpted shoulder appearance while enhancing overall shoulder stability. Whether you're a beginner or an experienced athlete, Bent-Over Raises can be adapted to your fitness level, providing a versatile and effective way to train your shoulders. II. Benefits of Bent-Over Raises: Bent-Over Raises are a dynamic exercise that offers a host of benefits, making them a valuable addition to your fitness routine: Improved Shoulder Strength and Stability: Bent-Over Raises specifically target the rear deltoid muscles, which play a crucial role in shoulder stability. Strengthening these muscles helps reduce the risk of shoulder injuries and enhances overall shoulder strength. Enhanced Shoulder Aesthetics and Definition: Incorporating Bent-Over Raises into your workout regimen contributes to a well-rounded shoulder appearance. It helps sculpt the rear deltoids, leading to improved shoulder aesthetics and definition, especially from the back. Injury Prevention by Strengthening the Rear Deltoids: The rear deltoids are often overlooked in shoulder training. However, they play a vital role in maintaining shoulder health. Strengthening these muscles through Bent-Over Raises can help prevent injuries and imbalances in the shoulder joint. Versatility in Shoulder Workouts: Bent-Over Raises can be adapted to suit various fitness levels and goals. Whether you're aiming to build muscle, increase strength, or enhance shoulder stability, this exercise provides versatility in your shoulder workouts. Incorporating Bent-Over Raises into your routine not only contributes to stronger and more defined shoulders but also bolsters shoulder stability and injury prevention, making it a valuable asset in your fitness journey. III. Proper Form and Technique: Executing Bent-Over Raises with precise form is essential for maximizing their benefits and minimizing the risk of injury. Here's a detailed breakdown of the proper form and technique: Correct Stance: Stand with your feet shoulder-width apart to provide a stable base. Keep your knees slightly bent to relieve any unnecessary strain on your lower back and maintain balance. Starting Position: Begin in a standing position with your back straight and chest up. Bend forward at the waist while maintaining the natural arch in your lower back. Keep your back flat, and avoid rounding or hunching. Hold a pair of dumbbells or weighted objects in each hand with your arms fully extended toward the floor. Your palms should be facing your body. Lifting Motion: Initiate the movement by engaging your rear deltoid muscles . Imagine squeezing your shoulder blades together. Raise the weights outward and upward in a controlled manner. Your arms should follow a slightly arched path. Maintain a slight bend in your elbows throughout the motion. Avoid locking your elbows. Continue lifting until your arms are parallel to the ground or slightly above, ensuring that you feel a contraction in your rear deltoids. Controlled Movements and Proper Breathing: Exhale as you exert force to lift the weights. Inhale as you lower the weights back to the starting position. Maintain a steady and controlled pace throughout the exercise. Caution Against Using Excessive Weight or Swinging: Avoid using weights that are too heavy, as this can lead to compromised form and potential injury. Refrain from swinging your body to lift the weights. This reduces the effectiveness of the exercise and increases the risk of strain on your lower back. By following these guidelines for proper form and technique, you'll optimize the effectiveness of Bent-Over Raises, ensure safety during your workouts, and achieve the desired results for your rear deltoids and overall shoulder strength. VI. Workout Routine: Warm-up: Begin with 5-10 minutes of light cardiovascular activity, such as jogging, jumping jacks, or brisk walking, to increase blood flow and prepare your muscles for exercise. Perform dynamic shoulder stretches to improve flexibility and range of motion. Gradually increase the weight for Bent-Over Raises during your warm-up sets. Workout: Bent-Over Raises (Dumbbell Version): Sets: 3 sets Repetitions: 10-12 repetitions per set Rest between sets: 60-90 seconds Execution: Follow proper form and technique as described earlier. Focus on controlled movements and maintaining proper posture. Seated Bent-Over Raises (Variation for Isolation): Sets: 2 sets Repetitions: 12-15 repetitions per set Rest between sets: 60 seconds Execution: Sit on a bench or chair, maintaining the same forward bend at the waist as in the standing version. This isolates the rear deltoids more effectively. Cooldown: Perform static stretches for the shoulders, back, and neck to enhance flexibility and prevent muscle tightness. Spend 5-10 minutes performing light static stretching exercises for the entire body. Hydrate and refuel with a post-workout snack or meal to aid in recovery. Notes: Start with a weight that allows you to complete the recommended repetitions with proper form. Gradually increase the weight as you progress to continue challenging your muscles. Ensure that you maintain proper posture and controlled movements throughout the workout. Consult with a fitness professional or trainer if you are new to strength training to ensure you are using correct form. This sample workout routine provides a structured approach to incorporating Bent-Over Raises into your shoulder training. It targets the rear deltoids effectively while allowing for variation and progression as you advance in your fitness journey. Conclusion: In wrapping up our exploration of Bent-Over Raises, it's evident that this exercise holds the power to reshape your shoulder strength, stability, and aesthetics. Here are the key takeaways that will guide you in your journey to mastering this versatile exercise: Key Takeaways: Form is Your Foundation: Proper form is not just a recommendation; it's the cornerstone of effective Bent-Over Raises. Maintaining impeccable form ensures that you maximize results and minimize the risk of injury. Safety is Paramount: Always prioritize safety precautions. Whether you're a beginner or an experienced lifter, never compromise on proper warm-up, controlled movements, and attentive breathing during your Bent-Over Raises. Versatility Unleashed: Bent-Over Raises offer a wealth of variation and adaptability, catering to different fitness levels and goals. This exercise isn't just for bodybuilders; it's a tool for anyone seeking stronger, sculpted shoulders. Your Call to Action: The path to stronger, more sculpted shoulders begins with action. Incorporate Bent-Over Raises into your fitness routine and experience the transformation firsthand. Start with a weight that's comfortable for your current fitness level and gradually progress as you grow stronger. We're here to support you on your fitness journey. Share your progress, questions, or experiences with Bent-Over Raises in the comments section below. Let's inspire and motivate each other to reach our fitness goals. Remember, with proper form, safety precautions, and dedication, you have the potential to unlock the true power of Bent-Over Raises and achieve the shoulders you've always desired. See More: ⤵ Mastering the Dumbbell Upright Row: A Comprehensive Guide Back and Shoulder Workout Routine Dumbbell Front Raise: Mastering the Art of Shoulder Training Barbell Overhead Shrugs: Maximize Your Shoulder Strength Front Raises: Your Comprehensive Guide Bent-Over Raises: Your Ultimate Guide Face Pulls: The Complete Guide Overhead Press: A Comprehensive Guide Delts Workout: Sculpting Strong and Shapely Shoulders Shoulder Workouts:The Ultimate Guide Lateral Raises: Elevate Your Shoulder Game with This Killer Move Shoulder Press: Your Ultimate Guide to Strong Shoulders Push Press: Complete Guide
- Overhead Press: Technique, Muscles Worked, Benefits & Programming
In this comprehensive guide, we will delve deep into the Overhead Press, exploring its various facets, benefits, proper form, and techniques to help you unlock its full potential. Whether you're looking to build a robust set of shoulders, enhance your posture, or improve overall upper body strength, the Overhead Press is a key that can open many doors to your fitness goals. So, let's dive in and uncover the secrets of this empowering exercise. When it comes to sculpting a strong and balanced upper body, few exercises hold as much potential as the Overhead Press. This fundamental compound movement is a cornerstone of strength training, targeting the shoulders, triceps, and upper chest. Whether you're a seasoned lifter or just beginning your fitness journey, mastering the Overhead Press can lead to substantial gains in both strength and functional fitness. Understanding the Overhead Press: The Overhead Press, often referred to as the OHP or Military Press, is a quintessential compound exercise that forms the backbone of upper body strength training. In its purest form, it involves lifting a weighted barbell or dumbbells from shoulder height to overhead, fully extending the arms. This motion engages a multitude of muscle groups and stabilizers, making it an invaluable addition to any workout routine. Variations of the Overhead Press: The beauty of the Overhead Press lies in its adaptability. It comes in various forms to cater to individual preferences and fitness levels: Barbell Overhead Press: This classic version involves lifting a barbell with both hands, targeting the shoulders, triceps, and upper chest. Dumbbell Overhead Press: Using dumbbells allows for a greater range of motion and works on stabilizing muscles. Seated Overhead Press: Performed while seated on a bench or chair, this variation minimizes lower body involvement and isolates the upper body muscles. Push Press: Incorporating leg drive, the Push Press enables you to lift heavier weights and is a favorite among athletes. Muscle Targets of the Overhead Press: The Overhead Press predominantly focuses on three primary muscle groups: Shoulders (Deltoids): The deltoid muscles are the stars of the show during the Overhead Press. This exercise helps develop all three heads of the deltoids, creating well-rounded, robust shoulders. Triceps: The triceps brachii, located at the back of the upper arm, play a significant role in extending the elbow during the lifting phase, making them a secondary but crucial target. Upper Chest (Clavicular Pectoralis): While the primary function of the chest is to push the arms forward, the upper chest (clavicular pectoralis) is engaged as you raise the weight, contributing to a more balanced upper body development. The Overhead Press is not only a strength-building powerhouse but also a fundamental exercise for enhancing shoulder stability and overall upper body function. As we delve deeper into this exercise, we'll uncover the intricacies of its proper execution and the myriad benefits it has to offer. Benefits of the Overhead Press: Incorporating the Overhead Press into your workout routine offers a plethora of advantages that extend far beyond just building muscle. This dynamic exercise plays a pivotal role in enhancing your overall fitness journey, contributing to both physical strength and functional well-being. Let's delve into the numerous benefits that make the Overhead Press a must-have in your training repertoire: 1. Shoulder Strength and Stability: Shoulder Powerhouse: The Overhead Press is unparalleled in its ability to sculpt strong and robust shoulders. It targets the deltoid muscles comprehensively, promoting balanced growth across all three heads. As a result, you not only achieve a sculpted appearance but also a shoulder girdle capable of handling everyday tasks and athletic challenges. Shoulder Stability: Beyond aesthetics, this exercise enhances shoulder stability by engaging the muscles responsible for supporting and controlling shoulder movement. This is particularly beneficial for injury prevention and improving joint health. 2. Improved Posture: Upper Body Balance: The Overhead Press engages the upper chest muscles, contributing to a more balanced upper body appearance. This balanced development aids in maintaining proper posture, countering the slouched shoulders that often result from prolonged sitting or desk work. Core Activation: To stabilize the torso during the Overhead Press, your core muscles must engage, promoting a strong and well-supported spine. This core activation plays a crucial role in maintaining an upright posture in daily life. 3. Functional Fitness: Enhanced Daily Activities: The strength gained from the Overhead Press translates into everyday life. Lifting heavy objects, reaching for items on high shelves, or even pushing open heavy doors becomes more manageable with improved shoulder and upper body strength. Athletic Performance: Athletes across various sports, from basketball to weightlifting, benefit from the functional strength and power developed through the Overhead Press. This exercise aids in improving performance in sports that involve overhead movements, throwing, or catching. 4. Mental Resilience: Mental Toughness: The Overhead Press requires focus, determination, and mental fortitude, especially when lifting heavier weights. It challenges your mental resilience and reinforces the idea that progress is often achieved through perseverance and dedication. Incorporating the Overhead Press into your fitness routine not only shapes your physique but also elevates your physical capabilities and overall well-being. As we explore the intricacies of proper form and technique, you'll discover how to harness these benefits effectively, making the Overhead Press a cornerstone of your fitness journey. Proper Form and Technique: Mastering the Overhead Press not only maximizes its benefits but also minimizes the risk of injury. Proper form and technique are paramount to ensure a safe and effective lift. Let's delve into the key elements of executing the Overhead Press with precision: 1. Posture and Grip: Standing Tall: Begin with your feet shoulder-width apart, ensuring a stable base. Stand tall, with your chest up and shoulders back. Maintaining an erect posture minimizes the risk of lower back strain. Grip Placement: For a barbell Overhead Press, grip the bar slightly wider than shoulder-width apart. Your wrists should be in line with your elbows, forming a straight line. 2. Lifting Sequence: The Setup: Set the barbell or dumbbells on a rack at about shoulder height. Position yourself underneath the bar or pick up the dumbbells from the floor with a clean, controlled motion. Initiating the Lift: With the bar or dumbbells at shoulder level, press the weight upward by extending your arms fully. Your head should move slightly backward as the weight rises. 3. Controlled Motion: Engaging the Core: Keep your core engaged throughout the movement. This not only provides stability but also protects your spine. Imagine bracing your midsection as if you were preparing to be lightly punched. Breathing Technique: Inhale deeply before starting the lift. Hold your breath as you press the weight overhead, exhaling only when the weight is safely overhead. This breath control aids in maintaining a stable core and supporting the lift. 4. The Lockout: Fully Extend: At the top of the lift, ensure your arms are fully extended, locking out your elbows without hyperextending them. Your head should move forward slightly, allowing the bar to clear your face. Controlled Descent: Lower the weight back down in a controlled manner, bringing it to shoulder level. Avoid rapid or jerky movements, which can strain your muscles or joints. 5. Avoiding Common Mistakes: Arching the Back: Maintain a neutral spine and avoid excessive arching of your lower back, which can lead to injury. Using Momentum: Rely on your shoulder and triceps strength rather than using momentum from your legs or back. Neglecting Core Engagement: Ensure your core remains tight throughout the lift to protect your spine and maintain stability. 6. Variations: Be mindful that the form may vary slightly depending on the specific variation of the Overhead Press you are performing, such as barbell, dumbbell, or seated press. Adapt your technique accordingly. Practicing and perfecting the proper form and technique for the Overhead Press is a journey in itself, but it's one that promises remarkable rewards in terms of strength, muscle development, and overall fitness. As you advance in your training, remember that consistency and patience are your allies on the path to mastery. Overhead Press Variations: The beauty of the Overhead Press lies in its versatility, with various variations catering to individual preferences and training goals. Each variation offers unique benefits and targets different muscle groups, allowing you to tailor your lifting routine for maximum gains. Let's explore the most popular Overhead Press variations: 1. Barbell Overhead Press: Muscle Focus: The barbell Overhead Press is the classic version that primarily targets the deltoid muscles, specifically the front (anterior) and middle (lateral) heads. It also engages the triceps and upper chest. Benefits: This variation allows you to lift heavy weights and build overall shoulder strength and size. It's an excellent choice for those seeking to increase raw pressing power. 2. Dumbbell Overhead Press: Muscle Focus: Dumbbell Overhead Press offers a broader range of motion compared to the barbell variation. It engages the deltoids, triceps, and upper chest while also intensively working on stabilizing muscles. Benefits: By requiring greater stabilization, it helps improve shoulder stability and can address muscle imbalances between your left and right sides. The increased range of motion can also reduce the risk of shoulder impingement. 3. Seated Overhead Press: Muscle Focus: The Seated Overhead Press targets the same muscle groups as the barbell and dumbbell variations but minimizes lower body involvement. It emphasizes the deltoids and triceps while isolating the upper chest. Benefits: Seated Overhead Press is ideal for those who need or prefer to reduce lower body strain, such as individuals with lower back issues. It also encourages strict form by eliminating leg drive. 4. Push Press: Muscle Focus: The Push Press incorporates leg drive into the lift, allowing you to lift heavier weights. It engages the deltoids, triceps, upper chest, and leg muscles. Benefits: By incorporating leg power, the Push Press is an excellent choice for increasing overall strength and explosiveness. It's favored by athletes and individuals aiming to enhance their athletic performance. 5. Z Press: Muscle Focus: The Z Press is performed while seated on the floor with your legs extended. It challenges your core and engages the deltoids, triceps, and upper chest. Benefits: The Z Press places a premium on core strength and stability while targeting the same upper body muscles. It's a unique variation that can help improve your posture and overall core strength. 6. Single-Arm Dumbbell Overhead Press: Muscle Focus: This variation involves pressing a single dumbbell overhead, engaging the deltoids, triceps, and upper chest while demanding core stability. Benefits: It helps address muscle imbalances and is particularly effective for building functional strength for everyday activities that involve unilateral movements. Choosing the right Overhead Press variation depends on your fitness goals, current strength level, and personal preferences. Consider incorporating a variety of these variations into your training routine to reap the full spectrum of benefits and ensure balanced shoulder development. Incorporating Overhead Press into Your Routine: The Overhead Press is a versatile exercise that can be seamlessly integrated into your workout routine, whether your aim is to build muscle, increase strength, or improve functional fitness. To maximize the benefits of the Overhead Press, it's essential to structure your workouts intelligently, ensuring balanced upper body training and pairing the Overhead Press with complementary exercises. Here are sample workout routines to help you get started: Sample Workout Routine 1: Strength and Muscle Building Exercise 1: Barbell Overhead Press Warm-up: 2 sets of lightweight, high-repetition presses to prepare your shoulder joints. Working Sets: 4 sets of 6-8 reps with a challenging weight. Rest between sets: 2-3 minutes. Exercise 2: Pull-Ups or Lat Pulldowns 3 sets of 8-10 reps to target your lats and complement shoulder work. Rest between sets: 1-2 minutes. Exercise 3: Dumbbell Bench Press 3 sets of 8-10 reps to balance your chest and triceps development. Rest between sets: 1-2 minutes. Exercise 4: Face Pulls 3 sets of 12-15 reps to promote healthy shoulder function and target the rear deltoids. Rest between sets: 1-2 minutes. Sample Workout Routine 2: Functional Fitness and Shoulder Stability Exercise 1: Dumbbell Overhead Press Warm-up: 2 sets of lightweight, high-repetition presses. Working Sets: 3 sets of 10-12 reps with a moderate weight. Rest between sets: 1-2 minutes. Exercise 2: Renegade Rows (with dumbbells) 3 sets of 8-10 reps to challenge core stability and work on upper body coordination. Rest between sets: 1-2 minutes. Exercise 3: Plank Variations 3 sets of 30-45 seconds to further strengthen your core and enhance shoulder stability. Rest between sets: 1-2 minutes. Exercise 4: Push-Ups 3 sets of 12-15 reps to complement the Overhead Press with bodyweight chest and triceps work. Rest between sets: 1-2 minutes. Sample Workout Routine 3: Athletic Performance Enhancement Exercise 1: Push Press Warm-up: 2 sets of lightweight, high-repetition presses. Working Sets: 4 sets of 5-6 reps with a heavy weight, incorporating leg drive. Rest between sets: 2-3 minutes. Exercise 2: Kettlebell Swings 3 sets of 15-20 reps to enhance overall power and explosiveness. Rest between sets: 1-2 minutes. Exercise 3: Box Jumps or Medicine Ball Throws 3 sets of 8-10 reps to further improve lower body explosiveness. Rest between sets: 1-2 minutes. Exercise 4: Bent-Over Rows (with barbell or dumbbells) 3 sets of 8-10 reps to maintain balanced upper body development. Rest between sets: 1-2 minutes. These sample workout routines are just a starting point. Feel free to adjust the sets, reps, and exercises based on your individual goals and fitness level. The key is to prioritize balanced upper body training while leveraging the benefits of the Overhead Press to enhance your strength, posture, and overall fitness. See More: ⤵ Mastering the Dumbbell Upright Row: A Comprehensive Guide Back and Shoulder Workout Routine Dumbbell Front Raise: Mastering the Art of Shoulder Training Barbell Overhead Shrugs: Maximize Your Shoulder Strength Front Raises: Your Comprehensive Guide Bent-Over Raises: Your Ultimate Guide Face Pulls: The Complete Guide Overhead Press: A Comprehensive Guide Delts Workout: Sculpting Strong and Shapely Shoulders Shoulder Workouts:The Ultimate Guide Lateral Raises: Elevate Your Shoulder Game with This Killer Move Shoulder Press: Your Ultimate Guide to Strong Shoulders Push Press: Complete Guide Conclusion: In the world of strength training, the Overhead Press stands as a stalwart exercise, offering a myriad of benefits for those seeking to sculpt a powerful upper body and foster functional strength. As we conclude this exploration of the Overhead Press, let's recap the key takeaways and why you should make it a cornerstone of your fitness routine: 1. Strong Shoulders and Beyond: The Overhead Press hones in on the deltoid muscles, transforming your shoulders into pillars of strength and stability. Beyond aesthetics, this leads to better shoulder function and reduced risk of injury. 2. Improved Posture: By fostering balanced upper body development, the Overhead Press promotes good posture, countering the effects of prolonged sitting and screen time. A strong upper body supports an upright, confident stance. 3. Functional Fitness: Elevate your daily life and athletic performance with the functional strength gained from the Overhead Press. Lifting, reaching, and performing athletic movements become easier and more efficient. 4. Mental Fortitude: The Overhead Press requires focus, determination, and mental resilience. It teaches us that progress is a product of perseverance and dedication, both in fitness and life. So, whether you're aiming for shoulder strength, posture perfection, or overall upper body might, the Overhead Press is your trusted companion. As you embark on this journey, remember that consistency is your ally, and progress will be your reward. Start incorporating the Overhead Press into your fitness routine, and witness the transformation in your shoulders, strength, and overall well-being. Your fitness odyssey awaits – embrace it with open arms and lifted weights.
- Shoulder Workouts: The Ultimate Guide to Exercises, Programming & Recovery
Are you ready to elevate your fitness game and rock those sleeveless shirts with confidence? Look no further, because in this guide, we're diving headfirst into the world of shoulder workouts. Whether you're aiming for sculpted shoulders that turn heads or simply looking to strengthen your upper body, these exercises have got you covered. Get ready to sweat, push your limits, and unleash the power of your shoulders like never before. When it comes to achieving a well-rounded physique , focusing on your shoulders is a game-changer. Not only do strong shoulders enhance your overall upper body strength, but they also contribute to improved posture and a balanced appearance. Think about it: from lifting grocery bags to hoisting yourself up during various activities, your shoulders play a vital role. And let's not forget the aesthetic appeal – those rounded deltoids can make any outfit look more impressive. In this guide , we'll walk you through a range of shoulder exercises that target different parts of this essential muscle group. From classic moves to advanced variations, you'll have a toolkit of exercises to choose from. Whether you're a beginner starting your fitness journey or a seasoned gym-goer looking to amp up your routine, these shoulder workouts are designed to help you achieve your goals. So, let's dive in and discover the secrets to building strong and defined shoulders that will make you feel unstoppable. Shoulders 101: Understanding the Basics Your shoulders are the unsung heroes of your upper body, providing both functional support and aesthetic appeal. Let's delve into the basics of shoulder anatomy and discover why these muscles deserve their moment in the spotlight. Anatomy of Shoulder Muscles: Your shoulders consist of three main muscles known as the deltoids – anterior (front), medial (side), and posterior (rear). These muscles work together to allow a wide range of motions, including lifting, pushing, and rotating your arms. The deltoids are complemented by the trapezius and the rotator cuff muscles, which aid in shoulder stability and movement. Functional and Aesthetic Importance: The shoulders play a crucial role in your daily activities, from reaching for objects on high shelves to performing various sports movements. Aesthetically, well-developed shoulders can give your upper body a balanced and powerful appearance. Whether you're looking to rock a tank top with confidence or enhance your overall strength, prioritizing shoulder workouts is a must. In this section , we'll break down the fundamentals of shoulder anatomy, helping you understand how these muscles work together to support both functional and aesthetic goals. Let's dive in and lay the foundation for effective shoulder workouts that will have you reaping the benefits in no time. Overhead Press: The Shoulder Powerhouse When it comes to sculpting strong and defined shoulders, the overhead press takes the crown as one of the most effective exercises in your arsenal. This compound movement targets multiple shoulder muscles and delivers exceptional results. Let's delve into the power of the overhead press and explore its variations to help you achieve those coveted shoulder gains. Effectiveness of Overhead Press: The overhead press, also known as the shoulder press, engages your entire shoulder complex, including the anterior, medial, and even the posterior deltoids. Additionally, it activates stabilizing muscles in your core and upper back, making it a functional and strength-building exercise. Variations for Every Preference: Whether you're a gym enthusiast or prefer working out at home, the overhead press has versatile variations to suit your needs. The barbell overhead press and dumbbell shoulder press are popular choices. The barbell version allows for heavy lifting, while the dumbbell alternative offers better muscle isolation and balance. In this section , we're diving deep into the magic of the overhead press. We'll discuss its effectiveness in targeting your shoulder muscles and guide you through variations that cater to different preferences and fitness levels. Get ready to harness the power of the overhead press and take your shoulder development to new heights. Section 3: Lateral Raises: Sculpting Those Delts When it comes to achieving well-rounded and sculpted shoulders, focusing on each deltoid muscle is essential. The lateral raises exercise shines as a go-to movement for targeting the lateral deltoids, giving your shoulders that broad and defined look. In this section, we're diving into the world of lateral raises, exploring their benefits, proper form, and variations to help you sculpt those impressive deltoid muscles. Lateral raises primarily target the lateral deltoid muscles, which are responsible for that sought-after width and definition in your shoulder profile. Strengthening these muscles not only enhances your appearance but also contributes to overall shoulder strength and functionality. To get the most out of lateral raises, it's crucial to maintain proper form. Engage your core, keep a slight bend in your elbows, and lift the weights out to the sides while maintaining a controlled motion. Remember, quality reps trump quantity, so focus on executing each rep with precision. To prevent plateaus and keep your shoulder workouts exciting, consider variations like cable lateral raises. The cable provides constant tension throughout the movement, offering a unique challenge to your deltoids. Exploring different variations ensures that you target your muscles from various angles for balanced development. In this section, we're diving into the details of lateral raises. From explaining their benefits to guiding you through proper form and variations, we're here to help you master this essential exercise for sculpting your deltoid muscles. Get ready to elevate your shoulder game and achieve those impressive lateral deltoid gains. YOU MUST SEE: Delts Workout: Sculpting Strong and Shapely Shoulders Shoulder Workouts:The Ultimate Guide Lateral Raises: Elevate Your Shoulder Game with This Killer Move Shoulder Press: Your Ultimate Guide to Strong Shoulders Front Raises: Nailing Front Delt Activation When it comes to achieving a well-balanced shoulder profile, focusing on the front deltoids is crucial. These muscles play a significant role in various upper body movements and contribute to the overall aesthetics of your shoulders. In this section, we're diving into front raises, a targeted exercise that helps you nail front deltoid activation and achieve a harmonious shoulder look. The front deltoids, also known as anterior deltoids, are located at the front of your shoulders. They are responsible for lifting your arms forward and are actively engaged in exercises like pressing movements and front raises. Strengthening these muscles not only enhances your shoulder aesthetics but also supports functional upper body movements. To effectively activate and work the front deltoids, it's essential to maintain proper form during front raises. Keep a slight bend in your elbows, engage your core, and lift the weights straight in front of you. Avoid swinging or using momentum to lift the weights, as this can compromise the effectiveness of the exercise. As you become more comfortable with front raises, consider adding variations to your routine. For instance, performing front raises with a plate or using a cable machine can introduce new challenges and angles, promoting well-rounded front deltoid development. In this section, we're delving into the specifics of front raises. From explaining the significance of front deltoids to providing tips on executing the exercise with precision, we're here to help you maximize the benefits of this movement. Get ready to give your front deltoids the attention they deserve and achieve a balanced and sculpted shoulder appearance. Bent-Over Raises: Building Strong Rear Delt s While front and lateral deltoids often steal the spotlight, the rear deltoids deserve just as much attention. These muscles, located at the back of your shoulders, play a crucial role in maintaining shoulder stability and symmetry. In this section, we're shining a light on the often neglected rear deltoids and exploring bent-over raises and other effective exercises to help you build strong and defined rear delts. The rear deltoids, also known as posterior deltoids, contribute to a well-rounded shoulder appearance and play a key role in maintaining shoulder health. Strengthening your rear delts not only enhances the aesthetics of your shoulders but also helps prevent imbalances that can lead to injuries. Bent-over raises are a fantastic exercise to isolate and target the rear deltoids. To perform this exercise, bend forward at the hips while keeping your back flat and core engaged. Hold a pair of dumbbells with your arms slightly bent and raise them out to the sides until they are parallel to the ground. Lower the weights back down with control. In addition to bent-over raises, there are several other exercises that effectively engage the rear deltoids. Face pulls, reverse flyes, and cable cross-overs are excellent options that provide variety and help you fully develop your rear delt muscles. In this section, we're diving into the world of rear deltoids and bent-over raises. We'll discuss their significance, provide step-by-step instructions for performing bent-over raises, and introduce you to other exercises that contribute to strong and defined rear delts. Get ready to target all aspects of your shoulder muscles and achieve a well-rounded and impressive shoulder look. Shoulder Supersets: Pump Up the Intensity If you're looking to take your shoulder workouts to the next level, it's time to embrace the power of supersets. Supersets involve performing two exercises back-to-back without resting in between, leading to increased muscle engagement and an intensified workout. In this section, we'll explore the concept of supersets and suggest some effective shoulder exercise pairings to help you pump up the intensity and achieve impressive shoulder gains. Supersets are a fantastic way to challenge your muscles, prevent plateaus, and promote muscle growth. By alternating between different exercises, you not only maximize your time but also enhance the overall effectiveness of your workout. To supercharge your shoulder workout, consider pairing complementary exercises. For instance, combine overhead presses with lateral raises. Start with a set of overhead presses to target the front deltoids, and immediately follow it with lateral raises to engage the lateral deltoids. This approach keeps the muscles under tension and creates a greater stimulus for growth. Feel free to experiment with different exercise combinations based on your preferences and fitness level. Supersetting can also involve pairing compound movements like rows or pull-ups with shoulder-specific exercises to work on multiple muscle groups simultaneously. In this section, we're diving into the world of supersets and their application in shoulder workouts. You'll learn how to effectively incorporate supersets into your routine and discover dynamic exercise pairings that will elevate your shoulder training. Whether you're aiming for muscle definition, strength, or overall shoulder development, supersets are a valuable tool in your fitness arsenal. Get ready to intensify your shoulder workouts and achieve the gains you've been striving for. Shoulder Workouts Routine This shoulder workouts routine is designed to target all three deltoid muscles (front, lateral, and rear) for a well-rounded and strong shoulder development. Perform this routine 2-3 times a week with at least one rest day in between sessions. Remember to warm up before each workout and cool down after. Adjust the weights and repetitions based on your fitness level. Warm-Up: 5-10 minutes Start with light cardio like jogging or jumping jacks to get your blood flowing. Follow up with shoulder mobility exercises, arm circles, and gentle stretches. Workout: Exercise 1 - Overhead Press (Barbell or Dumbbell) 3 sets of 8-10 reps Rest: 60 seconds between sets Exercise 2 - Lateral Raises 3 sets of 12-15 reps Rest: 45 seconds between sets Exercise 3 - Front Raises 3 sets of 12-15 reps Rest: 45 seconds between sets Exercise 4 - Bent-Over Raises (Rear Delt Flyes) 3 sets of 12-15 reps Rest: 45 seconds between sets Superset:Exercise 5a - Seated Dumbbell Shrugs 3 sets of 12-15 reps No rest Exercise 5b - Face Pulls 3 sets of 12-15 reps Rest: 60 seconds after completing both exercises Cool Down: 5-10 minutes Perform gentle stretches for your shoulders, neck, and upper back. Notes: Use proper form and control for each exercise to avoid injury. Gradually increase the weight as you become more comfortable with the routine. Pay attention to your body and don't push through pain. Stay hydrated throughout your workout. Consult a fitness professional or healthcare provider if you have any pre-existing conditions or concerns before starting a new workout routine. Conclusion: Broaden Your Horizons with Shoulder Workouts As you've journeyed through this guide to shoulder workouts, you've gained insights into the importance of strong and well-defined shoulder muscles. From overhead presses to lateral raises, front raises to bent-over raises, and even incorporating the power of supersets, the possibilities for sculpting your shoulders are endless. Well-developed shoulder muscles don't just enhance your appearance but also play a crucial role in functional movements and overall upper body strength. By targeting different areas of the deltoids through various exercises, you can create a balanced and powerful shoulder region that supports your daily activities and athletic pursuits. It's time to put what you've learned into action. Incorporate these shoulder workouts into your fitness routine and experience the rewards of increased strength, improved posture, and enhanced athletic performance. Whether you're a beginner exploring the world of shoulder exercises or a seasoned fitness enthusiast looking to take your gains to new heights, these workouts offer a path to a well-rounded upper body. Thank you for joining us on this journey to discover effective shoulder workouts. As you embrace the challenge and dedication required for a stronger and more sculpted upper body, remember that the focus on "shoulder workouts" is not just a phrase—it's an invitation to elevate your fitness game and achieve your goals. See More: ⤵ Mastering the Dumbbell Upright Row: A Comprehensive Guide Back and Shoulder Workout Routine Dumbbell Front Raise: Mastering the Art of Shoulder Training Barbell Overhead Shrugs: Maximize Your Shoulder Strength Front Raises: Your Comprehensive Guide Bent-Over Raises: Your Ultimate Guide Face Pulls: The Complete Guide Overhead Press: A Comprehensive Guide Delts Workout: Sculpting Strong and Shapely Shoulders Shoulder Workouts:The Ultimate Guide Lateral Raises: Elevate Your Shoulder Game with This Killer Move Shoulder Press: Your Ultimate Guide to Strong Shoulders Push Press: Complete Guide
- Incline Dumbbell Curls: Proper Form, Muscles Worked & Variations
Incline dumbbell curls are a highly effective bicep exercise that has gained popularity among fitness enthusiasts and professional bodybuilders alike. This variation of the traditional bicep curl involves performing the movement while lying back on an incline bench, typically set at a 45-60 degree angle. The unique positioning of the body during this exercise allows for a greater stretch in the biceps at the bottom of the movement and a more intense contraction at the top, making it an invaluable tool for developing impressive arm muscles. Whether you're a beginner looking to build your first pair of sleeve-busting arms or an experienced lifter aiming to break through a plateau, mastering the incline dumbbell curl can be a game-changer in your arm training routine. The incline dumbbell curl stands out from other bicep exercises due to its ability to target the long head of the biceps more effectively. This is particularly important for developing the coveted bicep peak that many athletes and bodybuilders strive for. By positioning the arms behind the torso, the incline bench creates a unique angle that places additional stress on the long head of the biceps throughout the entire range of motion. This increased emphasis on the long head not only contributes to overall bicep size but also helps in creating a more aesthetically pleasing arm shape. Additionally, the incline position minimizes the ability to use momentum or "cheat" during the exercise, ensuring that the biceps are doing the majority of the work throughout the movement. In this comprehensive guide, we'll delve deep into the world of incline dumbbell curls, exploring everything from proper technique and muscle anatomy to advanced training strategies and nutrition tips. We'll cover various grip styles, equipment choices, and programming recommendations to help you maximize your results. Whether your goal is to build impressive biceps, increase your arm strength, or simply improve your overall upper body aesthetics, this article will equip you with the knowledge and tools to perfect your incline dumbbell curl technique and integrate this powerful exercise effectively into your training regimen. Get ready to transform your arm workouts and unlock the full potential of this versatile bicep-building movement. The Anatomy of Incline Dumbbell Curls Understanding the anatomy involved in incline dumbbell curls is crucial for maximizing the effectiveness of this exercise and achieving optimal bicep development. The primary muscle targeted during incline dumbbell curls is the biceps brachii, a two-headed muscle located on the front of the upper arm. This muscle is responsible for flexion of the elbow joint and supination of the forearm. The biceps brachii consists of a long head and a short head, both of which are heavily engaged during incline dumbbell curls. However, the incline position places particular emphasis on the long head of the biceps, which runs along the outer part of the arm and contributes more to the bicep peak. While the biceps brachii is the star of the show, incline dumbbell curls also engage several other muscles as synergists and stabilizers. The brachialis, a muscle that lies underneath the biceps brachii, plays a significant role in elbow flexion and is particularly emphasized when using a hammer grip variation of the incline dumbbell curl. The brachioradialis, a forearm muscle, is also involved, especially during the initial phase of the lift. Additionally, muscles like the anterior deltoid (front shoulder), trapezius, and various forearm muscles act as stabilizers during the movement. This comprehensive muscle engagement is what makes the incline dumbbell curl such an effective compound movement for upper arm development. The biomechanics of incline dumbbell curls involve a precise movement pattern that maximizes muscle engagement while minimizing joint stress. As you curl the dumbbells upward, the biceps contract concentrically, shortening to bring the forearm closer to the upper arm. This concentric phase is where most people feel the intense "pump" associated with bicep training. During the lowering phase, the biceps undergo eccentric contraction, lengthening under tension to control the descent of the dumbbells. This eccentric phase is equally important for muscle growth and strength development. The incline position creates a unique strength curve, with the biceps being under tension throughout the entire range of motion. This constant tension, particularly at the stretched position at the bottom of the movement, is what makes incline dumbbell curls so effective for stimulating muscle growth and improving overall bicep strength and development. Benefits of Incline Dumbbell Curls Incline dumbbell curls offer a myriad of benefits that make them an indispensable part of any comprehensive arm training program. First and foremost, they are exceptional for enhancing bicep peak development. The incline position places the long head of the biceps in a stretched position at the bottom of the movement, allowing for a greater range of motion and more intense contraction at the top. This increased emphasis on the long head of the biceps is particularly effective for developing the coveted "peak" that many bodybuilders and fitness enthusiasts strive for. Regular incorporation of incline dumbbell curls into your arm routine can lead to noticeable improvements in bicep shape and overall arm aesthetics. One of the most significant advantages of incline dumbbell curls is their ability to improve muscle isolation. The incline position minimizes the ability to use momentum or "cheat" during the exercise, ensuring that the biceps are doing the majority of the work throughout the movement. This increased isolation leads to more targeted muscle stimulation and potentially greater muscle growth. Additionally, the stabilized position on the incline bench reduces the involvement of other muscle groups, such as the lower back and core, which are often engaged during standing curl variations. This isolation not only enhances the effectiveness of the exercise for bicep development but also makes it a safer option for those with lower back issues. Another key benefit of incline dumbbell curls is the increased range of motion they provide. The incline position allows for a greater stretch at the bottom of the movement and a more complete contraction at the top. This extended range of motion ensures that the biceps are worked through their full functional capacity, potentially leading to greater muscle fiber recruitment and overall muscle development. The increased time under tension resulting from this extended range of motion can stimulate more significant muscle growth and strength gains. Furthermore, the unilateral nature of dumbbell curls allows for balanced arm development, helping to identify and correct any strength imbalances between arms. This balanced approach not only contributes to more symmetrical arm development but also helps in preventing muscle imbalances that can lead to injuries. Proper Incline Dumbbell Curl Technique Mastering the proper technique for incline dumbbell curls is crucial for maximizing muscle engagement and minimizing the risk of injury. Start by setting up an adjustable bench to a 45-60 degree angle. Sit on the bench with your back firmly against the pad and your feet flat on the floor. Hold a dumbbell in each hand, allowing your arms to hang straight down towards the floor with your palms facing forward. This starting position ensures proper alignment and prepares you for the full range of motion. It's important to choose a weight that allows you to maintain strict form throughout the entire set. Remember, the focus should be on isolating the biceps, not on moving the heaviest weight possible through poor form. To execute the curl, begin by exhaling and contracting your biceps to lift the dumbbells towards your shoulders. Keep your upper arms stationary throughout the movement; only your forearms should move. As you lift, focus on squeezing your biceps, especially at the top of the movement where the contraction is most intense. The top of the movement should see your biceps fully contracted with the dumbbells near shoulder level, but be careful not to bring the weights so high that your elbows move forward, as this can reduce tension on the biceps. Lower the dumbbells slowly back to the starting position while inhaling, maintaining control throughout the eccentric (lowering) phase. This controlled descent is crucial for muscle development and prevents injury. Common mistakes to avoid include using momentum by swinging the body, allowing the elbows to move away from the torso, and not completing the full range of motion. To maximize effectiveness, focus on quality over quantity. It's better to perform fewer repetitions with perfect form than to rush through more reps with poor technique. Pay particular attention to maintaining a controlled tempo throughout the entire movement, especially during the lowering phase. Many lifters tend to rush through the eccentric portion, which reduces the effectiveness of the exercise. Additionally, be mindful of your wrist position; they should remain straight throughout the movement to prevent strain. Some lifters find it helpful to visualize trying to touch their biceps to their forearms at the top of the movement, which encourages a strong peak contraction. Remember, consistency and proper form are key to seeing significant improvements in bicep strength and size through incline dumbbell curls. Variations of Incline Dumbbell Curls Alternating Incline Dumbbell Curls offer a unique twist on the standard bilateral movement. Instead of curling both dumbbells simultaneously, you alternate between left and right arms. This variation allows for greater focus on each arm individually, promoting balanced development and potentially allowing for the use of heavier weights. To perform alternating incline dumbbell curls, start with both dumbbells at the bottom position, then curl one dumbbell up while the other arm remains at the starting position. This alternating pattern not only adds variety to your workout but also helps in identifying and correcting any strength imbalances between arms. The brief rest period for each arm between repetitions can also allow for slightly heavier weights or more total repetitions, potentially leading to increased overall volume and strength gains. Hammer Grip Incline Dumbbell Curls involve performing the exercise with a neutral grip, where your palms face each other throughout the movement. This grip variation shifts the emphasis slightly from the biceps brachii to the brachialis and brachioradialis muscles, contributing to overall arm thickness and forearm development. The hammer grip also tends to be more comfortable for those with wrist or elbow issues. To execute this variation, set up as you would for standard incline dumbbell curls, but keep your palms facing each other as you curl the weights up. The movement pattern remains the same, focusing on a controlled lift and lower while keeping the upper arms stationary. Incorporating hammer grip incline curls into your routine can help ensure comprehensive arm development and add variety to your bicep training. Cross-Body Incline Dumbbell Curls introduce an element of unilateral training and increased range of motion to your arm workout. In this variation, you curl the dumbbell towards the opposite shoulder, crossing the midline of your body. This movement pattern engages the biceps from a different angle and can lead to improved muscle fiber recruitment. To perform cross-body incline dumbbell curls, start in the standard incline position but curl each dumbbell diagonally across your body towards the opposite shoulder. This variation not only targets the biceps but also engages the brachialis more intensively due to the slight rotation involved in the movement. The increased range of motion can lead to greater muscle stimulation and potentially enhanced muscle growth. As with all variations, focus on maintaining strict form and avoiding the use of momentum to lift the weight. Equipment for Incline Dumbbell Curls An adjustable incline bench is the cornerstone equipment for performing incline dumbbell curls effectively. The ability to adjust the angle of the bench is crucial for targeting the biceps from different angles and accommodating various body types and fitness levels. A bench that can be set between 30 to 60 degrees is ideal, with most lifters finding 45 degrees to be the sweet spot for optimal bicep engagement. When selecting an incline bench, look for stability, durability, and ease of adjustment. A bench with a wide base and non-slip feet ensures safety during your workouts. Some benches come with additional features like leg rollers for added stability, which can be beneficial when lifting heavier weights. Investing in a quality adjustable incline bench not only enhances your incline dumbbell curl performance but also opens up possibilities for a wide range of other exercises in your fitness routine. Dumbbells are the primary resistance tool for incline dumbbell curls, offering versatility and allowing for unilateral training. When choosing dumbbells for this exercise, consider factors like grip comfort, weight increments, and durability. Hexagonal dumbbells can be particularly useful as they don't roll away between sets. For home gyms or those just starting out, adjustable dumbbells can be a cost-effective solution, allowing you to change weights quickly without needing a full set of individual dumbbells. As you progress, having a variety of dumbbell weights will enable you to implement techniques like drop sets or pyramid training for more advanced workouts. It's important to have a range of weights available to accommodate different exercises and to allow for progressive overload as your strength improves over time. For those looking to perform incline dumbbell curls at home without access to traditional gym equipment, there are several alternatives that can be used. Resistance bands can be anchored under the feet or a heavy object to simulate the pulling motion of dumbbell curls. While the resistance curve differs from free weights, bands can provide an effective workout, especially when combined with the incline position. Another option is to use household items as makeshift weights. Water bottles, books, or even bags filled with sand can serve as substitutes for dumbbells. While these alternatives may not perfectly replicate the feel of dumbbells, they can still provide an effective bicep workout when proper form and technique are maintained. For a more permanent home solution, consider investing in adjustable dumbbells or a set of resistance bands with varying strengths to ensure you have options for progressive overload in your incline curl workouts. Incorporating Incline Dumbbell Curls into Your Workout Routine Effectively incorporating incline dumbbell curls into your workout routine requires strategic planning to ensure optimal bicep development without overtraining. For most individuals, training biceps, including incline dumbbell curls, 2-3 times per week provides sufficient stimulus for growth while allowing adequate recovery time. This frequency can be adjusted based on your overall training split and recovery capacity. If you're following a body part split, you might dedicate one day to arms or include incline dumbbell curls on your bicep or pull day. For those on a full-body or upper/lower split, incorporate incline dumbbell curls into your upper body or pull-focused workouts. Remember that biceps are also indirectly worked during many back exercises, so factor this into your overall arm training volume. The number of sets and repetitions for incline dumbbell curls should be tailored to your specific goals. For muscle hypertrophy (size increase), aim for 3-4 sets of 8-12 repetitions. If strength is your primary goal, you might opt for 3-5 sets of 4-6 repetitions with heavier weights. For endurance and muscle definition, higher repetition ranges of 12-15 or even 15-20 can be effective. Regardless of your rep range, the key is to choose a weight that challenges you in the target rep range while maintaining proper form. Progressive overload is crucial for continued gains, so gradually increase the weight, reps, or sets as your strength improves. Consider pairing incline dumbbell curls with exercises that target the antagonist muscles, such as tricep extensions, for a balanced arm workout. To maximize the effectiveness of incline dumbbell curls in your routine, consider incorporating advanced techniques like supersets and drop sets. Supersets involve performing incline dumbbell curls immediately followed by another exercise, either for the same muscle group (e.g., hammer curls) or an antagonist muscle (e.g., tricep pushdowns). This technique increases workout intensity and can lead to greater muscle fatigue and growth stimulus. Drop sets, where you perform a set to near failure, then immediately reduce the weight and continue for more reps, can be an excellent way to increase volume and push your biceps to their limit. However, use these intense techniques judiciously to avoid overtraining and ensure proper recovery. Vary your grip width and curl variations periodically to prevent adaptation and continue challenging your muscles in new ways. Incline Dumbbell Curls for Different Fitness Goals For bodybuilding, incline dumbbell curls are an essential tool for sculpting impressive, well-defined biceps. Focus on a hypertrophy-oriented approach, typically involving 3-4 sets of 8-12 repetitions. Incorporate a variety of incline curl variations to target all aspects of the biceps, including alternating curls, hammer grip curls, and cross-body curls. Emphasize the mind-muscle connection and use techniques like drop sets, supersets, and slow negatives to increase time under tension and stimulate maximum muscle growth. Pay close attention to form and contraction quality, squeezing the biceps at the top of each rep. For peak bodybuilding results, combine incline dumbbell curls with other bicep exercises like barbell curls and cable curls, and ensure your nutrition supports muscle growth with adequate protein and calorie intake. Strength training with incline dumbbell curls requires a different approach. Focus on lower repetition ranges, typically 4-6 reps, with heavier weights. This approach stimulates neuromuscular adaptations and increases overall bicep strength. Include variations like heavy alternating curls and isometric holds to overload the muscles. Progressive overload is key; gradually increase the weight as your strength improves. Consider incorporating isometric holds at various points in the curl to further challenge your biceps. Remember, while the focus is on strength, maintaining proper form is crucial to prevent injury and ensure effective muscle engagement. Strength gains in incline dumbbell curls can translate to improved performance in compound movements like pull-ups and rows, enhancing overall upper body strength. For functional fitness and sports performance, incline dumbbell curls should be integrated into a comprehensive strength and conditioning program. Focus on moderate weights with controlled movements that mimic sport-specific actions. For athletes in sports requiring strong pulling motions, like rowing or rock climbing, incline dumbbell curls can be a valuable accessory exercise to enhance performance. Use moderate weights and focus on controlled movements that mimic sport-specific actions. Incorporate unilateral exercises, like alternating incline curls, to improve balance and core stability. The goal here is not just to build bicep size or strength, but to enhance overall arm functionality that translates to improved performance in daily activities and various sports. Adjust the volume and intensity of incline dumbbell curls based on the specific demands of your sport or functional fitness goals. Nutrition to Support Incline Dumbbell Curl Progress Proper nutrition plays a crucial role in maximizing the results of your incline dumbbell curl workouts and overall bicep development. Protein intake is particularly important for muscle growth and repair. Aim for 1.6 to 2.2 grams of protein per kilogram of body weight daily, spread across multiple meals. High-quality protein sources such as lean meats, fish, eggs, and plant-based options like legumes and tofu should form the cornerstone of your diet. Timing your protein intake is also important; consuming protein within 30 minutes after your workout can help jumpstart the muscle recovery process. Consider incorporating protein shakes or easily digestible protein sources immediately post-workout to support muscle growth and repair. Carbohydrates are equally important, providing the energy necessary for intense incline dumbbell curl sessions and supporting overall workout performance. Complex carbohydrates like whole grains, fruits, and vegetables should make up the majority of your carb intake, providing sustained energy and essential nutrients. Timing your carb intake around your workouts can be beneficial; consuming carbs before exercise can provide energy for your session, while post-workout carbs help replenish glycogen stores and support recovery. For those focusing on muscle gain, a slight caloric surplus may be necessary, while those aiming for definition might need to monitor their calorie intake more closely. Balance is key – ensure you're eating enough to support muscle growth without excessive fat gain. Hydration is often overlooked but is critical for optimal performance and recovery in bicep training. Adequate water intake supports nutrient transport, helps maintain electrolyte balance, and aids in muscle function. Aim to drink water consistently throughout the day, with increased intake around your workouts. For intense or prolonged training sessions, consider a sports drink to replenish electrolytes. Additionally, don't neglect healthy fats in your diet; they play a crucial role in hormone production, including testosterone, which is important for muscle growth. Sources like avocados, nuts, seeds, and fatty fish should be included in moderation as part of a balanced diet. Some supplements that may aid bicep development include creatine monohydrate for strength and muscle volume, and omega-3 fatty acids for reducing inflammation and supporting joint health. Always consult with a healthcare professional before starting any new supplement regimen. Common Mistakes in Incline Dumbbell Curls One of the most prevalent mistakes in incline dumbbell curls is the use of momentum to lift the weight. This often manifests as swinging the body or using a slight "kick" with the legs to initiate the curl. While this might allow you to lift heavier weights, it significantly reduces the tension on the biceps, compromising the effectiveness of the exercise. To avoid this, focus on keeping your back firmly pressed against the incline bench throughout the movement. If you find yourself needing to swing, it's a clear sign that the weight is too heavy. Reduce the weight and concentrate on slow, controlled movements that isolate the biceps. Remember, the goal is muscle engagement and growth, not just moving weight from point A to point B. Another common error is setting the bench at an incorrect angle. The ideal angle for incline dumbbell curls is typically between 45 to 60 degrees. Setting the bench too flat reduces the unique benefits of the incline position, while setting it too steep can put unnecessary strain on the shoulder joints. Experiment with different angles within this range to find what feels most comfortable and effective for your individual biomechanics. Additionally, ensure that the bench is securely locked in position before beginning your set to prevent any unexpected shifts during the exercise. The correct bench angle is crucial for maximizing the stretch on the long head of the biceps and achieving optimal muscle engagement throughout the movement. Limiting the range of motion is another mistake that can significantly reduce the effectiveness of incline dumbbell curls. This often occurs when lifters don't fully extend their arms at the bottom of the movement or don't curl the dumbbells high enough at the top. Partial reps can be useful in certain advanced techniques, but for standard incline dumbbell curls, a full range of motion is crucial for optimal muscle development. Ensure that you start each rep with your arms fully extended, feeling a stretch in your biceps, and curl the weights until your forearms are nearly parallel to your upper arms. This full range of motion ensures that you're targeting the entire length of the bicep muscle and maximizing the benefits of the exercise. Be mindful not to let your elbows drift forward at the top of the movement, as this can reduce tension on the biceps and potentially strain your shoulders. Focus on maintaining a controlled, full range of motion throughout each repetition to maximize bicep engagement and growth. Advanced Incline Dumbbell Curl Techniques Drop sets are an advanced technique that can take your incline dumbbell curl workouts to the next level, pushing your biceps to their limits and stimulating new growth. To perform a drop set, start with a weight you can lift for 8-10 reps with good form. Once you reach muscle failure, immediately reduce the weight by 20-30% and continue performing reps until failure again. You can repeat this process for 2-3 drops. For example, you might start with 30-pound dumbbells, then drop to 25 pounds, and finally to 20 pounds, performing as many reps as possible with each weight. This technique increases time under tension and volume, leading to greater muscle fatigue and potential growth. However, due to its intensity, drop sets should be used sparingly, perhaps as a finisher to your bicep workout once a week. The 21s method is another advanced technique that can shock your biceps into new growth. This challenging variation involves performing 21 total repetitions in three different ranges of motion: 7 reps from the bottom to halfway up, 7 reps from halfway to the top, and 7 full range of motion reps. The partial reps in the first two sets pre-exhaust the muscle, making the full range of motion reps extremely challenging and effective for muscle growth. To perform 21s with incline dumbbell curls, start with a lighter weight than you would normally use for standard curls. Focus on maintaining strict form throughout all 21 reps, especially as fatigue sets in during the final full-range set. This technique is particularly intense and should be used sparingly, perhaps once every couple of weeks, to avoid overtraining. Isometric holds are an effective advanced technique for enhancing the mind-muscle connection and increasing time under tension in incline dumbbell curls. This method involves holding the dumbbells static at various points during the curl movement. For example, you might curl the weights up, hold them halfway for 10-15 seconds, then complete the curl and hold at the top for another 10-15 seconds before lowering. Alternatively, you can perform a full curl and hold at the top position for 20-30 seconds. Isometric holds increase time under tension and can improve muscle fiber recruitment throughout the entire range of motion. They're also excellent for developing muscular endurance and can be particularly beneficial for breaking through plateaus. Incorporate isometric holds sparingly into your routine, perhaps as a finisher or as part of a varied bicep workout to keep your muscles challenged and growing. Incline Dumbbell Curls vs. Standard Dumbbell Curls Incline dumbbell curls and standard dumbbell curls, while both targeting the biceps, offer distinct advantages and challenges. The primary difference lies in the positioning of the arms relative to the torso. Incline curls place the arms behind the body, creating a greater stretch on the long head of the biceps throughout the movement. This increased stretch leads to more significant activation of the long head, which is crucial for developing the coveted bicep peak. Standard curls, performed while standing or seated with arms at the sides, provide a more balanced engagement of both the long and short heads of the biceps. The incline position also minimizes the ability to use body momentum, ensuring more strict form and isolated bicep work compared to standard curls. The choice between incline and standard dumbbell curls often depends on your specific training goals and current bicep development. If your primary aim is to enhance the peak of your biceps and target the long head more intensively, incline curls should be a staple in your routine. They're particularly effective for those looking to improve the overall shape and definition of their biceps. Standard curls, on the other hand, are superior for overall bicep mass and thickness. They allow for slightly heavier weights to be used and can be more easily incorporated into various workout styles, including supersets and drop sets. From a functional standpoint, standard curls more closely mimic everyday lifting motions, while incline curls offer a unique stimulus that can help break through plateaus in bicep development. For a well-rounded bicep development program, it's beneficial to incorporate both incline and standard dumbbell curls into your workout routine. A balanced approach might involve alternating between the two exercises in different workouts or including both in the same session. For example, you could start with incline curls to pre-exhaust the long head of the biceps, then move to standard curls for overall bicep development. Alternatively, you could dedicate certain training cycles to focus more on one variation over the other, depending on your current goals. Remember, variety in your training not only ensures comprehensive muscle development but also helps prevent boredom and plateaus. By mastering both incline and standard dumbbell curls, you'll have a powerful toolkit for building strong, well-defined biceps that are both aesthetically pleasing and functionally powerful. Incline Dumbbell Curls for Beginners For beginners embarking on their incline dumbbell curl journey, starting with the right weight is crucial. A good rule of thumb is to choose a weight that allows you to perform 10-12 repetitions with proper form, where the last few reps are challenging but not impossible. This typically means starting with lighter dumbbells, often in the 5-10 pound (2-5 kg) range for most beginners. It's far better to start light and focus on perfecting your form than to risk injury or develop bad habits by lifting too heavy too soon. As you gain strength and confidence, you can gradually increase the weight. Remember, progress in strength training is a marathon, not a sprint. Your initial focus should be on mastering the movement pattern and developing a strong mind-muscle connection with your biceps. Form should be the primary focus for beginners practicing incline dumbbell curls. Start by setting an adjustable bench to a 45-degree angle. Sit on the bench with your back firmly against the pad, feet flat on the floor, and a dumbbell in each hand hanging at arm's length. Your palms should be facing forward. Keep your upper arms stationary and close to your torso throughout the movement. Curl the weights up towards your shoulders by flexing your biceps, exhaling as you lift. Pause briefly at the top of the movement, focusing on squeezing your biceps. Then, slowly lower the dumbbells back to the starting position while inhaling. Control the descent; don't let gravity do the work. Practice in front of a mirror if possible to ensure you're maintaining proper posture and not swinging the weights. Pay particular attention to keeping your wrists straight and your elbows close to your body throughout the movement. Progression for beginners should be gradual and focused on consistency. Aim to perform incline dumbbell curls 2-3 times a week as part of a broader strength training routine. Start with 2-3 sets of 10-12 repetitions, focusing on maintaining perfect form throughout each set. As you become more comfortable with the movement, you can start to experiment with different grip positions or try variations like alternating incline curls. Increase the weight only when you can complete all sets and reps with good form. A good progression might be to increase the weight by 2-5 pounds every 2-3 weeks, depending on your individual progress. Be patient and consistent; noticeable improvements in strength and muscle definition will come with time and proper technique. Don't be discouraged if progress seems slow at first; building a solid foundation of strength and proper form is crucial for long-term success and injury prevention in your incline dumbbell curl journey. Remember to balance your bicep training with exercises for other muscle groups to ensure overall balanced development. Conclusion Incline dumbbell curls stand as a cornerstone exercise in the realm of bicep training, offering a unique blend of benefits that make them indispensable for anyone looking to develop strong, well-defined arms. Throughout this comprehensive guide, we've explored the multifaceted aspects of this powerful movement, from its anatomical foundations to advanced techniques for seasoned lifters. The versatility of incline dumbbell curls makes them an essential tool for a wide range of fitness goals, whether you're a bodybuilder seeking impressive bicep peaks, an athlete looking to enhance functional arm strength, or a fitness enthusiast aiming for overall arm health and aesthetics. We've delved into the proper execution of incline dumbbell curls, emphasizing the importance of correct form to maximize results and minimize injury risk. The various types of incline curl variations discussed – from alternating to hammer grip curls – provide a rich repertoire of movements to keep your bicep training diverse and challenging. By incorporating these variations and the advanced techniques we've covered, such as drop sets and 21s, you can continue to stimulate muscle growth and strength gains well into your training journey. Remember, the key to success with incline dumbbell curls, as with any exercise regimen, lies in consistency, proper progression, and attention to form. As you apply the knowledge and techniques shared in this guide, you're well-equipped to transform your bicep training routine. Remember to balance your incline dumbbell curl training with exercises for other arm muscles and to pay close attention to your nutrition and recovery. Regular tracking of your progress, whether through workout logs, measurements, or strength benchmarks, will help you stay motivated and make informed decisions about your training. Embrace the journey of mastering incline dumbbell curls, stay patient with your progress, and watch as your dedication pays off in impressive bicep development, enhanced arm strength, and overall upper body power. With incline dumbbell curls as a staple in your workout arsenal, you're on the path to achieving the strong, functional, and aesthetically pleasing arms you've always desired.
- Zottman Curl: Form, Benefits, and Variations
The Zottman Curl, named after its creator, the 19th-century strongman George Zottman, is a unique and highly effective bicep exercise that has stood the test of time. This multifaceted movement combines the traditional bicep curl with a reverse curl, engaging multiple muscle groups in the arms for comprehensive development. Unlike standard bicep curls, the Zottman Curl targets not only the biceps brachii but also the brachialis, brachioradialis, and forearm muscles, making it an invaluable addition to any arm training regimen. Whether you're a bodybuilder looking to sculpt impressive arms, an athlete seeking functional strength, or a fitness enthusiast aiming to improve overall arm development, mastering the Zottman Curl can significantly enhance your arm training results. The beauty of the Zottman Curl lies in its unique execution. The exercise begins with a standard supinated (palms-up) curl, targeting the biceps brachii. However, at the top of the movement, the hands are rotated to a pronated (palms-down) position before the weight is lowered. This pronated lowering phase shifts the emphasis to the brachialis and forearm muscles, providing a comprehensive arm workout in a single exercise. This dual-action movement not only contributes to more balanced arm development but also helps in preventing muscle imbalances that can lead to injuries. The Zottman Curl is particularly beneficial for those looking to improve grip strength and forearm aesthetics, areas often neglected in traditional arm workouts. In this comprehensive guide, we'll delve deep into the world of Zottman Curls, exploring everything from proper technique and muscle anatomy to advanced training strategies and nutrition tips. Whether your goal is to build sleeve-busting arms, increase your functional arm strength, or simply diversify your arm training routine, this article will equip you with the knowledge and tools to maximize your Zottman Curl workouts. Get ready to transform your arm training and unlock the full potential of this highly effective exercise, which has been a secret weapon in the arsenals of strongmen, bodybuilders, and fitness enthusiasts for over a century. The Anatomy of Zottman Curls Understanding the anatomy involved in Zottman Curls is crucial for maximizing the effectiveness of this exercise and achieving optimal arm development. The primary muscles targeted during Zottman Curls are the biceps brachii, brachialis, and brachioradialis. The biceps brachii, a two-headed muscle located on the front of the upper arm, is heavily engaged during the supinated (palms-up) curling phase of the movement. This muscle is responsible for flexion of the elbow joint and supination of the forearm. The brachialis, which lies underneath the biceps brachii, is particularly emphasized during the pronated (palms-down) lowering phase of the Zottman Curl. Developing the brachialis can contribute significantly to overall arm thickness and strength. The brachioradialis, a prominent muscle of the forearm that runs from the lateral supracondylar ridge of the humerus to the lateral side of the radius, plays a crucial role in the Zottman Curl. This muscle is heavily engaged during both the lifting and lowering phases of the exercise, contributing to forearm development and elbow flexion strength. The unique aspect of the Zottman Curl is its ability to target the brachioradialis more effectively than many other bicep exercises, due to the pronated grip during the eccentric (lowering) phase. This comprehensive engagement of multiple arm muscles makes the Zottman Curl an excellent compound movement for overall arm development. In addition to these primary movers, Zottman Curls also engage several secondary muscles as synergists and stabilizers. The forearm flexors and extensors are heavily involved, particularly during the grip transition at the top of the movement and throughout the lowering phase. This engagement contributes significantly to grip strength and forearm aesthetics. Muscles of the upper arm and shoulder, such as the anterior deltoid and various rotator cuff muscles, act as stabilizers during the movement. The core muscles, including the rectus abdominis and obliques, are also activated to maintain proper posture and stability throughout the exercise. This comprehensive muscle engagement is what makes the Zottman Curl such an effective and efficient exercise for overall arm and upper body development. Benefits of Zottman Curls Zottman Curls offer a myriad of benefits that make them an indispensable part of any comprehensive arm training program. First and foremost, they provide unparalleled comprehensive arm development. By combining a supinated curl with a pronated lowering phase, Zottman Curls target all major muscles of the arm, including the biceps, brachialis, brachioradialis, and forearm muscles. This comprehensive engagement leads to balanced muscle growth and strength development throughout the entire arm. Unlike exercises that focus solely on the biceps, Zottman Curls contribute to overall arm thickness and definition, creating a more aesthetically pleasing and functionally strong arm. One of the most significant advantages of Zottman Curls is their ability to improve grip strength. The transition from a supinated to a pronated grip at the top of each repetition, coupled with the controlled lowering phase, places significant demands on the grip muscles. This aspect of the exercise translates directly to improved performance in various other exercises and daily activities that require a strong grip. Athletes in sports such as rock climbing, tennis, or martial arts can particularly benefit from the grip strength gains provided by regular Zottman Curl training. Additionally, the emphasis on the forearms during the lowering phase contributes to enhanced forearm aesthetics, an often-neglected aspect of arm training that can significantly improve overall arm appearance. Another key benefit of Zottman Curls is their contribution to balanced muscle engagement and development. Many traditional bicep exercises primarily target the biceps brachii, potentially leading to muscle imbalances over time. Zottman Curls, with their dual-action nature, ensure that all major muscles of the arm are targeted in a single exercise. This balanced approach not only contributes to more symmetrical arm development but also helps in preventing muscle imbalances that can lead to injuries. The varied muscle engagement throughout the exercise also makes Zottman Curls an excellent choice for improving muscular endurance and promoting better mind-muscle connection in the arms. This comprehensive stimulation of the arm muscles can lead to improved overall arm functionality, benefiting both athletic performance and everyday activities. Proper Zottman Curl Technique Mastering the proper technique for Zottman Curls is crucial for maximizing muscle engagement and minimizing the risk of injury. Start by standing with your feet shoulder-width apart, holding a dumbbell in each hand at arm's length. Your palms should be facing forward (supinated grip) at the beginning of the movement. Maintain a straight back, engage your core, and keep your upper arms close to your torso throughout the exercise. This starting position ensures stability and proper alignment for the movement. Remember, the focus should be on isolating the arm muscles, not on moving the heaviest weight possible through poor form. To execute the curl, begin by exhaling and contracting your biceps to lift the dumbbells towards your shoulders. Keep your upper arms stationary throughout the movement; only your forearms should move. As you lift, focus on squeezing your biceps, especially at the top of the movement where the contraction is most intense. Once the dumbbells reach shoulder level, pause briefly and rotate your wrists to transition to a pronated grip (palms facing down). This transition is a key element of the Zottman Curl and should be performed smoothly and deliberately. From this pronated position, slowly lower the dumbbells back to the starting position while inhaling, maintaining control throughout the eccentric (lowering) phase. The lowering portion of the exercise is crucial for targeting the brachialis and forearm muscles, so resist the temptation to let gravity do the work. Common mistakes to avoid include using momentum by swinging the body, failing to fully rotate the wrists at the top of the movement, and not completing the full range of motion. To maximize effectiveness, focus on quality over quantity. It's better to perform fewer repetitions with perfect form than to rush through more reps with poor technique. Pay particular attention to maintaining a controlled tempo throughout the entire movement, especially during the lowering phase. Many lifters tend to rush through the eccentric portion, which reduces the effectiveness of the exercise. Additionally, be mindful of your wrist position; they should remain straight throughout the movement to prevent strain. Some lifters find it helpful to visualize squeezing a tennis ball between their bicep and forearm at the top of the movement to ensure maximum contraction. Remember, consistency and proper form are key to seeing significant improvements in arm strength and size through Zottman Curls. Variations of Zottman Curls Seated Zottman Curls offer a unique twist on the standard standing variation, providing enhanced stability and isolation of the target muscles. By sitting on a bench with your back straight, you eliminate the potential for using lower body momentum, forcing your arms to do all the work. This seated position is particularly beneficial for those looking to improve their form or for individuals with lower back issues. To perform seated Zottman Curls, sit on a bench with a dumbbell in each hand, palms facing forward. Execute the curl as you would in the standing position, rotating your wrists at the top and lowering with a pronated grip. This variation can be especially effective for focusing on strict form and maximizing the mind-muscle connection in your arms. Incline Zottman Curls add a new dimension to the exercise by changing the angle of attack on the arm muscles. Set an adjustable bench to a 45-60 degree incline and sit back against it, allowing your arms to hang straight down, perpendicular to the floor. This position puts the biceps in a stretched state at the bottom of the movement, leading to a more intense contraction as you curl. Perform the Zottman Curl as usual, focusing on a full range of motion and smooth transitions. The incline position particularly targets the long head of the biceps, which contributes to the coveted bicep peak. Additionally, the increased stretch at the bottom of the movement can lead to greater engagement of the brachialis and brachioradialis, potentially stimulating more comprehensive arm growth. Alternating Zottman Curls introduce an element of unilateral training to your arm workout. Instead of curling both dumbbells simultaneously, you alternate between left and right arms. This variation allows for greater focus on each arm individually, promoting balanced development and potentially allowing for the use of heavier weights. To perform alternating Zottman Curls, start with both dumbbells at your sides, then curl one dumbbell up, rotate at the top, and lower it with a pronated grip while the other arm remains at the starting position. This alternating pattern not only adds variety to your workout but also helps in identifying and correcting any strength imbalances between arms. The brief rest period for each arm between repetitions can also allow for slightly heavier weights or more total repetitions, potentially leading to increased overall volume and strength gains. Equipment for Zottman Curls Dumbbells are the most common and versatile equipment for performing Zottman Curls. They offer a range of weights to suit different strength levels and allow for easy progression as you get stronger. When selecting dumbbells for Zottman Curls, consider factors like grip comfort, weight increments, and durability. Hexagonal dumbbells can be particularly useful as they don't roll away between sets and provide a stable base during the grip transition at the top of the movement. For home gyms or those just starting out, adjustable dumbbells can be a cost-effective solution, allowing you to change weights quickly without needing a full set of individual dumbbells. As you progress, having a variety of dumbbell weights will enable you to implement techniques like drop sets or pyramid training for more advanced workouts. Kettlebells provide an interesting alternative to dumbbells for Zottman Curls. The unique shape and weight distribution of kettlebells can add a new challenge to the exercise, particularly in terms of grip strength and forearm engagement. To perform Zottman Curls with kettlebells, grasp them by the handles with your palms facing forward, and execute the movement as you would with dumbbells. The offset weight of the kettlebell requires more stabilization from your forearm muscles, potentially leading to greater strength gains. However, it's important to note that the grip transition at the top of the movement can be more challenging with kettlebells, so start with a lighter weight than you would use for dumbbell Zottman Curls to get accustomed to the different feel and balance. Cable machines offer a unique approach to Zottman Curls, providing constant tension throughout the movement. To perform Zottman Curls on a cable machine, attach a straight bar or individual handles to a low pulley. Start with your palms facing up, curl the weight up, rotate your wrists at the top, and lower the weight with your palms facing down. The constant tension provided by the cables can lead to increased time under tension for the muscles, potentially stimulating greater muscle growth. Cable machines also allow for easy adjustment of resistance and can be particularly useful for drop sets or high-volume training. Additionally, the fixed path of motion of cable machines can help in maintaining strict form, making them an excellent option for beginners learning the exercise or for more advanced lifters looking to isolate their arm muscles more effectively. Incorporating Zottman Curls into Your Workout Routine Effectively incorporating Zottman Curls into your workout routine requires strategic planning to ensure optimal arm development without overtraining. For most individuals, training arms, including Zottman Curls, 2-3 times per week provides sufficient stimulus for growth while allowing adequate recovery time. This frequency can be adjusted based on your overall training split and recovery capacity. If you're following a body part split, you might dedicate one day to arms or include Zottman Curls on your bicep or pull day. For those on a full-body or upper/lower split, incorporate Zottman Curls into your upper body or pull-focused workouts. Remember that biceps and forearms are also indirectly worked during many back exercises, so factor this into your overall arm training volume. The number of sets and repetitions for Zottman Curls should be tailored to your specific goals. For muscle hypertrophy (size increase), aim for 3-4 sets of 8-12 repetitions. If strength is your primary goal, you might opt for 3-5 sets of 4-6 repetitions with heavier weights. For endurance and muscle definition, higher repetition ranges of 12-15 or even 15-20 can be effective. Regardless of your rep range, the key is to choose a weight that challenges you in the target rep range while maintaining proper form. Progressive overload is crucial for continued gains, so gradually increase the weight, reps, or sets as your strength improves. Consider pairing Zottman Curls with exercises that target the antagonist muscles, such as tricep extensions, for a balanced arm workout. To maximize the effectiveness of Zottman Curls in your routine, consider incorporating advanced techniques like supersets and drop sets. Supersets involve performing Zottman Curls immediately followed by another exercise, either for the same muscle group (e.g., hammer curls) or an antagonist muscle (e.g., tricep pushdowns). This technique increases workout intensity and can lead to greater muscle fatigue and growth stimulus. Drop sets, where you perform a set to near failure, then immediately reduce the weight and continue for more reps, can be an excellent way to increase volume and push your arm muscles to their limit. However, use these intense techniques judiciously to avoid overtraining and ensure proper recovery. Vary your grip width and curl variations periodically to prevent adaptation and continue challenging your muscles in new ways. Zottman Curls for Different Fitness Goals For bodybuilding, Zottman Curls are an essential tool for sculpting impressive, well-rounded arms. Focus on a hypertrophy-oriented approach, typically involving 3-4 sets of 8-12 repetitions. Incorporate a variety of Zottman Curl variations to target all aspects of the arms, including seated Zottman Curls, incline Zottman Curls, and alternating Zottman Curls. Emphasize the mind-muscle connection and use techniques like drop sets, supersets, and slow negatives to increase time under tension and stimulate maximum muscle growth. Pay close attention to form and contraction quality, squeezing the muscles at the top of each rep and controlling the eccentric phase. For peak bodybuilding results, combine Zottman Curls with other bicep and forearm exercises and ensure your nutrition supports muscle growth with adequate protein and calorie intake. Functional fitness enthusiasts can benefit greatly from incorporating Zottman Curls into their routines. Focus on performing Zottman Curls with a moderate weight for 2-3 sets of 10-15 repetitions. Emphasize the grip transition and controlled lowering phase to develop forearm strength and grip endurance, which are crucial for many everyday activities and sports. Consider integrating Zottman Curls into circuit training or combining them with other functional movements like lunges or step-ups to create compound exercises that challenge multiple muscle groups simultaneously. This approach enhances overall body coordination and prepares you for the varied demands of daily activities and sports performance. The balanced muscle engagement provided by Zottman Curls contributes to improved arm functionality and reduced risk of muscle imbalances. For sports performance, Zottman Curls can be tailored to meet sport-specific needs. Athletes in sports requiring strong grip and forearm strength, such as rock climbing, tennis, or martial arts, can particularly benefit from Zottman Curls. Focus on explosive concentric movements with controlled eccentric phases to develop power and control. Perform 3-4 sets of 6-8 repetitions, emphasizing perfect form and full range of motion. For sports demanding endurance and repeated arm actions, higher rep ranges of 15-20 can improve muscular endurance. Incorporate Zottman Curls as part of a comprehensive strength and conditioning program, ensuring they complement rather than interfere with sport-specific training. Additionally, the improved grip strength and forearm development from Zottman Curls can enhance performance in other weight training exercises, contributing to overall athletic development. Nutrition to Support Zottman Curl Progress Proper nutrition plays a crucial role in maximizing the results of your Zottman Curl workouts and overall arm development. Protein intake is particularly important for muscle growth and repair. Aim for 1.6 to 2.2 grams of protein per kilogram of body weight daily, spread across multiple meals. High-quality protein sources such as lean meats, fish, eggs, and plant-based options like legumes and tofu should form the cornerstone of your diet. Timing your protein intake is also important; consuming protein within 30 minutes after your workout can help jumpstart the muscle recovery process. Consider incorporating protein shakes or easily digestible protein sources immediately post-workout to support muscle growth and repair, especially after intense Zottman Curl sessions. Carbohydrates are equally important, providing the energy necessary for intense Zottman Curl workouts and supporting overall arm training performance. Complex carbohydrates like whole grains, fruits, and vegetables should make up the majority of your carb intake, providing sustained energy and essential nutrients. Timing your carb intake around your workouts can be beneficial; consuming carbs before exercise can provide energy for your session, while post-workout carbs help replenish glycogen stores and support recovery. For those focusing on muscle gain, a slight caloric surplus may be necessary, while those aiming for definition might need to monitor their calorie intake more closely. Balance is key – ensure you're eating enough to support muscle growth without excessive fat gain. Hydration is often overlooked but is critical for optimal performance and recovery in arm training, including Zottman Curls. Adequate water intake supports nutrient transport, helps maintain electrolyte balance, and aids in muscle function. Aim to drink water consistently throughout the day, with increased intake around your workouts. For intense or prolonged training sessions, consider a sports drink to replenish electrolytes. Additionally, don't neglect healthy fats in your diet; they play a crucial role in hormone production, including testosterone, which is important for muscle growth. Sources like avocados, nuts, seeds, and fatty fish should be included in moderation as part of a balanced diet. Some supplements that may aid arm development include creatine monohydrate for strength and muscle volume, and omega-3 fatty acids for reducing inflammation and supporting joint health. Always consult with a healthcare professional before starting any new supplement regimen, especially when intensifying your Zottman Curl training. Common Mistakes in Zottman Curls One of the most prevalent mistakes in Zottman Curls is the use of momentum to lift the weight. This often manifests as swinging the body or using a slight "kick" with the legs to initiate the curl. While this might allow you to lift heavier weights, it significantly reduces the tension on the target muscles, compromising the effectiveness of the exercise. To avoid this, focus on keeping your upper arms stationary and your core engaged throughout the movement. If you find yourself needing to swing, it's a clear sign that the weight is too heavy. Reduce the weight and concentrate on slow, controlled movements that isolate the biceps and forearms. Remember, the goal is muscle engagement and growth, not just moving weight from point A to point B. Another common error is incorrect grip transition at the top of the movement. The unique aspect of the Zottman Curl is the rotation from a supinated (palms-up) to a pronated (palms-down) grip at the top of the curl. Some lifters rush through this transition or fail to fully rotate their wrists, which reduces the effectiveness of the exercise, particularly for forearm development. To perform the transition correctly, pause briefly at the top of the curl and deliberately rotate your wrists to achieve a fully pronated grip before beginning the lowering phase. This controlled transition ensures maximum engagement of the forearm muscles during the eccentric portion of the exercise. Practice this transition with lighter weights until it becomes smooth and natural before progressing to heavier loads. Limiting the range of motion is another mistake that can significantly reduce the effectiveness of Zottman Curls. This often occurs when lifters don't fully extend their arms at the bottom of the movement or don't curl the weight high enough at the top. Partial reps can be useful in certain advanced techniques, but for standard Zottman Curls, a full range of motion is crucial for optimal muscle development. Ensure that you start each rep with your arms fully extended and curl the weight until your forearms are nearly parallel to your upper arms. This full range of motion ensures that you're targeting the entire length of the biceps and maximizing forearm engagement during the lowering phase. Be mindful not to let your elbows drift forward at the top of the movement, as this can reduce tension on the target muscles and potentially strain your shoulders. Focus on maintaining a controlled, full range of motion throughout each repetition to maximize the benefits of Zottman Curls for comprehensive arm development. Advanced Zottman Curl Techniques Drop sets are an advanced technique that can take your Zottman Curl workouts to the next level, pushing your arm muscles to their limits and stimulating new growth. To perform a drop set, start with a weight you can lift for 8-10 reps with good form. Once you reach muscle failure, immediately reduce the weight by 20-30% and continue performing reps until failure again. You can repeat this process for 2-3 drops. For example, you might start with 25-pound dumbbells, then drop to 20 pounds, and finally to 15 pounds, performing as many reps as possible with each weight. This technique increases time under tension and volume, leading to greater muscle fatigue and potential growth. The unique nature of Zottman Curls makes drop sets particularly effective, as you're challenging both the biceps and forearms throughout the entire set. However, due to its intensity, drop sets should be used sparingly, perhaps as a finisher to your arm workout once a week. Tempo variations can add a new dimension to your Zottman Curl workouts, enhancing muscle tension and promoting growth. Experiment with different lifting tempos to challenge your arm muscles in new ways. For example, try a 4-1-1-4 tempo: take 4 seconds to curl the weight up, pause for 1 second at the top, take 1 second to rotate your wrists, then 4 seconds to lower the weight. This slow, controlled movement eliminates momentum and keeps constant tension on the muscles. Alternatively, you can try explosive concentric movements with slow eccentric phases to develop power and control. Another effective tempo variation is to pause for 2-3 seconds halfway through the lowering phase, which increases time under tension for the forearms. Varying your tempo not only adds variety to your workouts but also targets different muscle fibers and can help break through plateaus in arm development. Isometric holds are another advanced technique that can enhance the effectiveness of your Zottman Curls. This method involves holding the weight static at various points during the curl movement. For example, you might curl the weight up, hold it halfway for 10-15 seconds, then complete the curl and hold at the top for another 10-15 seconds before rotating your wrists and lowering. Alternatively, you can perform a full curl, rotate to the pronated grip, and hold at the top position for 20-30 seconds before lowering. Isometric holds increase time under tension and can improve mind-muscle connection, helping you better engage the target muscles throughout the entire range of motion. They're also excellent for developing muscular endurance and can be particularly beneficial for sports or activities requiring sustained grip strength. Incorporate isometric holds sparingly into your routine, perhaps as a finisher or as part of a varied arm workout to keep your muscles challenged and growing. Zottman Curls vs. Traditional Bicep Curls Zottman Curls and traditional bicep curls, while both targeting the arms, offer distinct advantages and challenges. The primary difference lies in the grip transition and muscle engagement throughout the movement. Traditional bicep curls maintain a supinated grip throughout, primarily targeting the biceps brachii. In contrast, Zottman Curls begin with a supinated grip during the concentric phase, targeting the biceps, but transition to a pronated grip for the eccentric phase, shifting emphasis to the brachialis and forearm muscles. This dual-action movement of Zottman Curls leads to more comprehensive arm development, engaging a wider range of muscles than traditional curls. The pronated lowering phase of Zottman Curls is particularly effective for developing forearm strength and aesthetics, an area often neglected in standard bicep training. The choice between Zottman Curls and traditional bicep curls often depends on your specific training goals. If your primary aim is to build overall arm thickness and improve grip strength, Zottman Curls should be a staple in your routine. They're particularly effective for developing the forearms and the outer portion of the upper arms. Traditional bicep curls, on the other hand, are superior for isolating and maximizing bicep peak development. They're typically the go-to exercise for those focusing specifically on bicep aesthetics. From a functional standpoint, Zottman Curls tend to have more carryover to everyday activities and sports that require grip strength and forearm endurance, while traditional curls are more specific to movements that involve supination of the forearm. For a well-rounded arm development program, it's beneficial to incorporate both Zottman Curls and traditional bicep curls into your workout routine. A balanced approach might involve alternating between the two exercises in different workouts or including both in the same session. For example, you could start with traditional bicep curls when your arms are fresh, then move to Zottman Curls to target the brachialis and forearms more intensively. Alternatively, you could dedicate certain training cycles to focus more on one variation over the other, depending on your current goals. Remember, variety in your training not only ensures comprehensive muscle development but also helps prevent boredom and plateaus. By mastering both Zottman Curls and traditional bicep curls, you'll have a powerful toolkit for building strong, well-defined arms that are both aesthetically pleasing and functionally powerful. Injury Prevention and Safety Proper warm-up techniques are essential for preventing injuries during Zottman Curl workouts. Start with 5-10 minutes of light cardio to increase blood flow to the muscles. This can be followed by dynamic stretches for the arms and shoulders, such as arm circles and controlled arm swings. Perform a few sets of very light Zottman Curls or resistance band curls to further warm up the target muscles and prepare them for heavier lifting. This gradual warm-up process not only reduces the risk of injury but also enhances performance by improving muscle elasticity and neural activation. Pay special attention to warming up the wrists and forearms, as these areas are particularly engaged during Zottman Curls. Consider incorporating wrist rotations and finger flexions to ensure the smaller muscles and joints of the hands are adequately prepared for the unique demands of this exercise. Maintaining correct form is crucial for preventing strains and other injuries associated with Zottman Curls. Keep your core engaged and maintain a straight back throughout the movement to protect your spine. Avoid swinging the weights or using momentum, as this can lead to shoulder or lower back injuries. Keep your elbows close to your body to minimize stress on the shoulder joints. The grip transition at the top of the movement should be smooth and controlled to prevent wrist strain. If you feel any sharp pain, especially in the biceps tendon near the elbow or in the wrists, stop the exercise immediately. It's also important to balance your training by including exercises for the antagonist muscles (triceps) to maintain muscular equilibrium around the elbow joint, reducing the risk of imbalances that can lead to injury. Start with lighter weights to master the form before progressing to heavier loads, as the unique nature of Zottman Curls can be challenging for beginners. Recognizing the signs of overtraining is crucial for long-term arm health and continuous progress. Symptoms of overtraining include persistent muscle soreness, decreased performance, mood changes, and increased susceptibility to injuries. To avoid overtraining, ensure you're allowing adequate rest between arm workouts (usually 48-72 hours). Incorporate deload weeks every 4-6 weeks where you reduce the volume or intensity of your training. Pay attention to your body's signals and don't hesitate to take extra rest days if needed. Remember, muscle growth occurs during recovery, not during the workout itself. Proper nutrition, hydration, and sleep are also critical components of injury prevention and overall training success. For those engaging in frequent or intense Zottman Curl sessions, consider using wrist supports to provide additional stability, especially when working with heavier weights. However, use supports judiciously to avoid over-reliance and ensure continued development of natural joint strength and stability. Tracking Progress with Zottman Curls Keeping a detailed workout log is an invaluable tool for tracking progress in your Zottman Curl routine. Record the weight used, number of sets and repetitions, and any variations performed in each session. Also, note subjective factors like how the exercise felt, any areas of difficulty, and your energy levels. This comprehensive tracking allows you to identify patterns in your training, recognize when you're ready to increase weight or volume, and pinpoint any potential issues before they become problems. Digital apps can make this process easier, often providing analytics and progress charts, but a simple notebook can be just as effective if used consistently. Over time, this log will become a roadmap of your progress, helping you make informed decisions about your training and keeping you motivated as you see your strength and endurance improve in Zottman Curls. Regularly measuring arm and forearm circumference provides a tangible way to track muscle growth from your Zottman Curl efforts. For the upper arm, measure at the peak of the bicep when flexed. For the forearm, measure at the widest point when the arm is extended. Take measurements at the same points on your arms and under the same conditions (e.g., first thing in the morning, or always after a workout) for consistency. Measure both arms to ensure balanced development. While arm size can fluctuate due to factors like hydration and recent workouts, tracking over time will reveal true muscle growth. Combine these measurements with progress photos taken every 4-6 weeks under consistent lighting and poses to visually document changes in muscle size and definition. This visual and numerical data can be highly motivating and help you adjust your Zottman Curl training program as needed. Pay particular attention to forearm development, as this is a unique benefit of Zottman Curls compared to traditional bicep exercises. Setting and tracking strength benchmarks is crucial for objectively assessing your progress with Zottman Curls. Set specific goals, such as increasing your curl weight by 5 pounds or being able to perform a certain number of strict form reps with a target weight. Periodically test your maximum Zottman Curl weight (with proper form) to gauge strength improvements. You might also track related exercises that benefit from improved arm strength, such as pull-ups or farmer's walks, as progress in these areas often correlates with gains from Zottman Curls. Remember, progress isn't always linear; plateaus are normal and can be overcome with patience and strategic training adjustments. Celebrate each milestone, no matter how small, as these achievements are powerful motivators for continued progress. Consider setting both short-term (e.g., monthly) and long-term (e.g., yearly) goals to keep yourself motivated and focused on continuous improvement in your Zottman Curl performance. Zottman Curls for Beginners For beginners embarking on their Zottman Curl journey, starting with the right weight is crucial. A good rule of thumb is to choose a weight that allows you to perform 10-12 repetitions with proper form, where the last few reps are challenging but not impossible. This typically means starting with lighter dumbbells, often in the 5-10 pound (2-5 kg) range for most beginners. It's far better to start light and focus on perfecting your form than to risk injury or develop bad habits by lifting too heavy too soon. As you gain strength and confidence, you can gradually increase the weight. Remember, progress in strength training is a marathon, not a sprint. Your initial focus should be on mastering the movement pattern and developing a strong mind-muscle connection with your biceps and forearms. Form should be the primary focus for beginners practicing Zottman Curls. Start by standing with feet shoulder-width apart, holding a dumbbell in each hand at arm's length, palms facing forward. Keep your upper arms stationary and close to your torso throughout the movement. Curl the weights up towards your shoulders by flexing your biceps, exhaling as you lift. At the top of the movement, pause briefly and rotate your wrists to transition to a palms-down position. Then, slowly lower the weights back to the starting position while inhaling, maintaining the palms-down grip. Control the descent; don't let gravity do the work. Practice in front of a mirror if possible to ensure you're maintaining proper posture and not swinging the weights. Pay particular attention to keeping your wrists straight and your elbows close to your body throughout the movement. Focus on the grip transition at the top, ensuring it's smooth and controlled. Progression for beginners should be gradual and focused on consistency. Aim to perform Zottman Curls 2-3 times a week as part of a broader strength training routine. Start with 2-3 sets of 10-12 repetitions, focusing on maintaining perfect form throughout each set. As you become more comfortable with the movement, you can start to experiment with different variations like seated or incline Zottman Curls. Increase the weight only when you can complete all sets and reps with good form. A good progression might be to increase the weight by 2-5 pounds every 2-3 weeks, depending on your individual progress. Be patient and consistent; noticeable improvements in strength and muscle definition will come with time and proper technique. Don't be discouraged if progress seems slow at first; building a solid foundation of strength and proper form is crucial for long-term success and injury prevention in your Zottman Curl journey. Remember to balance your arm training with exercises for other muscle groups to ensure overall balanced development. Conclusion Zottman Curls stand as a cornerstone exercise in the realm of arm training, offering a unique blend of benefits that make them indispensable for anyone looking to develop strong, well-defined arms. Throughout this comprehensive guide, we've explored the multifaceted aspects of this powerful movement, from its anatomical foundations to advanced techniques for seasoned lifters. The versatility of Zottman Curls makes them an essential tool for a wide range of fitness goals, whether you're a bodybuilder seeking impressive arm development, an athlete looking to enhance functional strength, or a fitness enthusiast aiming for overall arm health and aesthetics. We've delved into the proper execution of Zottman Curls, emphasizing the importance of correct form to maximize results and minimize injury risk. The various types of Zottman Curls discussed – from seated to incline variations – provide a rich repertoire of movements to keep your arm training diverse and challenging. By incorporating these variations and the advanced techniques we've covered, such as drop sets and tempo variations, you can continue to stimulate muscle growth and strength gains well into your training journey. Remember, the key to success with Zottman Curls, as with any exercise regimen, lies in consistency, proper progression, and attention to form. As you apply the knowledge and techniques shared in this guide, you're well-equipped to transform your arm training routine. Remember to balance your Zottman Curl training with exercises for other arm muscles and to pay close attention to your nutrition and recovery. Regular tracking of your progress, whether through workout logs, measurements, or strength benchmarks, will help you stay motivated and make informed decisions about your training. Embrace the journey of mastering Zottman Curls, stay patient with your progress, and watch as your dedication pays off in impressive bicep development, enhanced forearm strength, and overall arm power. With Zottman Curls as a staple in your workout arsenal, you're on the path to achieving the strong, functional, and aesthetically pleasing arms you've always desired. See More: ⤵ Dumbbell Bicep Curls: Your Ultimate Guide Biceps Workouts: How Can i build a Strong Arms Unlocking Arm Strength with Machine High Row Zottman Curl Barbell Curls: Unleash Your Bicep Power and Forge Iron-Like Arms! Alternating Curls: An Effective Exercise for Stronger Biceps Hammer Curls: The Ultimate Guide to Bigger Arms Dumbbell Curls: The Ultimate Guide to Sculpted Arms Arm Workout: A Complete Routine for Strong and Toned Arms