Resultados de busca
207 results found with an empty search
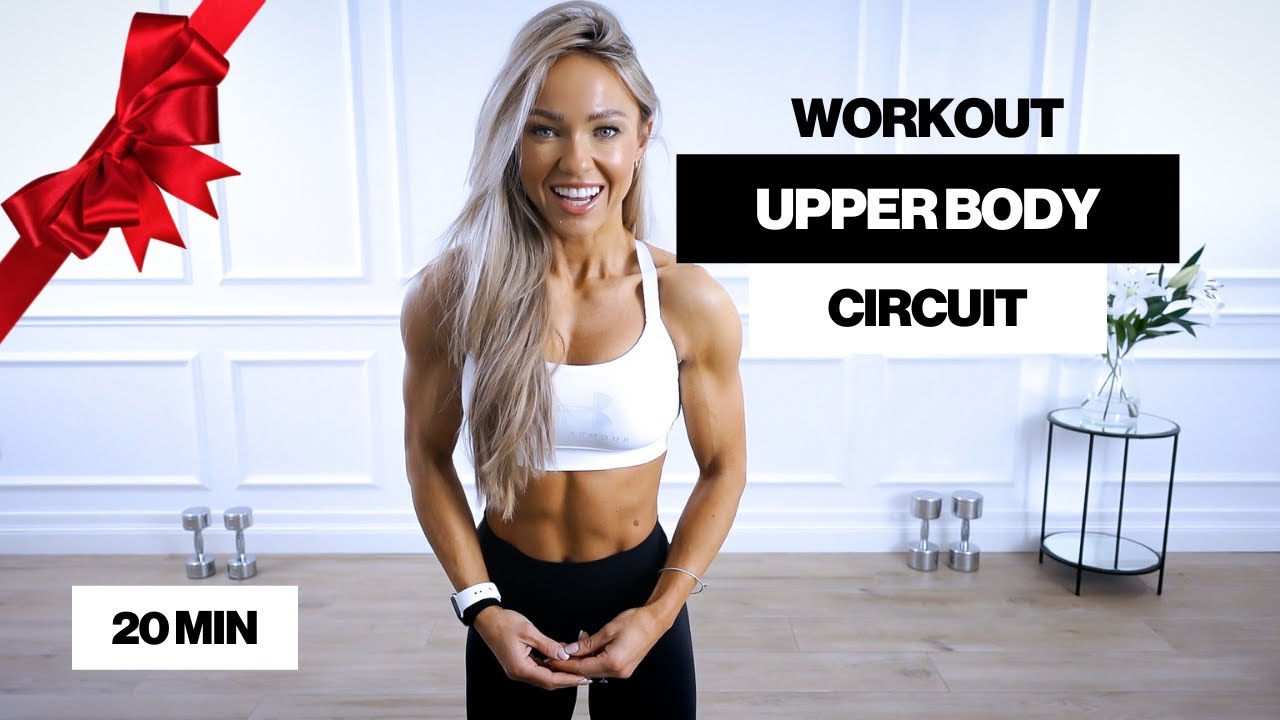
- T-Bar Row Guide for a Massive Back
If I walk through the heavy lifting zone at Academia Central Fitness, I can almost guarantee I’ll see someone butchering the T-Bar Row. They load up four or five heavy plates on the bar, grab the handle, and proceed to do a bizarre standing-up motion, jerking their entire torso up and down while their lower back rounds like a scared cat. They drop the weight, gasping for air, thinking they just crushed their back workout. The reality? Their lats barely did any work, and their lumbar spine just took a beating that will catch up to them in a few years. As a fitness expert and gym manager, I need to be brutally honest with you: the T-Bar Row is one of the greatest mass-builders in existence for your upper and middle back. But it is a highly technical movement. If you can't control your hips and your core, you have no business loading up the bar. If you want to stop the pain, fix your posture, and build a back that looks thick and powerful from every angle, this comprehensive guide will teach you how to master the T-Bar Row once and for all. The Anatomy: Why the T-Bar Row is a Mass Builder To understand why this exercise is so effective, you need to look at the angle of the pull. Unlike a standard barbell row where the weight is pulled straight up against gravity, the T-Bar Row operates on an arc (because one end of the bar is anchored to the floor). This unique angle allows you to lift heavier weights with slightly more stability, placing a massive amount of mechanical tension on the thickest muscles of your back: Latissimus Dorsi (Lats): The large "wings" on the sides of your back that give you that coveted V-taper. Rhomboids and Middle Traps: The deep muscles between your shoulder blades. The T-Bar Row is arguably the best exercise for adding thickness to this area, giving your back that 3D, armored look. Erector Spinae (Lower Back): These muscles work in deep isometric contraction to keep your spine safe and stable while you row. Quick tip: If you find that your grip gives out before your back muscles do, don't let that limit your growth. While I don't have a specific strap link here, focusing on forearm strength or using lifting straps is a game-changer for heavy rows. The 3 Fatal Mistakes Destroying Your Spine If you feel a sharp pain in your lower back instead of a deep pump between your shoulder blades, you are likely committing one of these three biomechanical crimes: 1. The "Ego Lift" (Standing Too Upright) This is the most common mistake. If your torso is almost vertical (standing straight up), you are no longer doing a row; you are doing a weird shrug. To hit the lats and rhomboids, your torso needs to be bent over at roughly a 45-degree angle to the floor. 2. Rounding the Lower Back If your lower back looks like a turtle shell, you are putting catastrophic shearing force on your spinal discs. Your spine must remain neutral. You achieve this by pushing your hips back (the hip hinge) and keeping your chest puffed out. 3. Jerking the Weight Using momentum to throw the weight up means your muscles aren't doing the work. The movement must be controlled. Pull the weight with your back, pause for a split second at the top, and lower it slowly. How to Execute the Perfect T-Bar Row (Step-by-Step) Leave your ego at the door. Strip a plate off the bar and follow this checklist to ensure maximum muscle activation: Step 1: The Setup and The Hip Hinge Stand over the bar with the plates in front of you. Plant your feet shoulder-width apart. Here is the secret: Don't just bend over. Push your hips backward (like you are closing a car door with your glutes) until your torso is at a 45-degree angle. Keep your chest up and your core braced tight. Comfort matters here. If your clothes restrict your hip hinge, your lower back will round to compensate. I always recommend training in high-stretch, breathable fabrics. Check out these high-performance options for Men and Women to ensure you can get into the proper rowing position without restriction. Step 2: The Grip Grab the V-handle (or the bar itself if you don't have a handle). Take a deep breath, brace your abs hard, and lift the weight slightly off the floor. This is your starting position. The weight should not touch the floor again until the set is over. Step 3: The Pull (Concentric Phase) Squeeze your shoulder blades together and pull the handle toward your lower chest/upper stomach. Imagine pulling with your elbows, not your hands. Keep your elbows tucked relatively close to your body. Step 4: The Squeeze and Descent (Eccentric Phase) Hold the weight at the top for 1 second, squeezing your back muscles as hard as you can. Then, lower the weight slowly and with control (take about 3 seconds). Let your shoulder blades stretch forward at the bottom, but do not let your lower back round. The "Heavy Lifter's Kit" for Maximum Back Growth The T-Bar Row is a heavy, compound movement that drains your central nervous system and tears down a massive amount of muscle tissue. To progress safely and actually build that muscle, your nutrition and supplementation must be dialed in. 1. Brute Force and Central Nervous System Focus Rowing heavy weight while holding a static hip hinge requires immense focus and cellular energy. A scoop of Dux Nutrition Pre-Workout 30 minutes before your session provides the mental clarity to keep your form strict when the set gets tough. Furthermore, the explosive power to pull the bar comes from your ATP stores. Saturating your muscles daily with Max Titanium Creatine is the proven way to add more plates to your T-Bar Row over time. 2. Immediate Muscle Reconstruction The back is a massive complex of thick muscle fibers. After a heavy rowing session, those micro-tears need immediate repair. A post-workout shake with Dux Isolate Whey Protein delivers the fast-absorbing, high-quality amino acids required to trigger protein synthesis and turn that workout into real, dense muscle mass. Frequently Asked Questions (FAQ) Is the T-Bar Row better than the Barbell Row? They are both excellent, but they feel different. The T-Bar Row locks the bar into a fixed path (the landmine anchor), which provides slightly more stability. This often allows people to lift heavier weights with a bit more confidence than a free-standing barbell row. A great back routine can alternate between the two. Where should I feel the T-Bar Row? You should feel a deep burn and pump in the middle of your back (between your shoulder blades) and in your lats (the sides of your back). You will also feel your hamstrings and lower back working to hold your body in position, but they should not feel sharp pain. Can I do T-Bar Rows without the V-handle? Yes! If your gym doesn't have the V-handle attachment, you can simply grip the thick part of the barbell right behind the plates. This forces a narrower grip, which is fantastic for targeting the lats. Conclusion and Your Next Steps The T-Bar Row is not an exercise for the faint of heart, but it is a mandatory tool if you want a back that looks thick, wide, and powerful. The moment you stop jerking the weight, lock your hips into a solid 45-degree hinge, and focus on pulling with your elbows, your back development will skyrocket. Technique always dictates the result. Do you want the exact roadmap to build a respected, powerful physique? If you want to stop wasting time with bad form and get access to complete periodization spreadsheets, execution videos, and the diet protocols that actually build muscle, join our Central Anabolik PRO members area. 👉 Click here to access Central Anabolik PRO and transform your physique with science and real results!
- Best Leg Workout for Mass: A Science-Backed Routine
Key Takeaways (Quick Summary): The Goal: A complete leg workout must target all four major muscle groups: Quadriceps, Hamstrings, Glutes, and Calves. The Routine: Start with heavy compound movements (Squats) when your central nervous system is fresh, then move to isolation exercises (Leg Extensions/Curls). The Secret to Calves: Stop doing fast, bouncy calf raises. Pause for 2 seconds at the bottom stretch to actually force the muscle to grow. Joint Safety: Heavy leg days destroy knee cartilage. Supporting your joints with Glucosamine and proper warm-ups is non-negotiable. "Never skip leg day." It is the oldest rule in the gym, yet walking around any commercial fitness center will reveal a sea of massive upper bodies supported by underdeveloped "chicken legs." Building a massive, powerful lower body is brutal. It requires more oxygen, burns more calories, and demands more mental fortitude than any other workout. But the rewards are unmatched: a heavy leg workout triggers a massive release of natural testosterone and growth hormone, which helps build muscle all over your entire body. If you are tired of doing random machines and want a structured, science-backed plan to force your legs to grow, you are in the right place. Here is the ultimate leg workout for mass. The Anatomy of a Complete Leg Day To build tree-trunk legs, you cannot just do squats and leave. Your lower body is a complex system of massive muscle groups that require different angles and stimuli: Quadriceps (Front of the thigh): Responsible for knee extension. Built via Squats, Leg Presses, and Extensions. Hamstrings (Back of the thigh): Responsible for knee flexion and hip extension. Built via Deadlifts and Leg Curls. Glutes (The buttocks): The most powerful muscle in the human body. Built via Hip Thrusts and deep Squats. Calves (Lower leg): Stubborn muscles that require high volume and deep stretching to grow. The Ultimate Leg Workout Routine (Copy This) Perform this routine 1 to 2 times per week. Rest 2 to 3 minutes between heavy compound sets, and 60 to 90 seconds between isolation sets. 1. Barbell Back Squat (The Mass Builder) Sets: 4 Reps: 6-8 Execution: Keep your chest up, brace your core, and drop your hips below parallel. Drive through your mid-foot to explode upward. Pro Tip: Squats drain your ATP (cellular energy) faster than any other lift. To push more weight and recover faster between sets, you need fully saturated muscles. Taking a daily scoop of Optimum Nutrition Micronized Creatine is mandatory for anyone serious about increasing their squat max. 2. Romanian Deadlift (RDL) Sets: 3 Reps: 8-10 Execution: Hold a barbell or dumbbells with a slight bend in your knees. Push your hips straight back until you feel a massive stretch in your hamstrings, then squeeze your glutes to stand back up. Keep the bar glued to your legs the entire time. 3. The Leg Press (Quad Isolation) Sets: 3 Reps: 10-12 Execution: Place your feet slightly lower on the platform to shift the tension directly onto your quadriceps. Lower the sled as far as possible without your lower back lifting off the seat pad. 4. Walking Lunges Sets: 3 Reps: 12 steps per leg Execution: Grab a pair of dumbbells and take long strides. Drop your back knee to one inch above the floor. This exercise fixes strength imbalances between your left and right leg. Home Gym Hack: If you train at home, lunges are your best friend. A set of Bowflex SelectTech Adjustable Dumbbells allows you to progressively overload your lunges and squats without needing a full gym setup. 5. Seated Leg Extensions superset with Lying Leg Curls Sets: 3 Reps: 15 reps each (No rest between the two exercises) Execution: This is the "pump" phase. Focus on a slow, controlled negative (lowering the weight) to flood the muscles with blood and nutrients. 6. Standing Calf Raises Sets: 4 Reps: 15-20 Execution: The reason your calves aren't growing is that you are bouncing the weight. Lower your heels until you feel a deep stretch, pause for 2 full seconds, and then explode up onto your toes. How to Protect Your Knees on Leg Day Lifting heavy weights is incredible for your muscles, but the sheer compressive force of Squats and Leg Presses can wreak havoc on your knee joints over time. If your knees ache when you walk up the stairs after leg day, your cartilage is crying out for help. You cannot build massive legs if you are sidelined with joint pain. To protect your knees and reduce workout-induced inflammation, you need to support your connective tissue: Stop the Inflammation: Supplementing with a high-absorption Turmeric Curcumin with BioPerine helps naturally block the inflammatory enzymes in your joints after a heavy session. Rebuild the Cartilage: Your body needs raw materials to repair the knee joint. A daily dose of Glucosamine + Chondroitin provides the exact building blocks required to keep your knees lubricated and pain-free. Conclusion: Fuel Your Recovery You do not grow in the gym; you grow when you recover. A brutal leg workout creates micro-tears in the largest muscles of your body. If you do not feed them immediately, you are leaving gains on the table. Consume a high-quality protein shake, eat a carbohydrate-rich meal, and get plenty of sleep. Take this routine to the gym, focus on your form, push close to failure, and watch your legs transform. Want to make sure your Squat form is perfect before loading up the bar? Watch this quick tutorial! See More: ⤵ Leg Press: Unleashing Leg Power Leg Extensions: The Ultimate Guide to Mastering Unveiling the Magic of Seated Leg Curl: Your Ticket to Sculpted Legs Bulgarian Split Squats: Mastering Leg Gains Unleash Your Leg Strength with the Russian Squat Program Dumbbell Thruster: Unleashing Full-Body Power Best Leg Workout Arnold Leg Workout How To Do The Leg Curl Hack Squat: Complete Guid Dumbbell Squat: Your Comprehensive Guide Goblet Squat: A Comprehensive Guide Calf Raises: Elevate Your Leg Day Romanian Deadlifts: Proper Form and Technique Barbell Squats: Strength and Stability
- 28-Day Wall Pilates Challenge: Free Plan & Real Results (FAQ)
The 28 Day Wall Pilates Challenge is an innovative fitness program designed to transform your body and mind using nothing more than your body weight and a wall. This challenge takes the principles of traditional Pilates and adapts them to a vertical plane, creating a unique and effective workout that can be done in the comfort of your own home. Over the course of 28 days, participants will engage in a series of wall-based exercises that target core strength, flexibility, and overall body conditioning. One of the key benefits of the 28 Day Wall Pilates Challenge is its accessibility. Unlike many fitness programs that require expensive equipment or gym memberships, this challenge can be completed by anyone with access to a clear wall space. Who can participate in the 28 Day Wall Pilates Challenge? The short answer is: everyone! This challenge has been designed to be inclusive and adaptable. Understanding Wall Pilates (credits: Rachel’s Fit Pilates) The 28 Day Wall Pilates Challenge offers a holistic approach to fitness. While the physical benefits are significant, including : Improved posture Increased core strength Enhanced flexibility the challenge also promotes mental well-being. The focus required for proper form and the mind-body connection fostered by Pilates can lead to reduced stress, improved concentration, and a greater sense of overall well-being. By committing to this challenge, participants are not just working towards physical goals, but are also investing in their mental health. Wall Pilates Foundation The foundation of the 28 Day Wall Pilates Challenge, is a modern adaptation of the classical Pilates method developed by Joseph Pilates in the early 20th century. While traditional Pilates is typically performed on a mat or specialized equipment like the Reformer, Wall Pilates utilizes a vertical surface to provide support and resistance. This approach was developed to make Pilates more accessible and to introduce new challenges to the practice. The wall serves as a guide for alignment and a tool for resistance, allowing practitioners to perform exercises with greater control and precision. The principles of Wall Pilates The principles of Wall Pilates align closely with those of traditional Pilates, including focus on core strength, proper breathing, alignment, and fluid movement. However, the 28 Day Wall Pilates Challenge takes these principles and applies them in a vertical plane, which introduces unique benefits. Working against gravity in this way can intensify the workout, particularly for the core muscles. It also provides immediate feedback on alignment, as practitioners can feel their body's contact with the wall throughout the exercises. One of the key differences between Wall Pilates and traditional Pilates, which makes the 28 Day Wall Pilates Challenge so effective, is the constant engagement required to maintain position against the wall. This engagement targets deep stabilizing muscles that might not be as intensively worked in mat-based exercises. Additionally, the wall provides support for individuals who might struggle with certain movements on the floor, making some advanced Pilates exercises more accessible to beginners or those with limited mobility. Equipment for Wall Pilates The equipment needed for the 28 Day Wall Pilates Challenge is minimal, which is part of its appeal. The primary requirement is a clear, flat wall space. Participants may also want to use a yoga mat for comfort during floor transitions, and a small towel to place behind the back for certain exercises. Some optional equipment that can enhance the challenge includes resistance bands, small hand weights, or a Pilates ball. However, these are not necessary to successfully complete the 28 Day Wall Pilates Challenge, making it an incredibly accessible program for people of all fitness levels and budgets. The Benefits of Wall Pilates: A Beginner-Friendly Workout Guide Week 1: Foundation Building (Days 1-7) The first week of the 28 Day Wall Pilates Challenge is all about building a strong foundation. During these initial seven days, participants will focus on mastering basic Wall Pilates exercises and principles. This week is crucial as it sets the tone for the entire challenge and helps prevent injury by ensuring proper form from the start. The exercises introduced in Week 1 will target major muscle groups, with a particular emphasis on core engagement, which is central to all Pilates practice. The first week of the 28 Day Wall Pilates Each day of Week 1 in the 28 Day Wall Pilates Challenge will introduce new exercises while reinforcing those learned on previous days. Typical exercises might include wall roll-downs to warm up the spine, wall squats to strengthen the legs and core, and wall planks to build overall body strength. The difficulty level is kept manageable to allow participants to focus on form and technique rather than intensity. By the end of the week, participants should feel more comfortable with the basic movements and be ready to progress to more challenging exercises. Proper breathing techniques are a key focus during Week 1 of the 28 Day Wall Pilates Challenge. Participants will learn how to coordinate their breath with movement, which is essential for maximizing the benefits of Pilates. The wall serves as an excellent tool for this, as it provides feedback on the expansion of the rib cage during inhalation. Exercises like wall-supported chest expansion help participants visualize and feel the correct breathing pattern, setting a foundation for more advanced work in later weeks. The daily workout plan for Week 1 of the 28 Day Wall Pilates Challenge typically includes a 15-20 minute routine that can be done at any time of day. Each session begins with a brief warm-up, followed by a series of foundational exercises, and ends with a cool-down and stretch. Week 2: Increasing Intensity (Days 8-14) (credits: Rachel’s Fit Pilates) As participants enter Week 2 of the 28 Day Wall Pilates Challenge, they'll notice a gradual increase in the intensity and complexity of the exercises. Building upon the foundation established in Week 1, this second week introduces more challenging variations of familiar movements and incorporates new exercises that require greater strength and control. The goal is to progressively overload the muscles, promoting continued improvement and preventing plateaus in strength and flexibility gains. The second week of the 28 Day Wall Pilates During Week 2 of the 28 Day Wall Pilates Challenge, there's a heightened focus on targeting specific muscle groups. While the core remains a central focus, more attention is given to the arms, legs, and back. Exercises like: wall push-ups for upper body strength wall scissors for leg and core engagement wall rolls for spinal articulation become part of the daily routine. These exercises not only build strength but also improve body awareness and control, key aspects of the Pilates method. The daily workout plan for Week 2 of the 28 Day Wall Pilates Challenge typically extends to 20-25 minutes, allowing for the inclusion of more exercises and longer hold times. Each day's routine is carefully structured to provide a balanced full-body workout while progressively challenging participants. For example, Monday might focus on lower body strength, Tuesday on upper body and core, Wednesday on flexibility and balance, and so on. This varied approach ensures that all muscle groups are targeted throughout the week, maximizing the benefits of the 28 Day Wall Pilates Challenge. As the intensity increases in Week 2, participants in the 28 Day Wall Pilates Challenge are encouraged to pay close attention to their form and listen to their bodies. While the goal is to push beyond comfort zones, it's crucial to maintain proper alignment and technique to prevent injury and ensure optimal results. Modifications are provided for each exercise, allowing participants to adjust the difficulty level as needed. By the end of Week 2, participants should feel a noticeable improvement in their strength, flexibility, and overall body awareness, setting the stage for the more advanced work to come in the second half of the 28 Day Wall Pilates Challenge. Week 3: Advanced Movements (Days 15-21) As participants enter Week 3 of the 28 Day Wall Pilates Challenge, they'll notice a significant leap in the complexity and intensity of the exercises. This week introduces more advanced Wall Pilates sequences that challenge both physical strength and mental focus. The movements in Week 3 build upon the foundational skills developed in the first two weeks, combining them into flowing sequences that require greater coordination and body control. These advanced movements are designed to push participants out of their comfort zones and accelerate their progress in the 28 Day Wall Pilates Challenge. Week 3 of the 28 Day Wall Pilates Challenge The daily workout plan for Week 3 of the 28 Day Wall Pilates Challenge typically extends to 25-30 minutes, allowing for more complex sequences and longer holds. Each day's routine is carefully crafted to build upon the previous day's work while preparing the body for the next day's challenges. For example, a day focused on core and upper body strength might be followed by a day emphasizing lower body and flexibility work. This strategic planning ensures balanced progress throughout the 28 Day Wall Pilates Challenge and helps prevent overuse injuries. By the end of Week 3, participants in the 28 Day Wall Pilates Challenge should notice significant improvements in their strength, flexibility, and overall body control. They may find that everyday movements feel easier and that they have a greater sense of physical confidence. However, it's important to remember that everyone progresses at their own pace. The 28 Day Wall Pilates Challenge is designed to be challenging but achievable, and modifications are always provided to ensure that each participant can work at a level appropriate for their current abilities while continuing to make progress. Week 4: Peak Performance (Days 22-28) (credits: Rachel’s Fit Pilates) The final week of the 28 Day Wall Pilates Challenge is all about reaching peak performance. By this point, participants have built a strong foundation, increased their strength and flexibility, and mastered advanced movements. Week 4 brings all of these elements together to maximize the benefits of Wall Pilates. The exercises in this week are designed to push participants to their limits, helping them achieve breakthroughs in their practice and finish the challenge on a high note. The final week of the 28 Day Wall Pilates Challenge During Week 4 of the 28 Day Wall Pilates Challenge, the focus shifts to combining exercises for full-body workouts that target multiple muscle groups simultaneously. These compound movements not only provide an intense physical challenge but also require a high level of concentration and body awareness. For example, participants might perform a wall-supported plank that flows into a pike position, then into a single-leg balance, all while maintaining core engagement and proper alignment. These complex sequences epitomize the progress made throughout the 28 Day Wall Pilates Challenge. The daily workout plan for the final week of the 28 Day Wall Pilates Challenge typically lasts 30-35 minutes, representing the peak intensity of the program. Each session is carefully structured to include a dynamic warm-up, an intense main workout, and a thorough cool-down and stretch. The routines are designed to challenge participants while also celebrating how far they've come in their 28-day journey. Despite the increased difficulty, modifications are still provided to ensure that all participants can complete the final week safely and effectively. As the 28 Day Wall Pilates Challenge comes to a close, participants are encouraged to reflect on their progress and set goals for continuing their Wall Pilates practice beyond the challenge. Many find that they've not only improved their physical fitness but also developed a greater sense of body awareness and mental focus. The final day of the challenge often includes a culminating workout that incorporates elements from all four weeks, allowing participants to see and feel how much they've progressed. This sense of achievement is a powerful motivator for maintaining the habits developed during the 28 Day Wall Pilates Challenge. The Mental Benefits of the 28 Day Wall Pilates Challenge The 28 Day Wall Pilates Challenge offers significant mental benefits alongside its physical advantages. Stress reduction. One of the most notable is stress reduction. The focused, controlled movements of Wall Pilates require concentration, which can act as a form of moving meditation. This mindful practice helps to clear the mind of daily stressors and promotes a sense of calm. As participants progress through the challenge, they often report feeling more relaxed and better equipped to handle daily pressures. The regular practice established during the 28 Day Wall Pilates Challenge can become a valuable stress-management tool that extends beyond the challenge itself. Improved focus Improved focus is another mental benefit of the 28 Day Wall Pilates Challenge. The precision required in Wall Pilates exercises demands full attention, training the mind to concentrate on the present moment. This enhanced ability to focus often carries over into other areas of life, with many participants noting improved productivity at work or in studies. As the challenge progresses and exercises become more complex, the mental engagement required increases, further honing concentration skills. By the end of the 28 days, many find that they're better able to maintain focus on tasks for longer periods. The 28 Day Wall Pilates Challenge is an excellent way to build a stronger mind-body connection. As participants become more attuned to their body's movements and sensations during the exercises, they develop a greater overall body awareness. increased awareness This increased awareness can lead to improved posture and movement patterns in daily life, as well as a better understanding of the body's needs in terms of rest, nutrition, and activity. The mind-body connection fostered during the challenge often results in participants feeling more "in tune" with their bodies, leading to better overall self-care practices. Boosting self-confidence Boosting self-confidence is a powerful mental benefit of completing the 28 Day Wall Pilates Challenge. As participants progress through the challenge, mastering new skills and observing improvements in their strength and flexibility, they experience a sense of achievement. This success in the physical realm often translates to increased confidence in other areas of life. Many participants report feeling more self-assured and willing to take on new challenges after completing the 28 days. The discipline required to stick with the challenge also builds mental resilience, further contributing to improved self-esteem and a more positive self-image. Frequently Asked Questions about the 28 Day Wall Pilates Challenge Can I do this challenge if I'm a complete beginner? The answer is a resounding yes. The 28 Day Wall Pilates Challenge is designed to be accessible for all fitness levels, including complete beginners. The challenge starts with foundational exercises and gradually progresses in difficulty. Each exercise comes with modifications, allowing beginners to work at their own pace and level. As you progress through the challenge, you'll build strength and confidence, preparing you for more advanced movements in the later weeks. How much time should I dedicate each day to the 28 Day Wall Pilates Challenge?" The daily time commitment varies throughout the challenge but generally ranges from 15 to 30 minutes per day. Week 1 typically starts with shorter sessions of about 15-20 minutes, gradually increasing to 25-30 minutes by Week 4. This progressive approach allows your body to adapt to the new routine. Remember, consistency is more important than duration, especially at the beginning. If you're pressed for time, it's better to do a shorter session than to skip a day entirely. What if I miss a day?" is a concern for many participants. Life can be unpredictable, and it's normal to occasionally miss a day of the challenge. If this happens, don't stress or give up. Simply resume the challenge where you left off. If you miss several days, you might want to repeat the last day you completed before moving forward. The key is to get back on track as soon as possible and not let a missed day derail your entire challenge. Remember, the 28 Day Wall Pilates Challenge is about progress, not perfection. Will I see results in just 28 days? While individual results can vary, many participants report noticeable improvements in strength, flexibility, and body awareness by the end of the 28 Day Wall Pilates Challenge. Some may see visible changes in muscle tone, especially in the core and arms. However, the most significant changes are often in how you feel – increased energy, better posture, and improved overall well-being. Keep in mind that sustainable fitness is a journey, and the 28 Day Wall Pilates Challenge is an excellent starting point for long-term health and fitness goals. Conclusion About Wall Pilates As we wrap up our comprehensive guide to the 28 Day Wall Pilates Challenge, it's important to recap the key benefits and takeaways. This challenge offers a unique approach to fitness that combines the principles of Pilates with the support and resistance of a wall. Over the course of 28 days, participants can expect to see improvements in core strength, flexibility, posture, and overall body awareness. The progressive nature of the challenge ensures that everyone, from beginners to fitness enthusiasts, can participate and see results. The 28 Day Wall Pilates Challenge is more than just a physical endeavor; it's a holistic approach to wellness that encompasses both body and mind. Through consistent practice, participants often report reduced stress levels, improved focus, and increased self-confidence. The challenge provides a structured way to establish a regular exercise routine, which can be the foundation for long-term fitness habits. We encourage all readers to take the first step and commit to the 28 Day Wall Pilates Challenge. Remember, the journey of a thousand miles begins with a single step – or in this case, a single Wall Pilates exercise. Whether your goal is to improve your physical fitness, reduce stress, or simply try something new, this challenge offers a path to achieve it. The beauty of the 28 Day Wall Pilates Challenge lies in its accessibility and adaptability to individual needs and fitness levels. As you embark on this 28-day journey, keep in mind that consistency is key. Celebrate small victories along the way, be patient with your progress, and most importantly, listen to your body. The skills and habits you develop during this challenge can serve as a springboard for a lifelong journey of health and wellness. So, are you ready to transform your body and mind with the 28 Day Wall Pilates Challenge? Your wall awaits! See More Exercises: ⤵ Pilates for Beginners: Your Path to Core Strength and Flexibility 28 Day Wall Pilates Challenge: Strengthen, Tone, Transform! What is the Difference Between Regular Pilates and Wall Pilates? Will 20 Minutes of Pilates Make a Difference? What Happens When You Do Wall Pilates Every Day? Can You Really Lose Weight with Wall Pilates? How Much Does Wall Pilates Cost?
- Ab Workout Alchemy: Transforming Your Core in 30 Days
Are you ready to unlock the secrets of a sculpted, powerful core? Welcome to "Ab Workout Alchemy: Transforming Your Core in 30 Days" – your comprehensive guide to achieving the abs you've always dreamed of through targeted and effective ab workouts. In just one month, you'll embark on a transformative journey that goes beyond mere aesthetics, delving into the true strength and functionality of your core through strategically designed ab workouts. This isn't just another ab workout program. It's a holistic approach to core transformation, blending cutting-edge exercise science with practical, actionable steps. Whether you're a fitness novice or a seasoned gym-goer, this guide will provide you with the knowledge and tools to revolutionize your midsection through carefully crafted ab workouts. Over the next 30 days, you'll discover: The intricate anatomy of your core and why it matters for effective ab workouts Scientifically-backed ab workout principles for maximum results A day-by-day ab workout plan that progressively challenges your core Nutrition strategies to reveal your hard-earned ab definition Tips for overcoming common ab workout obstacles and staying motivated Get ready to transform not just your body, but your understanding of core fitness. Let's turn your ab goals into reality through the alchemy of smart ab workout training, proper nutrition, and unwavering dedication. Table of Contents: Understanding Core Anatomy The Science Behind Effective Ab Workouts Preparing for Your 30-Day Ab Workout Journey The 30-Day Ab Workout Plan Daily Ab Workout Breakdowns Nutrition Guide for Core Definition Supplementary Cardio for Fat Loss and Ab Definition Recovery and Rest for Optimal Ab Development Tracking Your Ab Workout Progress Common Ab Workout Challenges and How to Overcome Them Advanced Ab Workout Techniques for Continued Growth Conclusion Embark on this 30-day ab workout adventure, and watch as your core transforms from ordinary to extraordinary. Your journey to a stronger, more defined midsection starts now! Understanding Core Anatomy To truly master the art of ab workouts and achieve a transformative core in just 30 days, it's crucial to understand the complex anatomy that makes up this pivotal area of your body. The core is far more than just the visible six-pack muscles; it's an intricate system of muscles that work in harmony to stabilize your spine, support your posture, and facilitate movement in all planes. At the forefront of core anatomy are the rectus abdominis muscles, commonly known as the "six-pack." These muscles run vertically along the front of your abdomen and are responsible for flexing the spine. However, focusing solely on these muscles, as many traditional ab workouts do, is a mistake that programs like P90X have helped to correct by introducing a more comprehensive approach to core training. Beneath the rectus abdominis lie the transverse abdominis, often referred to as the body's natural weight belt. This deep muscle wraps around your midsection like a corset, providing stability and compression to the entire abdominal area. Strengthening this muscle is crucial for not only aesthetic purposes but also for improving overall core strength and stability, a focus that programs like Athlean X emphasize heavily in their core training protocols. The obliques, both internal and external, run along the sides of your core and are responsible for rotation and lateral flexion of the trunk. These muscles play a vital role in sports performance and daily activities that require twisting or bending to the side. Often overlooked in traditional ab workouts but essential for a truly strong core are the muscles of the lower back, including the erector spinae group. These muscles work in tandem with the abdominal muscles to maintain proper posture and spine alignment. Neglecting these muscles can lead to imbalances and potential back pain, which is why comprehensive programs like Les Mills CORE incorporate exercises that target both the front and back of the core. The hip flexors, while not strictly part of the core, work closely with the abdominal muscles and play a crucial role in many ab workout exercises. Understanding the interplay between the hip flexors and the abs is key to performing exercises correctly and avoiding unnecessary strain on the lower back. Another critical component of core anatomy is the pelvic floor muscles. These muscles form the base of the core and play a vital role in stability and continence. While often associated with women's health, a strong pelvic floor is important for everyone and can contribute significantly to overall core strength and function. Many advanced ab workout programs now include exercises that engage the pelvic floor, recognizing its importance in the larger picture of core fitness. Understanding core anatomy goes beyond just knowing which muscles to target in your ab workouts; it's about comprehending how these muscles work together in functional movements. This holistic understanding is what sets apart transformative ab workout programs from those that simply promise six-pack abs. By focusing on the core as an integrated unit, you can develop not just a visually impressive midsection, but a functionally strong and stable center that improves your overall fitness and daily life. As you embark on your 30-day journey to transform your core through targeted ab workouts, keep in mind that you're not just working towards aesthetic goals, but building a foundation of strength that will benefit your entire body. The Science Behind Effective Ab Workouts The science of effective ab workouts has evolved significantly over the years, moving away from endless crunches to a more nuanced and evidence-based approach. At the heart of this evolution is the understanding of muscle fiber types within the core muscles. The abdominal muscles, like other muscles in the body, consist of both slow-twitch (Type I) and fast-twitch (Type II) fibers. Slow-twitch fibers are crucial for endurance and stabilization, while fast-twitch fibers are responsible for powerful, explosive movements. A well-rounded ab workout routine, such as those found in P90X or Athlean X programs, targets both types of fibers to ensure comprehensive core development. The principle of progressive overload is fundamental to effective ab workouts. This concept, which involves gradually increasing the demand on the musculoskeletal system to continually make gains in muscle size, strength, and endurance, is as applicable to core training as it is to any other muscle group. However, applying progressive overload to ab workouts requires creativity and variety. Unlike larger muscle groups where simply adding weight is often sufficient, core training may involve increasing repetitions, extending time under tension, altering body positions, or incorporating unstable surfaces to progressively challenge the muscles. This is where programs like Les Mills CORE excel, offering a structured progression that continually challenges participants at all levels. Another crucial scientific principle in ab workouts is the concept of neuromuscular adaptation. The core muscles play a vital role in stabilization and posture, functions that rely heavily on the nervous system's ability to recruit and coordinate muscle fibers efficiently. Effective ab workouts focus not just on strengthening the muscles, but on improving the brain-muscle connection. This is achieved through exercises that require balance, coordination, and precise movement control. Many Athlean X workouts incorporate this principle, using exercises that challenge the core's stabilizing function in various planes of motion, leading to improved overall core performance and not just superficial muscle development. The role of nutrition in revealing abdominal definition cannot be overstated and is grounded in solid scientific principles. No matter how effective your ab workouts are, your abs won't be visible if covered by a layer of body fat. The science of fat loss for abdominal definition involves creating a caloric deficit while maintaining adequate protein intake to preserve muscle mass. However, it's not just about calories in versus calories out. The hormonal impact of different foods plays a crucial role. Foods that help regulate insulin levels and reduce inflammation can be particularly effective in reducing abdominal fat. This is why many successful ab transformation programs, including those in P90X, place a strong emphasis on nutrition alongside exercise. Recent scientific research has also highlighted the importance of recovery and sleep in effective ab workout routines. During sleep, the body releases growth hormone, which is crucial for muscle repair and growth. Additionally, adequate sleep helps regulate cortisol levels, a stress hormone that, when chronically elevated, can lead to increased abdominal fat storage. This understanding has led to a more holistic approach to ab workouts, where rest and recovery are given as much importance as the workouts themselves. Programs like Athlean X and Les Mills CORE incorporate this knowledge, emphasizing the importance of proper rest and recovery techniques to maximize the benefits of core training. Preparing for Your 30-Day Ab Workout Journey Embarking on a 30-day journey to transform your core through intensive ab workouts requires more than just motivation; it demands proper preparation and a clear understanding of what lies ahead. The first step in this preparation is setting realistic goals for your ab workout program. While the promise of a complete core transformation in 30 days is enticing, it's important to understand that results will vary based on factors such as your starting fitness level, diet, and genetics. Setting specific, measurable, achievable, relevant, and time-bound (SMART) goals will help you stay focused and motivated throughout the program. Whether your aim is to increase core strength, improve posture, or achieve better definition through your ab workouts, clearly defining your objectives will guide your efforts and help you track progress effectively. Equipment preparation is another crucial aspect of getting ready for your core transformation journey. While many effective ab workouts require nothing more than your body weight, having access to certain equipment can enhance your workouts and provide additional challenge and variety. Basic equipment such as a yoga mat for comfort during floor exercises, resistance bands for added tension, and a stability ball for balance and instability training can greatly expand your ab workout options. Programs like P90X often include a list of recommended equipment, but don't worry if you don't have everything – many ab exercises can be modified for bodyweight-only versions. The key is to work with what you have and focus on consistency rather than perfect conditions for your ab workouts. Mental preparation is equally important as physical preparation when it comes to ab workouts. A 30-day intensive core program will challenge you not just physically but mentally as well. It's essential to cultivate a positive mindset and develop strategies to stay motivated throughout the month of ab workouts. This might involve creating a vision board with your fitness goals, setting up a reward system for reaching ab workout milestones, or finding a workout buddy or online community for support and accountability. Many successful programs, such as Athlean X, emphasize the importance of mental toughness and provide motivational content to keep participants engaged and focused on their ab workout goals. Understanding the importance of consistency and commitment is crucial before starting your 30-day ab workout journey. Transforming your core in a month requires dedication and a willingness to stick to the program even when motivation wanes or results seem slow to come. It's helpful to schedule your ab workouts in advance, treating them as non-negotiable appointments with yourself. Programs like Les Mills CORE often provide structured schedules to follow, which can be incredibly helpful in maintaining consistency with your ab workouts. Remember, it's not just about the intensity of your ab workouts, but the consistency with which you perform them that will lead to real, lasting changes in your core strength and appearance. Lastly, preparing for your 30-day ab workout transformation involves setting up a supportive environment. This includes both your physical space and your social circle. Ensure you have a designated area for your ab workouts, even if it's just a small corner of your living room. Having a space ready and waiting for you eliminates one potential barrier to getting your ab workout done. Additionally, communicate your goals and commitment to friends and family. Their understanding and support can be invaluable, especially during challenging days of your ab workout program. Many successful fitness journeys, including those following popular programs like P90X or Athlean X, attribute a significant part of their success to a supportive environment and community. The 30-Day Ab Workout Plan The cornerstone of your core transformation journey is a carefully structured 30-day ab workout plan. This plan is designed to progressively challenge your core muscles, ensuring continuous improvement and preventing plateaus in your ab workouts. The program is divided into four distinct weeks, each building upon the last to create a comprehensive and effective core training regimen. Week 1 focuses on establishing a strong foundation, introducing basic ab workout exercises that target all areas of the core. This initial week is crucial for developing proper form and building the endurance necessary for the more challenging ab workouts ahead. Exercises in this week might include standard planks, basic crunches, and Russian twists, performed with a focus on maintaining perfect form rather than high repetitions. As you move into Week 2, the intensity of your ab workouts begins to increase. This week introduces more dynamic movements and starts to incorporate elements of instability to further challenge your core. Exercises like mountain climbers, bicycle crunches, and stability ball exercises become prominent in your ab workout routine. The goal here is to build upon the foundational strength developed in Week 1 while introducing your muscles to new stimuli. This progression is similar to what you might find in the early stages of P90X, where each week builds upon the last in a logical, structured manner to enhance the effectiveness of your ab workouts. Week 3 marks the introduction of advanced techniques and more complex movements in your ab workouts. This is where your core training really starts to intensify, incorporating exercises that challenge not just strength but also balance, coordination, and power. Athlean X-inspired exercises like hanging leg raises, dragon flags, and weighted Russian twists might be introduced here. The focus shifts from simply performing the ab exercises to maximizing muscle engagement through perfect form and mind-muscle connection. This week also sees an increase in the volume and intensity of the ab workouts, pushing your core to new limits. The final week, Week 4, is all about peak performance in your ab workouts. This week combines all the elements from the previous weeks into high-intensity, complex routines designed to push your core to its absolute limit. Expect to see advanced plyometric movements, combination exercises that target multiple areas of the core simultaneously, and challenging isometric holds in your ab workouts. This week might draw inspiration from the intensity of Les Mills CORE workouts, known for their ability to deliver maximum results in minimum time. The goal of this final week is not just to challenge your core strength and endurance, but to showcase the progress you've made over the past month of dedicated ab workouts. Throughout the 30-day plan, rest and active recovery days are strategically placed to ensure optimal muscle recovery and growth from your intense ab workouts. These days are not about complete inactivity but rather about engaging in low-intensity activities that promote blood flow and flexibility without overstressing the core muscles. Activities like gentle yoga, light cardio, or mobility work are excellent choices for these days. The placement of these recovery days is crucial and follows principles used in well-designed programs like P90X and Athlean X, which recognize the importance of rest in achieving maximum results from your ab workouts. Daily Ab Workout Breakdowns The success of your 30-day core transformation journey hinges on the detailed execution of each daily ab workout. These workouts are meticulously designed to target every aspect of your core, ensuring a balanced and comprehensive approach to abdominal training. Each day's ab workout routine is structured to provide the right balance of challenge and achievability, gradually increasing in intensity as you progress through the program. Let's break down what a typical day in this transformative ab workout journey might look like, drawing inspiration from effective programs like P90X, Athlean X, and Les Mills CORE. A typical daily ab workout begins with a proper warm-up, a crucial step often emphasized in programs like Athlean X. This warm-up isn't just about raising your heart rate; it's designed to activate your core muscles and prepare them for the intense ab workout ahead. It might include exercises like cat-cow stretches, light twists, and dynamic planks. This initial phase helps to increase blood flow to the core muscles, improve flexibility, and mentally focus you for the challenging ab workout ahead. The warm-up usually lasts about 5-10 minutes and is tailored to the specific ab exercises you'll be performing in the main workout. Moving into the main portion of the ab workout, you'll encounter a mix of exercises that target different areas of your core. A common structure might involve starting with exercises that focus on the rectus abdominis (the "six-pack" muscles), such as crunches or sit-ups, performed for a specific number of repetitions or time duration. Following this, you might move on to exercises that target the obliques, like Russian twists or side planks. The ab workout then typically progresses to more challenging compound movements that engage multiple areas of the core simultaneously, such as mountain climbers or V-ups. This varied approach ensures that all aspects of your core are being trained effectively during each ab workout session. The sets, reps, and rest periods in each daily ab workout are carefully calibrated to provide the right level of stimulus for muscle growth and endurance development. Early in the program, you might see higher rep ranges with shorter rest periods, focusing on building muscular endurance and establishing proper form in your ab workouts. As the program progresses, the rep ranges might decrease while the difficulty of the ab exercises increases, shifting the focus towards building strength and power. Rest periods are strategically placed and timed to maintain an elevated heart rate while allowing for sufficient recovery between sets. This approach to structuring sets and reps in ab workouts is similar to what you might find in a Les Mills CORE workout, known for its scientific approach to exercise programming. Proper form and technique are emphasized throughout each daily ab workout. Detailed instructions and cues are provided for each ab exercise, ensuring that you're not just going through the motions but truly engaging your core muscles effectively. For instance, when performing a plank, you'll be reminded to keep your body in a straight line, engage your glutes, and pull your navel towards your spine. These form cues are crucial for maximizing the effectiveness of each ab exercise and preventing injury. Programs like P90X are known for their attention to form and technique in ab workouts, recognizing that proper execution is key to achieving optimal results. As you progress through the 30 days, you'll notice the daily ab workouts becoming more challenging and complex. This might involve the introduction of equipment like resistance bands or stability balls, or the incorporation of more advanced ab exercise variations. For example, a standard crunch might evolve into a weighted crunch, and then into a decline crunch with a twist. This progression ensures that your muscles are continually challenged, preventing plateaus and promoting ongoing improvement in your ab workouts. The concept of progressive overload, a cornerstone of effective strength training, is applied throughout the program to ensure continuous gains in core strength and definition through your ab workouts. Nutrition Guide for Core Definition A crucial component of your 30-day ab workout transformation journey is a well-structured nutrition plan. The saying "abs are made in the kitchen" holds a great deal of truth, as no amount of ab workouts can outwork a poor diet when it comes to revealing abdominal definition. This nutrition guide is designed to complement your intensive ab workouts, providing your body with the fuel it needs to perform and recover while also supporting fat loss to unveil your newly strengthened abs. The approach combines principles from successful programs like P90X, Athlean X, and Les Mills, adapting them into a comprehensive nutrition strategy for optimal core definition to support your ab workout regimen. The foundation of your nutrition plan starts with calculating your caloric needs to support your ab workouts and overall transformation goals. This involves determining your Total Daily Energy Expenditure (TDEE), which takes into account your basal metabolic rate, activity level, and the increased calorie burn from your intense ab workouts. Once you have your TDEE, the plan typically recommends a moderate calorie deficit to promote fat loss while still providing enough energy for your ab workouts and recovery. This deficit is usually around 15-20% below your TDEE, a range that promotes steady, sustainable fat loss without sacrificing muscle mass or energy levels for your ab workouts. It's important to note that this calorie target isn't static; as your body composition changes and your ab workout intensity increases, you may need to adjust your caloric intake accordingly. Macronutrient balance plays a crucial role in your nutrition plan for core definition and supporting your ab workouts. Protein takes center stage, with recommendations typically ranging from 1.6 to 2.2 grams per kilogram of body weight. This higher protein intake is essential for muscle recovery and growth, particularly important when you're in a calorie deficit and performing intense ab workouts. Carbohydrates, while often vilified in fat loss diets, are still an important part of your nutrition plan. They provide the energy needed for high-intensity ab workouts and help maintain muscle glycogen stores. However, the focus is on complex, nutrient-dense carbohydrates rather than simple sugars. Fats, especially healthy sources like avocados, nuts, and olive oil, are included in moderate amounts to support hormone production and overall health, which is crucial for the success of your ab workout program. Meal timing and frequency are also considered in this nutrition guide to support your ab workout routine. While the old bodybuilding advice of eating every 2-3 hours isn't necessary, the plan does emphasize the importance of pre- and post-workout nutrition for your ab workouts. A meal containing both carbohydrates and protein about 1-2 hours before your ab workout can provide the energy needed for an intense session. Post-workout, a similar combination helps kickstart the recovery process after your ab exercises. Some individuals may find success with intermittent fasting protocols, which can aid in fat loss when implemented correctly. However, these should be approached cautiously and tailored to individual preferences and schedules, ensuring they don't interfere with the energy demands of your ab workouts. Hydration is an often-overlooked aspect of nutrition that plays a vital role in core definition and supporting your ab workout performance. Proper hydration supports metabolism, aids in nutrient transport, and can help reduce water retention, which can obscure abdominal definition. The nutrition plan recommends consuming at least 8-10 glasses of water daily, with additional intake around your ab workout times. Herbal teas and other non-caloric beverages can also contribute to your daily fluid intake. It's important to note that sometimes what appears to be fat around the midsection is actually bloating or water retention, which can be mitigated through proper hydration and by avoiding foods that cause individual sensitivities, allowing your ab workout results to shine through more clearly. Supplementary Cardio for Fat Loss and Ab Definition While targeted ab workouts are crucial for building core strength and muscle, incorporating supplementary cardio into your 30-day transformation plan is essential for maximizing fat loss and revealing your newly sculpted abs. Cardio not only helps create the calorie deficit necessary for fat loss but also improves overall cardiovascular health and endurance, complementing your core-focused ab workouts. The key is to choose cardio activities that align with your goals and integrate seamlessly with your ab training routine. This approach to combining strength training with strategic cardio is a hallmark of comprehensive fitness programs like P90X, Athlean X, and Les Mills, each offering unique perspectives on the most effective cardio for fat loss and core definition to enhance your ab workout results. High-Intensity Interval Training (HIIT) stands out as one of the most effective forms of cardio for fat loss and core engagement, perfectly complementing your ab workouts. HIIT involves short bursts of intense exercise followed by brief recovery periods, a method that has been shown to be particularly effective in burning calories and boosting metabolism long after the workout is over. This afterburn effect, known as Excess Post-exercise Oxygen Consumption (EPOC), means you continue to burn calories at an elevated rate for hours after your HIIT session. Many HIIT workouts also incorporate exercises that engage the core, such as mountain climbers or burpees, providing an additional stimulus for your abdominal muscles and enhancing the effects of your dedicated ab workouts. Programs like Athlean X often include HIIT sessions that are specifically designed to complement core training, maximizing both fat loss and abdominal engagement. Steady-state cardio, while sometimes overlooked in favor of more intense methods, still has its place in a well-rounded fat loss plan to support your ab workout goals. Activities like jogging, cycling, or swimming at a moderate intensity for longer durations can help burn calories and improve cardiovascular endurance. These longer, less intense sessions can be particularly beneficial on days when you're recovering from intense ab workouts, allowing you to continue burning calories without overstressing your abdominal muscles. The key is to find a balance between intensity and duration that fits your fitness level and complements your ab workout schedule. Many successful fitness programs, including P90X, incorporate a mix of high-intensity and steady-state cardio to cater to different energy systems and recovery needs while supporting overall fat loss and ab definition goals. Incorporating cardio that directly engages the core can provide a dual benefit of cardiovascular exercise and additional ab training, enhancing the effects of your dedicated ab workouts. Activities like rowing, kickboxing, or even dance-based workouts like those found in Les Mills programs can be excellent choices. These forms of cardio require significant core stabilization and often include rotational movements that target the obliques. By choosing cardio activities that engage the core, you're essentially getting bonus ab work while also burning calories for fat loss. This efficient approach to training is particularly valuable in a time-limited program like a 30-day transformation challenge, where every minute counts towards your ab workout goals. The timing and frequency of your cardio sessions are important considerations in your overall program, especially in relation to your ab workouts. Generally, it's recommended to separate intense cardio sessions from your primary ab workouts to ensure you have enough energy for both. You might consider doing cardio on your active recovery days or at a different time of day than your ab workouts. For example, you could perform your ab routine in the morning and a cardio session in the evening, or vice versa. The frequency of cardio sessions can vary based on your current fitness level and goals, but typically, 3-4 cardio sessions per week, ranging from 20-45 minutes each, can be effective when combined with your core training and proper nutrition to support your ab workout transformation. Recovery and Rest for Optimal Ab Development In the pursuit of a transformed core through intensive ab workouts in just 30 days, it's easy to fall into the trap of thinking that more is always better. However, recovery and rest are absolutely crucial components of your journey, playing a vital role in muscle growth, fat loss, and overall progress in your ab workout program. Without adequate recovery, even the most perfectly designed ab workout plan can fall short of its potential. This section explores the importance of rest and recovery in your 30-day core transformation program, drawing insights from successful fitness approaches like those found in P90X, Athlean X, and Les Mills CORE. First and foremost, it's important to understand that muscle growth and strength gains occur during rest periods, not during the ab workouts themselves. When you perform intense core exercises, you create micro-tears in your muscle fibers. It's during the recovery period that your body repairs these tears, building the muscles back stronger and more resilient. This process, known as muscle protein synthesis, requires adequate rest time between ab workouts. Without sufficient recovery, you risk overtraining, which can lead to decreased performance, increased risk of injury, and even regression in your fitness goals. Most well-designed programs, including Athlean X, carefully structure rest days into their schedules to ensure optimal recovery and continued progress in your ab workout routine. Sleep plays a paramount role in recovery and should be a top priority during your 30-day ab workout transformation. During deep sleep stages, your body releases growth hormone, which is crucial for muscle repair and growth following your intense ab workouts. Aim for 7-9 hours of quality sleep each night. This might mean adjusting your schedule or creating a bedtime routine that promotes better sleep. Techniques like avoiding screens before bed, creating a cool and dark sleeping environment, and maintaining a consistent sleep schedule can significantly improve sleep quality. Programs like P90X often emphasize the importance of sleep in their overall fitness philosophy, recognizing its critical role in recovery and performance, especially when it comes to intensive ab workout regimens. Active recovery days are another key component of an effective rest and recovery strategy in your ab workout program. These are days when you engage in light, low-intensity activities rather than complete inactivity. Activities like gentle yoga, light swimming, or a leisurely walk can promote blood flow to your muscles, aiding in recovery without placing additional stress on your core. Many Les Mills CORE workouts include specific cool-down and recovery sessions that can be perfect for active recovery days. These activities not only help in physical recovery from your ab workouts but also provide mental refreshment, helping to prevent burnout and maintain motivation throughout your 30-day ab workout journey. Proper nutrition plays a crucial role in recovery from your ab workouts. Your body needs adequate nutrients to repair muscle tissue and replenish energy stores depleted during intense core training. Post-workout nutrition is particularly important; consuming a combination of protein and carbohydrates within 30 minutes to an hour after your ab workout can jumpstart the recovery process. Hydration is equally important, as water plays a vital role in nutrient transport and waste removal in the body. Aim to drink plenty of water throughout the day, especially around your ab workout times. Some programs, like Athlean X, provide specific nutritional guidance for recovery periods, recognizing the synergy between proper nutrition and effective rest in maximizing the benefits of your ab workouts. Tracking Your Ab Workout Progress Tracking your progress is a crucial aspect of any successful fitness journey, and it's particularly important in a focused 30-day ab workout transformation program. Effective tracking not only helps you stay motivated by visualizing your improvements but also allows you to make informed adjustments to your ab workout and nutrition plans as needed. This section will explore various methods for measuring your progress, drawing inspiration from successful programs like P90X, Athlean X, and Les Mills CORE, which all emphasize the importance of progress tracking in achieving fitness goals, especially when it comes to ab workouts. One of the most straightforward ways to track your core strength improvements is through performance metrics in key ab workout exercises. Keep a detailed log of the number of repetitions, duration of holds, or weight used in core exercises like planks, crunches, or weighted movements. For example, if you could hold a plank for 30 seconds at the start of the program and can hold it for 90 seconds by the end, that's a clear indication of improved core endurance. Similarly, if you're able to perform more reps of an ab exercise with the same weight or increase the weight while maintaining form, you're seeing tangible strength gains. Many fitness apps can help you log these metrics easily, allowing you to see your progression over time in your ab workout journey. Taking regular measurements of your waist and other body parts can provide insights into changes in your body composition resulting from your ab workouts. Use a flexible tape measure to record your waist circumference at the start of the program and then at regular intervals, perhaps weekly. It's important to be consistent with the location and tension of your measurements for accuracy. Keep in mind that changes in waist measurements can be influenced by factors like water retention and bloating, so don't be discouraged by small fluctuations. Programs like P90X often include body measurements as part of their tracking protocol, recognizing their value in demonstrating physical changes that might not be immediately visible from ab workouts alone. Progress photos are an incredibly powerful tool for tracking your ab workout transformation. Take photos of your midsection from the front, side, and back at the beginning of the 30 days and then at regular intervals throughout the program. Try to maintain consistent lighting, pose, and time of day for each set of photos to ensure accurate comparisons. These visual records can be incredibly motivating, often revealing changes from your ab workouts that might not be apparent day-to-day. Many successful transformation stories, including those from Athlean X programs, showcase the power of before-and-after photos in demonstrating dramatic core transformations achieved through dedicated ab workout routines. Assessing your performance in functional movements can also indicate progress in core strength and stability resulting from your ab workouts. Tests like the overhead squat, single-leg balance, or even everyday activities like carrying groceries can reveal improvements in core function that go beyond aesthetics. Pay attention to how these movements feel at the beginning of your ab workout journey compared to the end. Increased stability, better balance, and reduced lower back strain during daily activities are all signs of improved core strength and function, showcasing the real-world benefits of your ab workout program. Body composition measurements, while not always easily accessible, can provide valuable data on your overall progress from your ab workouts and nutrition plan. Methods like DEXA scans, bioelectrical impedance analysis, or even simple skinfold caliper measurements can give you information about changes in body fat percentage and lean muscle mass. While these methods don't isolate core measurements, they can provide a picture of overall body composition changes, which are often reflected in core definition. If these tools are available to you, consider taking measurements at the beginning and end of your 30-day ab workout program to quantify your transformation. Common Ab Workout Challenges and How to Overcome Them Embarking on a 30-day ab workout transformation journey is an exciting endeavor, but it's not without its challenges. Understanding these common hurdles and knowing how to overcome them can be the difference between achieving your ab workout goals and falling short. This section will address some of the most frequent challenges faced during intensive ab workout programs and provide strategies to overcome them, drawing insights from successful approaches used in programs like P90X, Athlean X, and Les Mills CORE. One of the most common challenges in ab workout routines is dealing with plateaus. After initial progress, you might find that your results seem to stall. This is a normal part of any fitness journey and doesn't mean you're doing anything wrong with your ab workouts. To overcome plateaus, try introducing variety into your ab workouts. This could mean changing the order of exercises, incorporating new ab movements, or adjusting the tempo of your reps. Programs like Athlean X are known for their constant variation in ab workouts, which helps prevent plateaus. Additionally, reassess your nutrition – sometimes a plateau is a sign that your body's caloric needs have changed as you've gotten fitter through your ab workout program. Managing soreness and fatigue is another significant challenge, especially in an intensive 30-day ab workout program. While some muscle soreness is normal, excessive fatigue can hinder your progress and increase the risk of injury during ab workouts. To combat this, ensure you're getting adequate rest and recovery time. This might mean incorporating more active recovery days or adjusting the intensity of your ab workouts. Proper nutrition, particularly post-workout, can also help manage soreness from intense ab exercises. Consider using techniques like foam rolling or gentle stretching to alleviate muscle tightness in your core area. Programs like P90X often include specific recovery routines that can be beneficial in managing soreness and maintaining consistent progress in your ab workout regimen. Staying motivated throughout the 30 days of ab workouts can be challenging, especially when results aren't immediately visible. To maintain motivation, set small, achievable goals in addition to your overall ab transformation goal. Celebrate these milestones as you reach them in your ab workout journey. Keep a workout journal to track your progress, noting improvements in strength and endurance in your core exercises. Visual aids like progress photos can be incredibly motivating, as they often reveal changes from your ab workouts that aren't apparent day-to-day. Many successful programs incorporate community aspects, like online forums or group classes, which can provide support and accountability. Les Mills CORE, for instance, often emphasizes the motivational power of group fitness in maintaining dedication to ab workouts. Time management is a common struggle for many people trying to fit a new ab workout routine into their busy lives. To overcome this, try scheduling your ab workouts like any other important appointment. Look for ways to make your ab workout routine more efficient – this might mean doing shorter, more intense workouts on busy days. Some programs offer modified versions of ab workouts for time-crunched individuals. Remember, consistency is key in ab training, so even a short workout is better than skipping it entirely. Planning and preparing meals in advance can also save time and help you stay on track with your nutrition goals to support your ab workout progress. Dealing with cravings and maintaining a clean diet can be particularly challenging during an intensive ab workout program. To manage this, focus on balanced, satisfying meals that include protein, complex carbohydrates, and healthy fats to support your ab workouts. Don't completely restrict yourself – allow for small, planned indulgences to prevent feeling deprived. Stay hydrated, as thirst is often mistaken for hunger. If cravings hit, try distracting yourself with a short walk or another activity. Many successful ab workout programs provide nutritional guidance and even meal plans to help participants stay on track while supporting their core training goals. Form and technique issues can hinder progress and increase the risk of injury in ab workouts. If you're struggling with proper form, don't hesitate to scale back the difficulty of ab exercises until you can perform them correctly. Utilize resources like video tutorials or consider working with a fitness professional to ensure you're performing ab exercises correctly. Programs like Athlean X are known for their detailed form instructions and emphasis on proper technique in ab workouts. Remember, quality of movement is more important than quantity when it comes to effective core training. Balancing ab workouts with other fitness goals can be challenging. You might worry that focusing intensively on your core will detract from other areas of fitness. To address this, look for ways to integrate ab work into your other training. Many compound exercises engage the core while working other muscle groups. Additionally, a strong core can actually enhance performance in other areas of fitness, from weightlifting to cardio activities. Programs like P90X demonstrate how ab training can be effectively integrated into a comprehensive fitness regimen. Dealing with comparison and unrealistic expectations is a mental challenge many face in their ab workout journey. It's important to remember that everyone's fitness journey is unique. Avoid comparing your ab workout progress to others, especially to heavily edited images on social media. Focus on your own improvements and how you feel, rather than trying to achieve an idealized appearance. Set realistic expectations – while significant changes can occur in 30 days of dedicated ab workouts, transformations take time and consistency beyond just one month. Managing stress and its impact on your ab workout goals is crucial. High stress levels can interfere with recovery, affect your eating habits, and even contribute to abdominal fat storage, potentially masking the results of your ab workouts. Incorporate stress-reduction techniques into your routine, such as meditation, deep breathing exercises, or yoga. Ensure you're getting enough sleep, as lack of sleep can increase stress hormones. Remember that your ab workouts themselves can be a great stress reliever. Lastly, dealing with setbacks or missed ab workouts can be discouraging. If you miss an ab workout or have a day where you don't stick to your plan, don't let it derail your entire program. Treat each day as a new opportunity to work towards your ab workout goals. Be flexible and willing to adjust your plan as needed. The most successful ab workout journeys are those that can adapt to life's unpredictability while maintaining overall consistency. Advanced Ab Workout Techniques for Continued Growth As you progress through your 30-day ab workout transformation journey, you may find yourself ready to take on more advanced challenges to continue pushing your limits and seeing results. This section explores advanced techniques that can help elevate your ab workouts to the next level, drawing inspiration from high-intensity programs like P90X, Athlean X, and Les Mills CORE. These techniques are designed for those who have already established a solid foundation in core strength through their initial ab workouts and are looking to further enhance their abdominal development and overall core performance. Incorporating weights and resistance is a powerful way to intensify your ab workouts. As your body adapts to bodyweight exercises, adding external resistance can provide the new stimulus needed for continued growth in your core muscles. This could involve using weighted plates, medicine balls, or resistance bands in exercises like Russian twists, woodchoppers, or pallof presses. For example, holding a dumbbell during crunches or using a weighted vest during planks can significantly increase the challenge of your ab workouts. Programs like Athlean X often incorporate weighted core exercises to push trainees beyond their comfort zones and stimulate new muscle growth in the abdominal area. When adding weights to your ab workouts, start conservatively and focus on maintaining perfect form to avoid injury. Isometric holds and timed sets are advanced techniques that can dramatically improve core endurance and stability in your ab workouts. Instead of performing repetitions, you hold challenging positions for extended periods. For instance, rather than doing standard planks in your ab workouts, you might progress to long-duration planks, aiming to hold the position for several minutes. Another example is the hollow body hold, where you maintain a curved position with your lower back pressed into the floor. These isometric exercises not only build incredible core strength but also improve your mind-muscle connection during ab workouts. Many Les Mills CORE workouts incorporate extended isometric holds to challenge participants' endurance and mental toughness in their ab training. Plyometric core exercises introduce explosive movements that can enhance power and athletic performance in your ab workouts. These high-intensity exercises include movements like plyo push-ups with a clap under the chest, explosive V-ups, or medicine ball slams. Plyometric training not only engages your core muscles but also improves the rate of force development, which is crucial for athletic performance and can take your ab workouts to a new level. P90X, known for its intense workouts, often includes plyometric elements in ab routines to create well-rounded, athletically-inclined physiques. When incorporating plyometrics into your ab workouts, ensure you have a solid strength base and start with lower impact variations before progressing to more intense versions. Advanced balance and stability work can take your ab workouts to new heights. This might involve performing exercises on unstable surfaces like BOSU balls, stability balls, or balance boards. For instance, try doing planks with your feet on a stability ball, or perform Russian twists while balancing on a BOSU ball. These exercises force your core to work overtime to maintain stability, engaging deeper muscles and improving overall balance and coordination. As you progress in your ab workout routine, you can combine unstable surfaces with weights for an even greater challenge to your core muscles. Incorporating multi-planar movements is another advanced technique to ensure comprehensive core development in your ab workouts. While many basic ab exercises work in the sagittal plane (forward and backward movements), advanced core training should also include movements in the frontal plane (side-to-side) and transverse plane (rotational). Exercises like woodchoppers, standing cable rotations, or Turkish get-ups challenge your core in multiple planes of motion, leading to more functional strength and improved athletic performance. This multi-planar approach is often emphasized in programs like Athlean X, which focus on developing well-rounded, athletic physiques through comprehensive ab workouts. Frequently Asked Questions About Ab Workouts As with any intensive fitness program, the 30-day ab workout transformation challenge often raises numerous questions from participants. Addressing these common queries not only provides clarity but also helps individuals prepare for and get the most out of their ab workout journey. Here, we'll tackle some of the most frequently asked questions about ab workouts, drawing on insights from popular programs like P90X, Athlean X, and Les Mills CORE to provide comprehensive answers. Q: How much time do I need to commit each day to see results from ab workouts? A: The time commitment can vary, but most participants find that dedicating 15-30 minutes per day to ab workouts is sufficient. This includes warm-up and cool-down periods. Some days may require slightly longer sessions, especially when incorporating more comprehensive core training. The key is consistency rather than lengthy workouts. Programs like Athlean X often emphasize the efficiency of shorter, high-intensity ab sessions over long, drawn-out workouts. Q: Do I need any special equipment for effective ab workouts? A: While many ab exercises can be performed with just your body weight, having access to some basic equipment can enhance your workouts. A yoga mat, resistance bands, and a set of dumbbells or kettlebells can be very useful for ab workouts. As you progress, items like a stability ball or ab wheel can add variety to your core training. However, the program provides modifications for those without equipment, similar to how P90X offers alternatives for different setups in their ab workout routines. Q: I'm a beginner. Are intense ab workouts too advanced for me? A: The ab workout program is designed to accommodate various fitness levels, including beginners. It starts with foundational core exercises and progressively increases in difficulty. Modifications are provided for each ab exercise to ensure you can participate safely and effectively regardless of your starting point. As you build core strength and confidence, you can gradually take on more challenging variations in your ab workouts. Q: How quickly can I expect to see results from ab workouts? A: While individual results vary, many participants notice improvements in core strength and endurance within the first two weeks of consistent ab workouts. Visual changes in abdominal definition typically become more apparent in the latter half of the program, provided you're also following the nutrition guidelines. Remember, factors like starting fitness level, diet adherence, and genetics play a role in how quickly you'll see changes from your ab workouts. Q: Can I do other workouts alongside my ab workout routine? A: Yes, but it's important to balance your activities to avoid overtraining. The ab workout program is designed to be comprehensive, so if you choose to include other workouts, consider reducing their intensity or frequency. Many find that light cardio or upper body strength training can complement the core program well. Listen to your body and adjust as needed to ensure proper recovery while maintaining your ab workout routine. Q: I have lower back issues. Is it safe for me to do intense ab workouts? A: The ab workout program includes exercises that can actually help strengthen the lower back and improve posture. However, if you have specific back issues, it's crucial to consult with a healthcare professional before starting any new exercise routine, including ab workouts. Many exercises offer modifications to reduce strain on the lower back. Programs like Athlean X often provide specific guidance for those with back concerns, emphasizing proper form and core engagement to protect the spine during ab workouts. Q: How important is diet in seeing results from ab workouts? A: Diet plays a crucial role in revealing the abdominal muscles you're working so hard to strengthen through ab workouts. The program includes nutritional guidance to support your core transformation goals. While you can still improve core strength without strict dieting, combining the ab workouts with proper nutrition will yield the best visible results. This approach aligns with comprehensive programs like P90X, which emphasize the synergy between exercise and nutrition in achieving optimal results from ab workouts. Q: Can women participate in this ab workout program, or is it designed for men? A: The ab workout program is suitable for both men and women. The principles of core strengthening and fat loss apply equally to all genders. Women may find that they build strength and definition without bulk, due to hormonal differences. Many successful core programs, including Les Mills CORE, are designed to be effective for all participants regardless of gender, focusing on overall core strength and functional fitness. Remember, while these answers provide general guidance, it's always best to listen to your body and consult with a healthcare professional if you have specific concerns about starting an intensive ab workout program. The key to success lies in consistency, proper form, and a holistic approach that combines effective ab workouts with proper nutrition and adequate rest. Conclusion As we reach the end of our comprehensive guide to the 30-day ab workout transformation challenge, it's important to reflect on the journey we've outlined and the potential it holds for transforming not just your physique, but your overall approach to fitness and well-being. This program, drawing inspiration from successful methodologies like those found in P90X, Athlean X, and Les Mills CORE, offers a holistic approach to core development through targeted ab workouts that goes far beyond simple aesthetics. Throughout this guide, we've explored the multifaceted nature of ab training, from understanding the complex anatomy of the abdominal and surrounding muscles to delving into advanced techniques for continued growth in your ab workouts. We've emphasized that a truly effective core transformation involves more than just endless crunches; it requires a balanced approach that includes targeted ab exercises, proper nutrition, adequate rest and recovery, and a mindset geared towards consistent progress. One of the key takeaways from this ab workout program is the importance of progressive overload and variety in your core training. By gradually increasing the challenge and incorporating a diverse range of ab exercises, you not only prevent plateaus but also develop a more functional and well-rounded core strength. This approach ensures that your gains from ab workouts translate into real-world benefits, improving your performance in other physical activities and daily tasks. We've also highlighted the crucial role of nutrition in revealing the results of your hard work in ab workouts. The saying "abs are made in the kitchen" holds true, and this program provides the nutritional guidance necessary to support your core development goals. By combining targeted ab exercises with proper eating habits, you create the optimal environment for transforming your midsection. The importance of rest and recovery in an intensive ab workout program cannot be overstated. This program recognizes that it's during periods of rest that your muscles actually grow and strengthen. By incorporating strategic rest days and emphasizing the value of sleep and active recovery, the program ensures that you can maintain the intensity required for significant changes in your ab workouts without risking burnout or injury. One of the strengths of this 30-day ab workout challenge is its adaptability. Whether you're a beginner just starting your fitness journey or an advanced athlete looking to take your core strength to the next level, the program offers modifications and progressions to suit your level. This flexibility ensures that everyone can participate and see meaningful results from their ab workouts, regardless of their starting point. The success stories and testimonials we've shared demonstrate the real-world impact of this approach to ab training. From improved athletic performance to enhanced daily functionality and increased confidence, the benefits of a strong, well-developed core extend far beyond just looking good at the beach. These stories serve as inspiration and proof of what can be achieved with dedication to consistent ab workouts and the right guidance. As you embark on or complete this 30-day ab workout journey, remember that it's not just about the end result, but about the habits and knowledge you gain along the way. The principles you learn – progressive overload, the importance of nutrition, the value of rest and recovery – are applicable to all areas of fitness and can serve you well in your future health and wellness endeavors. It's also important to recognize that while 30 days of dedicated ab workouts can bring significant changes, true fitness is a lifelong journey. This program provides a solid foundation and a kickstart to your core development, but the real challenge lies in maintaining and building upon these results over the long term. The habits and discipline you develop during these 30 days of ab workouts can set the stage for continued progress and a lasting commitment to your health and fitness. In conclusion, the 30-day ab workout transformation challenge offers a comprehensive, science-based approach to developing a strong, functional, and visually impressive core. By combining intense, targeted ab workouts with proper nutrition, rest, and recovery, it provides a blueprint for significant physical transformation in a relatively short period. However, its true value lies not just in the physical changes it can bring about, but in the knowledge, habits, and mindset it instills. As you move forward, whether you're just starting the ab workout program or reflecting on your completed journey, remember that every plank, crunch, and healthy meal is an investment in your overall health and well-being. Embrace the challenge of your ab workouts, stay consistent, and trust in the process. Your stronger, more defined core awaits, along with the confidence and improved quality of life that comes with it. Thank you for joining us on this exploration of ab workout transformation. Here's to your success in building a stronger, healthier you, from the inside out!
- Protein Powder Bloating: Real Causes & How to Prevent
Disclaimer: The information provided in this article is for educational purposes only and is not intended as medical advice. Always consult with your healthcare provider or a registered dietitian before making significant changes to your diet or supplement routine. We’ve all been there: you finish a tough workout, drink your standard protein shake, and within 30 minutes, your stomach expands like a balloon. You feel sluggish, gassy, and uncomfortable for the rest of the day. For years, the fitness industry pushed standard Whey Protein Concentrate as the only way to build muscle or lose weight. But for millions of adults—especially those over 30—standard whey is a digestive nightmare. If you have a sensitive stomach, irritable bowel syndrome (IBS), or a mild dairy intolerance, forcing down heavy shakes will only cause chronic inflammation in your gut. The good news? You don't have to give up on your protein goals. As a fitness and nutrition expert, I’ve tested and analyzed the market to bring you the best gut-friendly protein powders that build muscle, burn fat, and leave your stomach completely flat. Why Does Make You Bloat? Before we look at the solutions, you need to understand the enemy. Most cheap protein powders cause bloating due to three main culprits: Lactose: Standard whey concentrate is packed with lactose (milk sugar). As we age, our bodies produce less lactase, the enzyme needed to digest it. Artificial Sweeteners: Ingredients like sucralose, aspartame, and sugar alcohols (erythritol) can disrupt your gut microbiome and cause severe gas. Thickeners and Gums: Xanthan gum and guar gum are added to make shakes creamy, but they are notoriously hard for sensitive stomachs to break down. To avoid the bloat, you need protein sources that bypass these triggers. Here are the top science-backed alternatives. 1. Bone Broth Protein: The Ultimate Gut Healer If standard dairy destroys your stomach, Bone Broth Protein is the ultimate upgrade. Made by simmering animal bones and connective tissue, this protein is completely dairy-free, lactose-free, and soy-free. Even better, bone broth is naturally rich in gelatin, collagen, and amino acids like glutamine and glycine, which have been clinically shown to help repair the gut lining (often referred to as "leaky gut"). It doesn't just avoid causing stomach pain; it actively helps heal your digestive tract. Best for: People with severe dairy intolerances, leaky gut, or those following a Paleo diet. Top Recommendation: Ancient Nutrition Bone Broth Protein. It delivers 20g of clean protein per scoop, mixes easily, and contains zero artificial sweeteners. 2. Whey Protein Isolate: The Clean Classic Wait, isn't whey the problem? Yes and no. Standard whey concentrate is the problem. Whey Protein Isolate, on the other hand, goes through an extra filtration process that strips away almost all the fat and lactose. What you are left with is a pure, fast-absorbing protein that is generally well-tolerated even by people with mild lactose sensitivity. If you want the muscle-building benefits of whey without the gas, Isolate is the answer. Best for: Post-workout recovery, muscle building, and those who want a low-carb, low-calorie option. Top Recommendation: Isopure Zero Carb Whey Protein Isolate. With zero carbs, zero sugar, and 100% pure isolate, it is one of the lightest, cleanest proteins on the market. 3. Organic Plant Protein: The Vegan Alternative For those who want to avoid animal products entirely, plant-based proteins are the logical next step. However, cheap vegan proteins (like pure soy or low-quality pea protein) can also cause bloating. The secret is to look for a multi-source, organic plant protein that includes digestive enzymes and probiotics. Blending different plant sources (like pea, sprouted navy bean, and lentil) ensures you get a complete amino acid profile without overloading your gut with one specific plant compound. Best for: Vegans, vegetarians, and anyone looking to increase their whole-food intake. Top Recommendation: Garden of Life Sport Organic Plant Protein. Certified organic, NSF certified for sport, and packed with a probiotic blend specifically designed to aid digestion. 4. Collagen Peptides: The Invisible Protein While collagen shouldn't be your only source of protein (because it lacks the amino acid tryptophan to be a "complete" protein), it is the most gut-friendly supplement in existence. Collagen peptides dissolve completely clear in water or coffee, have zero taste, and are absorbed almost instantly. Like bone broth, collagen helps soothe and repair the digestive tract while providing incredible benefits for your joints, skin, and hair. Best for: Adding extra protein to your morning coffee, joint health, and anti-aging. Top Recommendation: Vital Proteins Collagen Peptides. The industry gold standard for purity and mixability. How to Choose the Right Protein for Your Stomach Still not sure which one to pick? Follow these simple rules: If you want to heal your digestion: Go with Bone Broth Protein. If your main goal is building muscle without lactose: Choose Whey Isolate. If you want a dairy-free, vegan option: Opt for Organic Plant Protein. Frequently Asked Questions (FAQs) 1. Why do I get gas from protein shakes? Gas is usually caused by your body's inability to break down the lactose in whey concentrate, or by a reaction to artificial sweeteners like sucralose and sugar alcohols commonly used to flavor the powder. 2. Is Bone Broth Protein as good as Whey for building muscle? Whey protein has a slightly higher concentration of leucine (the amino acid responsible for triggering muscle protein synthesis). However, Bone Broth Protein still provides an excellent amino acid profile for muscle repair, with the added benefit of being much easier to digest. 3. Can I mix these proteins with milk? If you have a sensitive stomach, mixing your protein with cow's milk defeats the purpose, as you are reintroducing lactose. Mix your powder with water, almond milk, or oat milk for the best digestive results. 4. What are digestive enzymes, and do I need them? Digestive enzymes (like protease, amylase, and lactase) help your body break down macronutrients into absorbable pieces. Choosing a protein powder that includes added enzymes (like the Garden of Life Plant Protein) can significantly reduce bloating. Conclusion: Fuel Your Body, Respect Your Gut You don't have to sacrifice your digestive comfort to hit your daily protein goals. The era of choking down thick, chalky, lactose-heavy shakes is over. By switching to a high-quality, highly bioavailable option like Bone Broth Protein, pure Whey Isolate, or an enzyme-rich Plant Protein, you can build muscle, boost your metabolism, and keep your stomach completely flat. Listen to your body, upgrade your supplement stack, and finally enjoy your post-workout recovery. Scientific References & Sources Nutrients (Journal): The Impact of Whey Protein on the Gut Microbiome and Digestion. (Discusses the differences in tolerability between whey concentrate and isolate). Clinical and Experimental Gastroenterology: Gelatin tannate reduces the proinflammatory effects of lipopolysaccharide in human intestinal epithelial cells. (Highlights the gut-healing properties of amino acids found in bone broth and collagen). Journal of the International Society of Sports Nutrition: The effects of protein supplements on muscle mass, strength, and aerobic and anaerobic power in healthy adults.
- Bulgarian Split Squat: Build Bigger Legs & Fix Muscle Imbalances
The Bulgarian Split Squat is a powerful unilateral leg exercise that has gained immense popularity among fitness enthusiasts, athletes, and trainers alike. This challenging movement involves elevating one foot behind you while performing a single-leg squat with the other leg, creating a unique combination of strength, balance, and stability work. As we delve into the world of Bulgarian Split Squats, you'll discover why this exercise has become a staple in many lower body workout routines. The origins of the Bulgarian Split Squat can be traced back to Bulgarian weightlifting coaches who popularized this movement as a way to develop exceptional leg strength and balance in their athletes. While the name might suggest a complex or exotic exercise, the Bulgarian Split Squat is actually a variation of the traditional split squat, with the key difference being the elevated rear foot. This simple modification transforms the exercise into a highly effective tool for building unilateral strength and correcting muscle imbalances. One of the primary reasons the Bulgarian Split Squat has gained such widespread acclaim is its versatility and effectiveness. Whether you're a beginner looking to improve your leg strength and stability, or an advanced athlete aiming to enhance your performance, the Bulgarian Split Squat offers benefits for all fitness levels. This exercise not only targets major muscle groups like the quadriceps, glutes, and hamstrings but also engages smaller stabilizing muscles, promoting overall lower body development and functional strength. As we explore the Bulgarian Split Squat in detail, you'll learn proper form, variations, and programming strategies to maximize the benefits of this exercise. Whether your goal is to build muscle, improve athletic performance, or simply enhance your everyday functional fitness, mastering the Bulgarian Split Squat can be a game-changer in your fitness journey. So, let's dive in and discover how this powerhouse exercise can transform your lower body workouts and help you achieve your fitness goals. Muscles Targeted by Bulgarian Split Squats The Bulgarian Split Squat is renowned for its ability to target multiple muscle groups simultaneously, making it an incredibly efficient exercise for lower body development. The primary muscles engaged during this movement are the quadriceps, glutes, and hamstrings. As you lower your body into the squat position, your quadriceps work to control the descent and power the ascent, while your glutes and hamstrings provide crucial support and stability throughout the movement. This comprehensive engagement of the major leg muscles is what makes the Bulgarian Split Squat such an effective exercise for building overall leg strength and muscle mass. While the quadriceps, glutes, and hamstrings are the star players in the Bulgarian Split Squat, several secondary muscle groups also come into play. Your calves are activated as they help stabilize your ankle and foot during the movement. Your core muscles, including the abdominals and lower back, work overtime to maintain balance and proper posture throughout the exercise. Additionally, the hip flexors of the rear leg are stretched and engaged, contributing to improved hip mobility and flexibility. This multi-muscle engagement is one of the reasons why Bulgarian Split Squats are considered a functional exercise, mimicking real-life movements and sports-specific actions. One of the unique benefits of the Bulgarian Split Squat is its ability to promote muscle balance and symmetry. As a unilateral exercise, it allows you to work each leg independently, which can help identify and correct strength imbalances between your left and right sides. This is particularly beneficial for athletes who may have developed asymmetries due to their sport, or for individuals recovering from injuries. By focusing on each leg separately, you can ensure that both sides of your body are developing equally, reducing the risk of injury and improving overall performance. Furthermore, the Bulgarian Split Squat's emphasis on balance and stability engages numerous smaller stabilizing muscles throughout the lower body and core. These muscles, often overlooked in traditional bilateral exercises like regular squats, play a crucial role in maintaining joint health and preventing injuries. By consistently incorporating Bulgarian Split Squats into your workout routine, you're not just building visible muscle, but also strengthening the intricate network of stabilizing muscles that support your major muscle groups. This comprehensive muscle engagement contributes to improved overall lower body function, better posture, and enhanced athletic performance. Step-by-Step Guide to Performing the Bulgarian Split Squat Mastering the proper technique of the Bulgarian Split Squat is crucial for maximizing its benefits and preventing injury. To begin, find a bench or platform about knee-height and stand about two feet in front of it, facing away. Extend one leg behind you and place the top of your foot on the bench. This is your starting position. Your front foot should be far enough forward that when you lower into the squat, your knee stays behind or in line with your toes. Take a moment to find your balance in this position before beginning the movement. Once you're set up, initiate the Bulgarian Split Squat by bending your front knee and hip, lowering your body straight down. Keep your torso upright and your core engaged throughout the movement. Lower yourself until your back knee nearly touches the ground, or as far as you can while maintaining proper form. At the bottom of the movement, your front thigh should be parallel to the ground or slightly below parallel. Pause briefly at the bottom, feeling the stretch in your rear leg's hip flexor and the engagement in your front leg's quadriceps and glutes. To return to the starting position, drive through the heel of your front foot, extending your hip and knee to stand back up. Focus on using your quadriceps and glutes to power the movement, rather than pushing off with your back foot. The movement should be controlled throughout, both on the way down and up. Repeat for the desired number of repetitions before switching legs. It's important to perform an equal number of reps on both sides to maintain balance and symmetry in your lower body development. Common mistakes to avoid when performing Bulgarian Split Squats include leaning too far forward, allowing your front knee to cave inward, or not lowering yourself far enough. Make sure to keep your chest up and your core engaged to maintain proper posture. Your front knee should track in line with your toes, and aim to achieve at least a 90-degree bend in your front knee at the bottom of the movement. If you're new to the exercise, start with bodyweight only and focus on perfecting your form before adding additional weight. Remember, proper technique is key to reaping the full benefits of the Bulgarian Split Squat and avoiding potential injuries. Benefits of Incorporating Bulgarian Split Squats in Your Workout One of the primary benefits of incorporating Bulgarian Split Squats into your workout routine is the enhanced unilateral leg strength it develops. Unlike traditional squats that work both legs simultaneously, the Bulgarian Split Squat focuses on one leg at a time, allowing for greater muscle activation and strength development in each individual leg. This unilateral focus helps to identify and correct any strength imbalances between your left and right sides, leading to more balanced overall leg strength. Over time, this can translate to improved performance in various sports and activities that require single-leg strength, such as running, jumping, or changing direction quickly. Another significant advantage of the Bulgarian Split Squat is its ability to improve balance and stability. The exercise requires you to maintain your balance on one leg while performing a complex movement, which engages your core and stabilizing muscles throughout your lower body. This heightened demand for balance not only strengthens these stabilizing muscles but also improves your proprioception - your body's ability to sense its position in space. Enhanced balance and stability can have far-reaching benefits, from reducing the risk of falls in everyday life to improving athletic performance in sports that require quick, precise movements. Bulgarian Split Squats are also excellent for increasing athletic performance. The exercise mimics many sport-specific movements, such as lunging, cutting, and jumping off one leg. By strengthening the muscles used in these actions and improving your single-leg stability, Bulgarian Split Squats can directly enhance your performance in various sports. Additionally, the exercise helps to develop power and explosiveness in your legs, which is crucial for activities like sprinting, jumping, and quick direction changes. Many athletes and coaches incorporate Bulgarian Split Squats into their training programs specifically for these performance-enhancing benefits. Lastly, Bulgarian Split Squats contribute significantly to better functional fitness for daily activities. The single-leg focus of the exercise closely mimics many everyday movements, such as climbing stairs, stepping over obstacles, or picking up objects from the floor. By strengthening the muscles used in these actions and improving your balance and stability, Bulgarian Split Squats can make everyday tasks easier and reduce the risk of injury during daily activities. This functional strength is particularly beneficial as we age, helping to maintain mobility and independence. Whether you're an athlete looking to improve performance or someone simply wanting to move better in daily life, incorporating Bulgarian Split Squats into your routine can yield significant functional benefits. Variations of the Bulgarian Split Squat The Bodyweight Bulgarian Split Squat is the foundational variation of this exercise and is excellent for beginners or those focusing on perfecting their form. To perform this variation, follow the basic Bulgarian Split Squat technique without any additional weight. This allows you to focus on maintaining proper balance, alignment, and range of motion. Bodyweight Bulgarian Split Squats are also great for high-rep endurance work or as a warm-up before moving on to weighted variations. Even advanced lifters can benefit from incorporating bodyweight reps to refine their technique or as part of a high-volume workout. The Dumbbell Bulgarian Split Squat is a popular progression from the bodyweight version. Hold a dumbbell in each hand at your sides while performing the movement. This added resistance increases the challenge to your muscles, promoting greater strength and muscle growth. You can vary the weight and rep scheme to target different aspects of fitness - use heavier weights for lower reps to focus on strength, or lighter weights for higher reps to build endurance. The dumbbell variation also allows for unilateral loading, where you can hold a dumbbell only on the working side for an extra balance challenge. For those looking to lift heavier and focus on maximal strength, the Barbell Bulgarian Split Squat is an excellent option. Hold a barbell across your upper back, as you would for a back squat, while performing the Bulgarian Split Squat movement. This variation allows for significant weight to be added, making it ideal for strength athletes or those looking to build substantial lower body strength. The barbell version also engages your upper back and core to a greater degree, as you work to stabilize the bar throughout the movement. To add an extra balance and mobility challenge, try the Elevated Front Foot Bulgarian Split Squat. In this variation, you place your front foot on a small elevation (like a weight plate) while keeping your back foot elevated as usual. This increased range of motion demands greater flexibility in your hip flexors and quadriceps while also intensifying the balance requirement. This variation is particularly beneficial for athletes looking to improve their lower body mobility and stability simultaneously. As with all variations, start with bodyweight before adding extra resistance to ensure you can maintain proper form throughout the increased range of motion. Bulgarian Split Squat vs. Traditional Squats When comparing Bulgarian Split Squats to traditional squats, one of the most significant differences lies in muscle activation. While both exercises target similar muscle groups, the Bulgarian Split Squat places a greater emphasis on unilateral (single-leg) strength. This unilateral focus leads to higher activation of the quadriceps, glutes, and hamstrings on the working leg compared to traditional squats. Additionally, the Bulgarian Split Squat engages more stabilizing muscles, particularly in the ankles and hips, due to the increased balance demand. This comprehensive muscle engagement makes the Bulgarian Split Squat an excellent complement to traditional squats in a well-rounded leg workout routine. The balance and stability requirements of Bulgarian Split Squats set them apart from traditional squats. While performing a Bulgarian Split Squat, you're essentially balancing on one leg, which significantly increases the demand on your proprioceptive system and core muscles. This heightened balance requirement not only strengthens these systems but also more closely mimics real-life movements and sports-specific actions. Traditional squats, while excellent for overall lower body strength, don't challenge your balance and stability to the same degree. Incorporating both exercises in your routine can lead to more comprehensive lower body development and functional strength. Choosing between Bulgarian Split Squats and traditional squats often depends on your specific fitness goals and current abilities. Bulgarian Split Squats are particularly beneficial for addressing muscle imbalances between legs, improving single-leg strength and stability, and enhancing sports performance that requires unilateral leg power. They're also an excellent option for those with limited equipment, as they can be performed effectively with bodyweight alone. Traditional squats, on the other hand, allow for heavier loading and are superior for developing overall lower body and core strength. They're often the go-to choice for powerlifters and those primarily focused on building maximum strength and muscle mass. Ultimately, both Bulgarian Split Squats and traditional squats have their place in a well-designed workout program. Many fitness experts recommend incorporating both exercises to reap the unique benefits of each. You might choose to focus on Bulgarian Split Squats during phases of training where you're working on balance, addressing muscle imbalances, or preparing for sports that require single-leg strength. Conversely, you might emphasize traditional squats during periods focused on building overall strength and muscle mass. By strategically incorporating both exercises, you can develop a more balanced, functional, and powerful lower body. Programming Bulgarian Split Squats in Your Workout Routine When it comes to optimal sets and repetitions for Bulgarian Split Squats, the approach can vary depending on your specific goals. For building strength, aim for 3-4 sets of 6-8 repetitions per leg, using a weight that challenges you in the later reps of each set. If muscle hypertrophy is your goal, increase the volume to 3-4 sets of 8-12 reps per leg. For endurance and toning, you might opt for 2-3 sets of 12-15 reps per leg. Remember, these are general guidelines and can be adjusted based on your fitness level and how your body responds to the exercise. Regardless of your rep scheme, always prioritize proper form over the number of repetitions. The frequency of incorporating Bulgarian Split Squats into your routine depends on your overall workout split and recovery capacity. For most individuals, performing Bulgarian Split Squats 1-2 times per week is sufficient to see improvements in strength and balance. If you're following a full-body workout routine, you might include Bulgarian Split Squats in 2-3 of your weekly sessions. For those on a leg-specific day, incorporating Bulgarian Split Squats once a week, alongside other lower body exercises, can be effective. Always allow at least one day of rest between sessions that include Bulgarian Split Squats to ensure proper recovery and reduce the risk of overtraining. When incorporating Bulgarian Split Squats into a leg day routine, consider their placement within the workout. Many trainers recommend performing Bulgarian Split Squats early in the workout, after a proper warm-up, when you're fresh and can maintain good form. This is especially important if you're using added weight, as the exercise requires significant balance and coordination. You might start with a compound movement like back squats or deadlifts, then move on to Bulgarian Split Squats before finishing with isolation exercises. Alternatively, you could use Bulgarian Split Squats as your primary leg exercise for the day, followed by complementary exercises like leg presses or lunges. Progressive overload is key to continual improvement with Bulgarian Split Squats. This can be achieved in several ways: gradually increasing the weight used, adding more repetitions or sets, decreasing rest time between sets, or improving the quality of each repetition (e.g., increasing range of motion or adding a pause at the bottom of the movement). Keep a workout log to track your progress and ensure you're consistently challenging yourself. Remember, progress isn't always linear, so don't be discouraged by temporary plateaus. Consistently applying progressive overload principles to your Bulgarian Split Squat routine will lead to long-term gains in leg strength, balance, and overall lower body development. Common Mistakes When Performing Bulgarian Split Squats One of the most frequent errors when performing Bulgarian Split Squats is incorrect foot placement. Many people position their front foot too close to the bench, which can lead to excessive forward knee movement and strain on the joint. To avoid this, ensure your front foot is far enough forward that when you lower into the squat, your knee stays behind or in line with your toes. Your rear foot should be placed comfortably on the bench, with the top of your foot resting flat. Experiment with different foot placements to find the position that allows for a full range of motion while maintaining balance and comfort. Knee alignment issues are another common mistake in Bulgarian Split Squats. As you lower into the squat, your front knee may have a tendency to cave inward (knee valgus), which can put unnecessary stress on the joint and reduce the effectiveness of the exercise. To correct this, focus on keeping your knee in line with your second toe throughout the movement. Engage your glutes and imagine pushing your knee outward slightly as you perform the exercise. This proper alignment not only protects your knee but also ensures optimal muscle engagement, particularly in the glutes and outer thigh muscles. Leaning too far forward or backward during the Bulgarian Split Squat can compromise your form and reduce the exercise's effectiveness. Leaning forward often occurs when trying to lower too far, and it shifts the focus away from the quadriceps and onto the glutes and hamstrings. Conversely, leaning too far back can put excessive strain on your lower back and knees. To maintain proper posture, keep your torso as upright as possible throughout the movement. Engage your core muscles and imagine a straight line from your head to your back knee. This alignment will ensure proper muscle engagement and reduce the risk of injury. Insufficient range of motion is a mistake that can limit the benefits of Bulgarian Split Squats. Some people may not lower themselves far enough due to fear of losing balance or lack of flexibility. However, to fully engage the target muscles and reap the maximum benefits, aim to lower your body until your back knee nearly touches the ground, or until your front thigh is parallel to the floor. If you're struggling with depth, start with a lower bench or platform for your back foot, and gradually increase the height as your strength and flexibility improve. Remember, proper form and full range of motion are more important than the amount of weight used or the number of repetitions performed. Bulgarian Split Squats for Different Fitness Goals For those aiming to build muscle mass and strength, Bulgarian Split Squats can be a powerful tool in your arsenal. To maximize hypertrophy, focus on moderate to heavy weights with rep ranges of 8-12 per leg. Incorporate techniques like drop sets or slow negatives to increase time under tension and stimulate muscle growth. For strength gains, use heavier weights with lower rep ranges (4-6 per leg) and longer rest periods between sets. The unilateral nature of Bulgarian Split Squats allows for intense focus on each leg, potentially leading to greater overall strength gains compared to bilateral exercises alone. Athletes looking to improve performance can benefit greatly from incorporating Bulgarian Split Squats into their training regimen. The exercise enhances single-leg strength, balance, and stability, which are crucial for many sports. For speed and power development, perform explosive Bulgarian Split Squats, focusing on a quick, powerful drive upwards. To improve endurance, use lighter weights or bodyweight for higher rep ranges (15-20 per leg). Additionally, vary the exercise by incorporating plyometric elements, such as jump split squats, to develop explosive power that translates directly to many athletic movements. Bulgarian Split Squats are excellent for enhancing balance and stability, making them ideal for individuals focused on improving overall functional fitness. To target these aspects, focus on perfecting your form with bodyweight exercises before adding external resistance. Incorporate balance challenges by performing the exercise on unstable surfaces or by closing your eyes during the movement (only if you're in a safe environment). These variations force your proprioceptive system to work harder, leading to improved balance and coordination that can benefit you in daily activities and reduce the risk of falls. For rehabilitation and injury prevention, Bulgarian Split Squats can play a crucial role. The exercise's unilateral nature allows for targeted strengthening of weaker legs, helping to correct imbalances that may have developed due to injury or habitual movement patterns. Start with bodyweight exercises and focus on proper form and full range of motion. As strength improves, gradually add resistance. The balance component of Bulgarian Split Squats also helps strengthen stabilizing muscles around joints, potentially reducing the risk of future injuries. Always consult with a healthcare professional or certified trainer before incorporating Bulgarian Split Squats into a rehabilitation program. Nutrition to Support Your Bulgarian Split Squat Training Protein requirements play a crucial role in supporting your Bulgarian Split Squat training, especially for muscle growth and recovery. Aim for a protein intake of about 1.6 to 2.2 grams per kilogram of body weight daily. This ensures adequate amino acids are available for muscle repair and growth following your intense leg workouts. Good sources of protein include lean meats, fish, eggs, dairy products, and plant-based options like legumes and tofu. Consider spreading your protein intake evenly throughout the day, including a serving within 30 minutes after your Bulgarian Split Squat workout to support optimal recovery. While protein is essential, maintaining an overall balanced diet is crucial to support your Bulgarian Split Squat training. Carbohydrates are vital for providing energy during your workouts, especially for those high-intensity sets of Bulgarian Split Squats. Aim for complex carbohydrates like whole grains, fruits, and vegetables to provide sustained energy. Healthy fats, such as those found in avocados, nuts, and olive oil, are important for hormone production, including testosterone, which plays a role in muscle growth and recovery. Don't neglect micronutrients – vitamins and minerals are essential for various bodily functions, including muscle recovery and growth. Pre-workout nutrition can significantly impact your Bulgarian Split Squat performance. About 1-2 hours before your workout, consume a meal that includes both carbohydrates and protein. This could be something like chicken with brown rice or a whole grain sandwich with turkey. If you're short on time, a banana with a scoop of peanut butter can provide quick energy. Proper pre-workout nutrition ensures you have the energy to perform Bulgarian Split Squats with intensity and helps prevent muscle breakdown during your workout. Post-workout nutrition is equally important for recovery and muscle growth after your Bulgarian Split Squat session. Within 30 minutes to an hour after your workout, consume a meal or shake that combines protein and carbohydrates. This helps replenish glycogen stores and provides the necessary amino acids for muscle repair. A protein shake with a piece of fruit or a chicken breast with sweet potato are excellent post-workout options. Stay hydrated as well – proper hydration is crucial for nutrient transport and overall recovery. Remember, consistent nutrition habits, along with your Bulgarian Split Squat workouts, will lead to the best results in leg strength and muscle development. Stretching and Recovery for Bulgarian Split Squat Sessions Essential stretches after Bulgarian Split Squat sessions are crucial for maintaining flexibility and reducing the risk of muscle tightness. Focus on stretching the quadriceps, hip flexors, and glutes, as these muscles are heavily engaged during the exercise. For a quad stretch, stand on one leg and bring your heel towards your buttocks, holding your foot with your hand. For hip flexors, kneel on one knee and push your hips forward while keeping your back straight. To stretch the glutes, lie on your back and cross one ankle over the opposite knee, then pull the uncrossed leg towards your chest. Hold each stretch for 20-30 seconds and repeat on both sides. Foam rolling can be an excellent technique for releasing tension in the muscles worked during Bulgarian Split Squats. Start with your quadriceps by lying face down with a foam roller under your thighs. Use your arms to roll from your hips to just above your knees. For the glutes, sit on the foam roller and cross one ankle over the opposite knee, then roll over the glute muscle. When you find a tender spot, pause and hold for 20-30 seconds, allowing the muscle to relax. Foam rolling can help break up adhesions in the muscle tissue, improve blood flow, and speed up recovery. Active recovery methods can play a significant role in maintaining leg health and overall recovery after intense Bulgarian Split Squat sessions. Light activities that promote blood flow without overstressing the muscles can be beneficial. This might include a gentle walk, a leisurely bike ride, or even some light swimming. These activities help circulate blood and nutrients to the muscles, aiding in recovery without causing additional strain. Yoga or gentle stretching routines that include leg-focused poses can also be excellent for active recovery, promoting flexibility and reducing muscle tension after Bulgarian Split Squat workouts. It's important to listen to your body and adjust your recovery strategies based on how your legs feel after Bulgarian Split Squat sessions. If you experience significant soreness, consider incorporating more rest days or reducing the intensity of your workouts. Adequate sleep is also crucial for muscle recovery and growth. Aim for 7-9 hours of quality sleep per night to give your body the time it needs to repair and strengthen the muscles worked during Bulgarian Split Squats. Remember, recovery is just as important as the workout itself when it comes to building strong, healthy legs and preventing overuse injuries. Bulgarian Split Squats for Women: Myths and Facts One common myth about Bulgarian Split Squats for women is that they will lead to bulky thighs. This is far from the truth. Women typically lack the testosterone levels necessary for significant muscle bulk. Instead, Bulgarian Split Squats help women develop lean, toned legs, contributing to a shapely and defined lower body. Regular Bulgarian Split Squat exercises, combined with a balanced diet, can help women achieve the coveted 'toned' look without excessive bulk. It's important to understand that muscle takes up less space than fat, so developing leg strength through Bulgarian Split Squats can actually lead to a leaner, more sculpted appearance. The benefits of Bulgarian Split Squats for women's fitness extend far beyond aesthetics. This exercise is excellent for improving functional strength, which translates to better performance in daily activities and sports. Bulgarian Split Squats enhance core stability, improve balance, and increase overall lower body strength. For women involved in sports or fitness activities, well-developed leg strength from regular Bulgarian Split Squat exercises can enhance performance and reduce the risk of injuries, particularly in activities that involve running, jumping, or quick direction changes. Additionally, the unilateral nature of the exercise helps correct muscle imbalances, which is beneficial for overall body symmetry and injury prevention. Bulgarian Split Squats play a crucial role in creating a balanced and aesthetically pleasing lower body for women. While exercises like traditional squats and lunges primarily target the quadriceps and glutes, Bulgarian Split Squats ensure that the hamstrings and inner thighs also receive attention. This balance is key not only for overall leg strength but also for achieving a proportionate and toned appearance. Women who incorporate Bulgarian Split Squats into their routine often report feeling more confident about the shape and definition of their legs. The exercise is particularly effective at targeting the glutes and outer thighs, areas that many women aim to tone and strengthen. It's worth noting that women can and should challenge themselves with Bulgarian Split Squats just as men do. Progressive overload principles apply regardless of gender. Women should not be afraid to increase the weight or intensity of their Bulgarian Split Squat exercises as they grow stronger. The key is to focus on proper form and gradual progression. By dispelling these myths and understanding the true benefits of Bulgarian Split Squats, women can confidently incorporate this exercise into their fitness routines, leading to stronger, more defined, and functionally superior lower bodies. Advanced Bulgarian Split Squat Techniques Plyometric Bulgarian Split Squats are an advanced variation that can significantly enhance explosive power in your legs. To perform this, start in the standard Bulgarian Split Squat position. As you push up from the bottom of the squat, do so explosively, driving your body upwards so that your front foot leaves the ground slightly. Land softly and immediately lower yourself into the next rep. This plyometric element adds a cardiovascular component to the exercise and is excellent for developing power in the legs, which is particularly beneficial for athletes. Start with bodyweight before attempting to add any additional resistance, and always prioritize proper form and soft landings to protect your joints. Incorporating a weighted vest into your Bulgarian Split Squat routine can provide a new challenge and promote further strength gains. The added weight from the vest increases the overall load on your muscles while keeping your hands free, allowing you to maintain better balance and form. Start with a light vest and gradually increase the weight as you become more comfortable with the movement. This variation is particularly effective for building overall lower body strength and endurance, as it challenges your muscles throughout the entire range of motion. Remember to maintain proper posture and engage your core to support the additional weight. Tempo training is an advanced technique that can increase the effectiveness of your Bulgarian Split Squats by manipulating the speed of different phases of the movement. For example, you might use a 4-1-2 tempo: take 4 seconds to lower yourself into the squat, pause for 1 second at the bottom, then take 2 seconds to return to the starting position. This increased time under tension can lead to greater muscle growth and strength gains. Experiment with different tempos to target specific aspects of strength or muscle development. Slow eccentric (lowering) phases are particularly effective for building strength and muscle size. Bulgarian Split Squat complexes involve combining the exercise with other movements to create a challenging, high-intensity workout. For example, you might perform a set of Bulgarian Split Squats immediately followed by jump squats and then walking lunges, all without rest in between. This type of complex not only builds strength and muscle, but also improves cardiovascular fitness and burns a significant number of calories. Start with bodyweight exercises before adding additional resistance, and adjust the number of repetitions and exercises based on your fitness level. These complexes are an excellent way to maximize your workout efficiency and take your Bulgarian Split Squat training to the next level. Conclusion In conclusion, the Bulgarian Split Squat stands as a cornerstone exercise for comprehensive lower body development and overall fitness. Throughout this guide, we've explored the multifaceted benefits of this exercise, from its role in building unilateral leg strength and muscle mass to its contributions to balance, stability, and athletic performance. The versatility of Bulgarian Split Squats, evident in its various forms and progressions, makes it an accessible and adaptable exercise for individuals across all fitness levels. We've delved into the proper technique for performing Bulgarian Split Squats, emphasizing the importance of maintaining correct form to maximize benefits and minimize the risk of injury. The discussion on common mistakes serves as a valuable reminder of the attention to detail required in executing this exercise effectively. By avoiding these pitfalls, you can ensure that every Bulgarian Split Squat repetition contributes positively to your fitness goals. The exploration of programming Bulgarian Split Squats into various workout routines highlights its flexibility as an exercise. Whether you're a bodybuilder looking to sculpt defined legs, an athlete aiming to enhance performance, or someone focused on general fitness and injury prevention, Bulgarian Split Squats can be tailored to meet your specific needs. The advanced techniques and variations discussed provide options for continual progression and challenge, ensuring that Bulgarian Split Squats remain an effective tool in your fitness arsenal as you grow stronger. Importantly, this guide has addressed common myths, particularly those surrounding Bulgarian Split Squats for women, emphasizing that this exercise is beneficial for all, regardless of gender or fitness goals. The real-life success stories shared illustrate the tangible impact that consistent Bulgarian Split Squat training can have, from alleviating back pain to improving athletic performance and overall quality of life. As you incorporate Bulgarian Split Squats into your fitness routine, remember the importance of proper nutrition, adequate recovery, and a balanced approach to training. Listen to your body, progress at a pace that's right for you, and don't hesitate to seek guidance from fitness professionals when needed. With dedication and proper execution, Bulgarian Split Squats can play a significant role in helping you achieve your lower body strength and aesthetic goals, contributing to a stronger, more balanced, and healthier you. See More: ⤵ Leg Press: Unleashing Leg Power Leg Extensions: The Ultimate Guide to Mastering Unveiling the Magic of Seated Leg Curl: Your Ticket to Sculpted Legs Bulgarian Split Squats: Mastering Leg Gains Unleash Your Leg Strength with the Russian Squat Program Dumbbell Thruster: Unleashing Full-Body Power Best Leg Workout Arnold Leg Workout How To Do The Leg Curl Hack Squat: Complete Guid Dumbbell Squat: Your Comprehensive Guide Goblet Squat: A Comprehensive Guide Calf Raises: Elevate Your Leg Day Romanian Deadlifts: Proper Form and Technique Barbell Squats: Strength and Stability
- Single-Leg Hip Thrust: Build Glute Strength & Fix Muscle Imbalances
Key Takeaways (Quick Summary): Primary Muscle: Gluteus Maximus (with high core, gluteus medius, and hamstring engagement). Main Benefit: Fixes strength imbalances between the left and right glute, preventing injuries. Foot Placement Rule: A 90-degree knee angle targets the glutes. Too far away hits the hamstrings; too close hits the quads. Best Beginner Modification: The "B-Stance" Hip Thrust helps you build balance before going fully single-leg. Equipment Needed: A bench/box and bodyweight (progress with dumbbells or resistance bands). In the pursuit of powerful glutes and a strong lower body, many lifters focus solely on bilateral exercises like squats and deadlifts. While these are foundational, they often mask a critical weakness: unilateral strength imbalances. Your body is designed to move one leg at a time, whether you're walking, running, or jumping. If one glute is significantly weaker than the other, it can lead to performance plateaus, poor movement mechanics, and lower back pain. Enter the Single-Leg Hip Thrust. This exercise is a game-changer for anyone serious about maximizing glute development and enhancing athletic performance. It takes the already powerful hip thrust movement and elevates it by forcing each glute to work independently. In fact, EMG studies consistently show that unilateral hip thrusts elicit higher gluteus medius activation than bilateral thrusts due to the intense pelvic stability required. Here is your complete, step-by-step guide to mastering the single-leg hip thrust. Muscles Worked in the Single-Leg Hip Thrust When you perform this movement, you are engaging a comprehensive network of lower-body muscles: Gluteus Maximus: The primary driver. This exercise isolates your largest glute muscle, promoting muscle growth and a firmer appearance. Gluteus Medius & Minimus: Because you are on one leg, these smaller side-glute muscles work overtime to stabilize your pelvis and keep your hips from dropping. Hamstrings: They assist with hip extension and stabilize the knee joint. Core & Erector Spinae: Your abdominals and lower back muscles engage intensely to maintain a straight spine and prevent rotation. Execution: How to Perfect Your Form The Single-Leg Hip Thrust is a precision-driven exercise. Follow these steps to ensure maximum glute engagement and zero lower back pain: The Setup: Position your upper back (just below your shoulder blades) against an elevated surface like a bench or a plyo box. The 90-Degree Rule: Plant your working foot flat on the ground. Pro Tip: When your hips are fully extended at the top, your knee should form a perfect 90-degree angle. If your foot is too far away, you will feel it in your hamstrings. If it's too close, you will feel it in your quads. The Non-Working Leg: You can either extend your non-working leg straight out or bend the knee and pull it toward your chest (which helps keep a neutral spine). The Thrust: Keep your chin tucked (look forward, not up at the ceiling) and your ribs down. Drive through the heel of your planted foot and powerfully extend your hips upward. The Squeeze: Stop when your body forms a straight line from your shoulders to your knee. Squeeze your working glute hard at the top. The Descent: Lower your hips back down with control, maintaining a slight hover above the ground before starting the next rep. The Best Beginner Progression: The B-Stance Hip Thrust Most people can perform a decent bilateral hip thrust, but ask them to do it on one leg, and suddenly they lose their balance. If you are struggling to keep your hips level, do not skip straight to the single-leg version. Start with the B-Stance Hip Thrust. How to do it: Set up like a normal bilateral hip thrust, but slide one foot forward so that only the heel of that foot is touching the ground. This "kickstand" foot provides just enough balance and support so you don't fall over, but it forces the other planted foot to do 80% of the lifting. It is the perfect bridge between two-legged and one-legged thrusts. How to Progress and Add Weight Once bodyweight becomes easy (you can do 3 sets of 15 reps per leg with perfect form), it's time to apply progressive overload: Adding External Weight: Place a dumbbell or a weight plate across the crease of your working hip. If you work out at home, investing in a set of Bowflex SelectTech Adjustable Dumbbells is the smartest move you can make. They allow you to easily increase the weight from 5 lbs up to 52.5 lbs without cluttering your living room. Using Resistance Bands: Loop a high-quality Resistance Band around your knees. This forces your gluteus medius to work even harder to push your knees outward during the thrust. Adding a Pause: Hold the top contraction for 3 full seconds on every single rep. Frequently Asked Questions (FAQs) Why do I feel the single-leg hip thrust in my lower back? You are likely hyperextending your spine at the top of the movement instead of using your glutes. To fix this, keep your chin tucked (looking forward) and brace your core. Stop lifting your hips once they are in line with your torso. How often should I do single-leg hip thrusts? For most individuals, incorporating them 1 to 2 times per week as part of a lower-body or glute-focused workout is optimal. Aim for 3 to 4 sets of 8 to 15 repetitions per leg. Can this exercise help with running or jumping? Absolutely! Single-leg hip thrusts directly strengthen the glutes, which are the primary drivers of hip extension—the exact movement responsible for powerful sprinting, explosive jumping, and efficient changes of direction. Do I need supplements to grow my glutes? While food is your primary fuel, recovering from intense unilateral training requires adequate protein. Supplementing with a high-quality powder like Optimum Nutrition Gold Standard Whey ensures your muscles have the building blocks they need to repair and grow after a heavy hip thrust session. Conclusion: Elevate Your Glute Game The Single-Leg Hip Thrust is an indispensable exercise for anyone looking to build explosive power, correct muscular imbalances, and sculpt truly impressive glutes. Start with your bodyweight or the B-Stance variation, master the 90-degree foot placement, and gradually add resistance. Want to make sure your form is 100% correct? Watch the video demonstration below before your next workout! See More Exercises: ⤵ Barbell Hack Squat exercise. Bodyweight Lunge exercise Barbell Sumo Squat exercise Dumbbell Good Morning exercise Dumbbell Walking Lunge Dumbbell Squat: Your Comprehensive Guide How To Do Reverse Lunges How To Do Good Morning Exercise Mastering Lateral Lunges for Stronger, More Agile Legs Single Leg Hip Thrust: Your Step-by-Step Guide Leg Press: Unleashing Leg Power Leg Extensions: The Ultimate Guide to Mastering Seated Leg Curl: Your Ticket to Sculpted Legs Bulgarian Split Squats: Mastering Leg Gains Russian Squat Program Dumbbell Thruster: Unleashing Full-Body Power Best Leg Workout Arnold Leg Workout How To Do The Leg Curl
- Bodybuilder Tattoos: Showcase Muscle & Express Your Style
Have you ever wondered how tattoos can enhance the aesthetic appeal of a bodybuilder's physique? Imagine the intricate designs flowing seamlessly over well-defined muscles, creating a living canvas of art and strength. Tattoos for bodybuilders have become a growing trend, merging the worlds of fitness and aesthetics in a unique and captivating way. As more bodybuilders choose to adorn their physiques with ink, the intersection of muscle definition and tattoo artistry has sparked interest and conversation within the fitness community. This trend is not just about personal expression; it's about how tattoos can complement and even enhance the visual impact of a sculpted body. In this article, we'll explore the reasons why bodybuilders get tattoos, the impact of tattoos on their physique, and tips for getting inked as a bodybuilder. Whether you're a seasoned athlete considering your first tattoo or simply curious about this fascinating trend, we'll provide insights and advice to help you understand the dynamic relationship between tattoos and bodybuilding. The Appeal of Tattoos for Bodybuilders Tattoos for bodybuilders serve as a powerful form of personal expression. For many, their bodies are not just a testament to their hard work and dedication in the gym but also a canvas to showcase their individuality and personal stories. Tattoos can symbolize significant life events, personal beliefs, or motivational quotes that resonate deeply with the individual. This form of self-expression is particularly appealing in a sport where the body is already a focal point. Moreover, tattoos can enhance the visual impact of a bodybuilder's physique. Well-placed tattoos can accentuate muscle definition, highlight symmetry, and draw attention to specific areas of the body. For instance, a tattoo on the bicep can make the muscle appear more prominent, while intricate designs on the back can emphasize the width and detail of the latissimus dorsi muscles. This artistic enhancement can be particularly beneficial during competitions, where visual appeal plays a crucial role. The cultural aspect also plays a significant role in the appeal of tattoos for bodybuilders. In many cultures, tattoos are seen as symbols of strength, resilience, and warrior spirit—qualities that align closely with the ethos of bodybuilding. This cultural connection can add an extra layer of meaning and significance to the tattoos, making them more than just decorative art. Additionally, tattoos can serve as a source of motivation and inspiration. Many bodybuilders choose designs that remind them of their goals, achievements, or the challenges they have overcome. This constant visual reminder can provide a psychological boost, helping them stay focused and driven in their training and competitions. Tattoos can also foster a sense of community and belonging. Within the bodybuilding community, tattoos can be a common ground, a shared interest that brings people together. This sense of camaraderie can be particularly valuable in a sport that often requires intense individual effort and dedication. From a practical standpoint, tattoos can also cover up scars or imperfections. Bodybuilders who have undergone surgeries or experienced injuries may use tattoos to conceal these marks, turning potential sources of insecurity into beautiful works of art. This can boost their confidence and help them feel more comfortable in their skin. The aesthetic appeal of tattoos for bodybuilders is further enhanced by the dynamic nature of the art. As the bodybuilder's physique changes and evolves, so too can the tattoos. This adaptability allows for continuous personalization and evolution of the body art, keeping it relevant and meaningful over time. In summary, the appeal of tattoos for bodybuilders is multifaceted, encompassing personal expression, visual enhancement, cultural significance, motivation, community, and practical benefits. This combination of factors makes tattoos a compelling choice for many in the bodybuilding community. Considerations Before Getting a Tattoo Before getting tattoos for bodybuilders, there are several important considerations to keep in mind. First and foremost is the placement of the tattoo. Bodybuilders need to think about how the tattoo will interact with their muscle definition and movement. A design that looks great on a relaxed muscle might distort when the muscle is flexed. Therefore, it's crucial to choose a placement that complements the natural lines and contours of the body. Another key consideration is the timing of getting the tattoo. Bodybuilders often go through cycles of bulking and cutting, which can significantly alter their body composition. Getting a tattoo during a bulking phase might result in the design stretching or distorting when the bodybuilder cuts down. Conversely, getting inked during a cutting phase might lead to the tattoo shrinking or losing detail if the bodybuilder gains muscle mass later. Ideally, tattoos should be planned for periods of stable body composition. The choice of tattoo artist is also critical. Not all tattoo artists are experienced in working with highly muscular bodies. It's important to find an artist who understands the unique challenges and opportunities of tattooing a bodybuilder. This includes knowledge of how to place designs to enhance muscle definition and how to work with the skin's elasticity and movement. Bodybuilders should also consider the potential impact on their training and competition schedule. Getting a tattoo requires a period of healing, during which intense physical activity should be minimized to avoid complications such as infection or ink distortion. This healing period can range from a few days to several weeks, depending on the size and complexity of the tattoo. Planning the tattoo around training cycles and competitions can help minimize disruptions. Pain tolerance is another factor to consider. Tattoos can be painful, and the level of discomfort varies depending on the placement and the individual's pain threshold. Areas with less muscle and more bone, such as the ribs or spine, tend to be more painful. Bodybuilders should be prepared for this aspect and choose placements that align with their pain tolerance. The long-term maintenance of tattoos is also an important consideration. Tattoos can fade over time, especially with exposure to sunlight and the natural aging process of the skin. Bodybuilders who spend a lot of time outdoors or in tanning beds may need to take extra precautions to protect their tattoos, such as using high-SPF sunscreen and avoiding excessive sun exposure. Additionally, bodybuilders should be aware of potential allergic reactions or skin sensitivities. Some individuals may react to certain tattoo inks or develop skin conditions that can affect the appearance and health of the tattoo. Consulting with a dermatologist before getting inked can help identify any potential risks and ensure that the tattoo process is safe. Finally, it's essential to think about the long-term implications of the tattoo. While tattoos can be removed, the process is often expensive, time-consuming, and not always completely effective. Bodybuilders should choose designs that they are confident they will still appreciate and feel proud of in the years to come. In conclusion, getting tattoos for bodybuilders involves careful consideration of placement, timing, artist choice, training schedule, pain tolerance, maintenance, skin health, and long-term implications. By taking these factors into account, bodybuilders can ensure that their tattoos enhance their physique and personal expression without compromising their training or health. Popular Tattoo Styles Among Bodybuilders When it comes to tattoos for bodybuilders, certain styles have gained popularity due to their ability to complement and enhance muscular physiques. One of the most favored styles is tribal tattoos. These designs often feature bold, black lines and intricate patterns that can accentuate muscle contours and create a striking visual impact. Tribal tattoos are particularly popular for areas like the shoulders, arms, and back, where they can flow naturally with the body's movements. Biomechanical tattoos are another popular choice among bodybuilders. These designs blend elements of machinery and human anatomy, creating the illusion of mechanical parts beneath the skin. Biomechanical tattoos can highlight muscle definition and add a futuristic, edgy aesthetic to the bodybuilder's physique. They are often placed on areas with significant muscle mass, such as the arms, legs, and chest, to maximize their visual effect. Realism tattoos are also highly sought after by bodybuilders. These tattoos aim to create lifelike images, whether they are portraits, animals, or other detailed designs. Realism tattoos require a high level of skill from the artist and can be incredibly striking when done well. For bodybuilders, realism tattoos can serve as a powerful form of personal expression, showcasing meaningful images that resonate deeply with them. Japanese tattoos, or Irezumi, are known for their vibrant colors and intricate designs. These tattoos often feature traditional motifs such as koi fish, dragons, and cherry blossoms. Japanese tattoos can cover large areas of the body, making them ideal for bodybuilders who want to create a cohesive and visually stunning piece of body art. The flowing lines and detailed imagery can enhance the natural curves and definition of the muscles. Blackwork tattoos are characterized by their use of solid black ink to create bold, graphic designs. This style can range from simple geometric patterns to complex, abstract art. Blackwork tattoos are popular among bodybuilders because they can create a strong visual contrast against the skin, highlighting muscle definition and adding a dramatic flair to the physique. They are often placed on areas like the arms, chest, and back for maximum impact. Dotwork tattoos involve creating images using tiny dots of ink. This technique can produce incredibly detailed and intricate designs, ranging from mandalas to portraits. Dotwork tattoos can be particularly effective for bodybuilders because the fine details can enhance the texture and depth of the muscles. These tattoos are often placed on areas with smooth, broad surfaces, such as the chest, back, and thighs. Watercolor tattoos are known for their vibrant, fluid colors that mimic the appearance of watercolor paintings. This style can add a unique and artistic touch to a bodybuilder's physique, creating a striking contrast with the defined lines of the muscles. Watercolor tattoos are often used to create abstract designs, nature scenes, or artistic interpretations of traditional tattoo motifs. They can be placed on various parts of the body, depending on the desired effect. Lettering tattoos are another popular choice among bodybuilders. These tattoos can feature quotes, names, or other meaningful words rendered in various fonts and styles. Lettering tattoos can be placed strategically to follow the natural lines of the muscles, enhancing their definition and adding a personal touch to the bodybuilder's physique. They are often placed on areas like the forearms, chest, and ribs. In summary, popular tattoo styles among bodybuilders include tribal, biomechanical, realism, Japanese, blackwork, dotwork, watercolor, and lettering tattoos. Each style offers unique advantages in terms of visual impact and personal expression, allowing bodybuilders to choose designs that best complement their physique and resonate with their individual tastes and stories. The Tattooing Process for Bodybuilders The tattooing process for bodybuilders involves several steps, each of which requires careful consideration to ensure the best possible outcome. The first step is the consultation with the tattoo artist. During this meeting, the bodybuilder discusses their design ideas, placement preferences, and any specific considerations related to their physique. The artist may take measurements and photos to help plan the design and placement, ensuring that it complements the body's natural lines and muscle definition. Once the design is finalized, the next step is the preparation. This involves cleaning and shaving the area where the tattoo will be placed to ensure a smooth and clean surface. The artist may also apply a stencil of the design to the skin, allowing the bodybuilder to see how it will look and make any final adjustments before the tattooing begins. The actual tattooing process involves the use of a tattoo machine to inject ink into the skin. For bodybuilders, this process can be more complex due to the contours and movement of the muscles. The artist must carefully navigate these challenges to ensure that the design remains consistent and visually appealing. This requires a high level of skill and experience, particularly for large or intricate designs. During the tattooing process, pain management is an important consideration. Bodybuilders should be prepared for varying levels of discomfort, depending on the placement and size of the tattoo. Areas with less muscle and more bone, such as the ribs or spine, tend to be more painful. The artist may use numbing creams or other pain relief methods to help manage the discomfort, but it's important for the bodybuilder to communicate their pain levels and take breaks as needed. After the tattoo is completed, the aftercare process begins. Proper aftercare is crucial for ensuring that the tattoo heals well and retains its quality. This involves keeping the tattoo clean and moisturized, avoiding direct sunlight and excessive moisture, and refraining from intense physical activity that could cause irritation or infection. The artist will provide detailed aftercare instructions, and it's important for the bodybuilder to follow these guidelines closely. For bodybuilders, the healing process can be particularly challenging due to their active lifestyle. It's important to plan the tattoo around training cycles and competitions to minimize disruptions. During the healing period, which can range from a few days to several weeks, bodybuilders should avoid activities that cause excessive sweating or friction on the tattooed area. This may require adjustments to their training routine and a temporary reduction in intensity. Once the tattoo has healed, long-term maintenance is essential to keep it looking its best. This includes protecting the tattoo from sun exposure by using high-SPF sunscreen and avoiding tanning beds. Regular moisturizing can also help keep the skin healthy and prevent the tattoo from fading. Bodybuilders should be mindful of how changes in their body composition, such as muscle growth or weight fluctuations, may affect the appearance of the tattoo over time. In conclusion, the tattooing process for bodybuilders involves careful planning, skilled execution, and diligent aftercare. By working with an experienced tattoo artist and following proper aftercare guidelines, bodybuilders can ensure that their tattoos enhance their physique and remain a source of pride and personal expression for years to come. Real-Life Examples and Testimonials Real-life examples and testimonials provide valuable insights into the experiences of bodybuilders with tattoos. These stories can offer inspiration, practical advice, and a sense of community for those considering getting inked. One notable example is Kai Greene, a professional bodybuilder known for his impressive physique and distinctive tattoos. Greene's tattoos, which include intricate designs on his arms and back, have become a signature part of his image, enhancing his muscle definition and adding to his overall aesthetic appeal. Another example is Dana Linn Bailey, a former Ms. Olympia and fitness icon. Bailey's tattoos, which include a large piece on her back and various designs on her arms, reflect her personal journey and achievements in the fitness world. Her tattoos have not only enhanced her visual appeal but also served as a source of motivation and inspiration for her fans and followers. Chris Bumstead, a Classic Physique Mr. Olympia champion, has shared his positive experiences with tattoos. Bumstead's tattoos, which include detailed designs on his arms and chest, have been carefully planned to complement his physique. He emphasizes the importance of choosing an experienced tattoo artist who understands the unique challenges of tattooing a muscular body. Ashley Kaltwasser, a three-time Bikini Olympia champion, has also spoken about her tattoos. Kaltwasser's tattoos, which include small, meaningful designs on her wrists and ankles, reflect her personal beliefs and experiences. She advises bodybuilders to consider the placement and size of their tattoos carefully, ensuring that they do not distract from their muscle definition during competitions. Testimonials from amateur bodybuilders can also provide valuable insights. For example, many amateur bodybuilders share their experiences on social media, offering tips and advice on choosing designs, finding the right artist, and managing the healing process. These firsthand accounts can be particularly helpful for those new to the world of tattoos. Community forums and online groups dedicated to bodybuilding and tattoos are another valuable resource. These platforms allow bodybuilders to share their experiences, ask questions, and seek advice from others who have gone through the process. The sense of camaraderie and support within these communities can be incredibly reassuring for those considering getting inked. In summary, real-life examples and testimonials from professional and amateur bodybuilders provide valuable insights into the world of tattoos for bodybuilders. These stories highlight the personal significance of tattoos, offer practical advice, and foster a sense of community and support. By learning from the experiences of others, bodybuilders can make informed decisions and ensure that their tattoos enhance their physique and personal expression. Addressing Common Concerns When it comes to tattoos for bodybuilders, several common concerns often arise. One of the primary concerns is the impact on muscle definition. Bodybuilders worry that tattoos might obscure their muscle lines and reduce the visual impact of their physique. However, with careful planning and the right design, tattoos can actually enhance muscle definition. Choosing designs that follow the natural contours of the muscles can create a more dynamic and visually appealing look. Another common concern is the potential for distortion. As bodybuilders go through cycles of bulking and cutting, their body composition can change significantly. This raises concerns about how tattoos will look as the muscles grow or shrink. To address this, it's important to get tattoos during periods of stable body composition and to choose designs that can adapt to changes in muscle size. Consulting with an experienced tattoo artist who understands these challenges is crucial. Pain tolerance is another concern for many bodybuilders. Tattoos can be painful, and the level of discomfort varies depending on the placement and the individual's pain threshold. Areas with less muscle and more bone, such as the ribs or spine, tend to be more painful. Bodybuilders should be prepared for this aspect and choose placements that align with their pain tolerance. Numbing creams and other pain relief methods can help manage discomfort during the tattooing process. The healing process is also a significant concern. Intense physical activity can complicate the healing process, leading to issues such as infection or ink distortion. Bodybuilders need to plan their tattoos around their training cycles and competitions to minimize disruptions. During the healing period, which can range from a few days to several weeks, it's important to avoid activities that cause excessive sweating or friction on the tattooed area. Long-term maintenance is another common concern. Tattoos can fade over time, especially with exposure to sunlight and the natural aging process of the skin. Bodybuilders who spend a lot of time outdoors or in tanning beds need to take extra precautions to protect their tattoos. This includes using high-SPF sunscreen, avoiding excessive sun exposure, and regularly moisturizing the skin to keep it healthy. Allergic reactions and skin sensitivities are also potential concerns. Some individuals may react to certain tattoo inks or develop skin conditions that can affect the appearance and health of the tattoo. Consulting with a dermatologist before getting inked can help identify any potential risks and ensure that the tattoo process is safe. It's also important to choose high-quality, hypoallergenic inks to minimize the risk of adverse reactions. Professional considerations can also be a concern for some bodybuilders. Depending on their career or industry, visible tattoos might be viewed negatively or be against dress codes. Bodybuilders should consider the potential impact on their professional life and choose placements that can be easily covered if necessary. This is particularly important for those who work in more conservative or formal environments. In conclusion, addressing common concerns about tattoos for bodybuilders involves careful planning, informed decision-making, and diligent aftercare. By considering factors such as muscle definition, potential distortion, pain tolerance, healing process, long-term maintenance, skin sensitivities, e considerações profissionais, bodybuilders podem tomar decisões mais seguras e satisfatórias sobre suas tatuagens. Conclusion Tattoos for bodybuilders offer a unique blend of personal expression and aesthetic enhancement. From the initial consultation to the careful consideration of placement, timing, and design, the process of getting a tattoo as a bodybuilder involves multiple steps that require thoughtful planning. Popular styles such as tribal, biomechanical, realism, Japanese, blackwork, dotwork, watercolor, and lettering tattoos each offer distinct advantages in highlighting and complementing a muscular physique. Working with an experienced tattoo artist who understands the unique challenges of tattooing a bodybuilder is crucial. This ensures that the design not only looks great but also adapts well to the body's natural lines and muscle movements. Professional guidance can also help navigate the healing process, manage pain, and provide long-term maintenance tips to keep the tattoo looking its best. Tattoos can serve as powerful symbols of personal achievements, beliefs, and motivations. For bodybuilders, these designs often reflect their dedication to the sport, significant life events, or inspirational quotes that keep them focused and driven. The psychological boost provided by these tattoos can be invaluable, offering constant reminders of their goals and accomplishments. The cultural and community aspects of tattoos for bodybuilders cannot be overlooked. Tattoos can symbolize strength, resilience, and a warrior spirit—qualities that resonate deeply within the bodybuilding community. They also foster a sense of camaraderie and belonging, creating connections among individuals who share similar interests and values. Common concerns such as the impact on muscle definition, potential for distortion, pain tolerance, healing process, long-term maintenance, skin sensitivities, and professional considerations can be effectively managed with proper planning and informed decision-making. By addressing these concerns, bodybuilders can ensure that their tattoos enhance their physique without compromising their training or health. Real-life examples and testimonials from professional and amateur bodybuilders provide valuable insights and inspiration. Stories from individuals like Kai Greene, Dana Linn Bailey, Chris Bumstead, and Ashley Kaltwasser highlight the personal significance of tattoos and offer practical advice for those considering getting inked. These firsthand accounts can be particularly helpful for newcomers to the world of tattoos. In conclusion, tattoos for bodybuilders represent a unique intersection of art and fitness. They offer a powerful means of personal expression, enhance the visual impact of a sculpted physique, and provide motivation and inspiration. By carefully considering the various factors involved and seeking professional guidance, bodybuilders can make informed decisions that result in tattoos they will be proud of for years to come. Whether you're a seasoned bodybuilder or just starting your fitness journey, exploring the world of tattoos can be a rewarding experience. Take the time to research, consult with experienced artists, and plan your designs carefully. With the right approach, tattoos can become a meaningful and visually stunning addition to your bodybuilding journey. Mermaid Tattoos: Enchanting Design Ideas and Meanings Phoenix Tattoo: Rising from the Ashes with Stunning Design Ideas Sun Tattoo: Illuminating Design Ideas and Meanings Heart Tattoo: Meanings, Designs, and Ideas for Your Next Ink Sailor Jerry Tattoos: The Legacy of a Tattoo Icon
- Lever Triceps Dip: Build Bigger Arms & Protect Your Shoulders
Embark on a transformative journey to sculpt powerful triceps with the Lever Triceps Dip, an exercise that combines efficiency with precision to redefine arm training. In the universe of fitness and strength conditioning, the Lever Triceps Dip emerges as a formidable ally, offering a targeted approach to those who seek not only aesthetic excellence but also functional strength. This guide is meticulously crafted to navigate you through the nuances of an exercise that is both a staple in weightlifting regimens and a secret weapon for those aiming to achieve peak arm fortitude. As we delve into the Lever Triceps Dip, we'll unveil its foundational role in building the triceps brachii, the nuances of proper execution, and the profound impact it has on your upper body capabilities. This exercise isn't just about the motion; it's an art form that, when mastered, can lead to significant gains in muscle strength, endurance, and definition. Whether you're a fitness rookie or a seasoned gym enthusiast, the Lever Triceps Dip is your next step toward unlocking the true potential of your upper limbs. Join us as we explore the essence of the Lever Triceps Dip, from its fundamental principles to advanced variations, ensuring that you leave equipped with the knowledge to incorporate this powerhouse movement into your routine effectively. It's time to elevate your arm training and embrace the strength that lies within the disciplined performance of the Lever Triceps Dip. What is Lever Triceps Dip? Credits: TYTAX Enter the world of targeted triceps training with the Lever Triceps Dip, a potent exercise designed to enhance your upper body strength and define the silhouette of your arms. This movement utilizes a lever or assisted dip machine, providing a stable and effective way to isolate and engage the triceps muscles intensely. Unlike traditional dips, the lever machine allows for controlled movement, making it accessible to a wide range of fitness levels. The Lever Triceps Dip stands out as a low-impact alternative to its bodyweight counterpart, offering the same benefits without excessive strain on the shoulders and chest. This unique piece of equipment guides your form, enabling you to focus solely on the contraction and extension of the triceps. It's a perfect fit for those who want to build muscle endurance and strength with precision. By incorporating the Lever Triceps Dip into your routine, you're not just working out; you're carving the path to a stronger, more resilient upper body. t's a tailored approach to arm conditioning that ensures every rep is a step closer to your goal, whether that's hypertrophy, muscular endurance, or raw tricep power. What is the Purpose of Lever Triceps Dip? The Lever Triceps Dip is engineered for one overarching goal: to activate and fortify the triceps. But the benefits extend far beyond mere muscle building. This exercise is designed to enhance functional strength that translates into better performance in sports, other weightlifting exercises, and daily tasks that require pushing movements. By utilizing the lever machine, this exercise also offers a safer and more controlled environment for those who are new to strength training or are dealing with injuries. The machine assists in maintaining proper form, which is crucial for effective muscle engagement and reducing the risk of strain. It's an excellent way for beginners to introduce intensity without compromising safety. Moreover, the Lever Triceps Dip serves as an essential exercise for those on a mission to fine-tune their upper body aesthetic. Its effectiveness in isolating the triceps allows for a more focused approach to defining the arm muscles, leading to that coveted sculpted look. Whether you're prepping for competition or striving for personal health goals, the Lever Triceps Dip is a versatile tool in your fitness arsenal. Muscles Worked by Lever Triceps Dip At the heart of the Lever Triceps Dip is the triceps brachii, the muscle primarily responsible for elbow extension. The exercise specifically targets the three heads of the triceps—the long, medial, and lateral heads—encouraging balanced growth and development. By engaging these muscles, you can expect to see an increase in both the size and definition of your upper arms. While the triceps are the stars of the show, the Lever Triceps Dip also calls upon the synergistic muscles of the upper body for stability and support. The anterior deltoids, pectoralis muscles, and the muscles of the upper and lower back all play a supporting role. This not only helps with the dip movement itself but also contributes to a stronger, more stable shoulder girdle. Lastly, the core muscles are subtly recruited to keep the body stable and upright during the exercise. This engagement is crucial for maintaining good form and ensuring that the focus remains on the triceps. The Lever Triceps Dip, therefore, offers a compound benefit—while it's an isolation exercise for the triceps, it also provides an opportunity to strengthen the core and other upper body muscles. How to Perform Lever Triceps Dip Credits: TYTAX To perform the Lever Triceps Dip, begin by adjusting the machine to fit your height. Sit down on the machine's seat and grasp the handles firmly. Your elbows should be bent and tucked close to your body, which is the starting position for the exercise. Before initiating the dip, ensure that your feet are flat on the floor and your posture is upright, with your core engaged. As you press down on the handles, focus on using your triceps to drive the movement. Extend your elbows until your arms are straight but not locked out. The downward motion should be smooth and controlled, avoiding any jerking or swinging that could put undue stress on your joints or engage momentum rather than muscle strength. At the top of the movement, pause briefly to squeeze your triceps for maximum contraction, then slowly return to the starting position. It's important to maintain control throughout the entire range of motion; the ascent should be just as deliberate as the descent. This ensures that your triceps remain engaged and that you're getting the full benefit of the exercise. Variations of the Exercise The Lever Triceps Dip can be varied to keep your workouts diverse and challenging. One straightforward variation is to adjust the weight on the machine, which can be increased or decreased based on your fitness level and goals. This allows you to use the exercise for both strength and endurance training. Another variation involves changing the position of your hands or the width of your grip. This can shift the focus among the different heads of the triceps or alter the involvement of the synergistic muscles. Additionally, changing the speed of your reps—performing them faster for power or slower for muscle endurance—can offer new challenges for your muscles. Advanced users may incorporate techniques such as drop sets or partial reps to maximize muscle fatigue and stimulate growth. These variations keep the Lever Triceps Dip exercise fresh and continually challenging, catering to a range of objectives from muscle toning to significant strength gains. Conclusion The Lever Triceps Dip stands as a testament to the sophistication and effectiveness of modern fitness equipment. It offers a targeted, joint-friendly approach to triceps training that can be tailored to suit anyone's strength and conditioning goals. Whether you're starting on your fitness journey or are a seasoned athlete, the Lever Triceps Dip can be a cornerstone of your arm workout regimen. Through consistent practice and attention to form, this exercise will not only build the strength and definition of your triceps but also contribute to your overall upper body development. It's a move that exemplifies the beauty of resistance training—progressive, adaptable, and utterly transformative. In closing, the Lever Triceps Dip is more than just an exercise; it's a building block for elite arm strength and definition. Incorporate it into your routine, and watch as your triceps transform, carrying you confidently towards your fitness aspirations. So step up, take hold, and dip into greatness—one rep at a time. See Related Articles: ⤵ Seated One-Arm Dumbbell Triceps Extension: Your Ultimate Guide to Sculpted Arms Triceps Dips on Floor: The Ultimate Guide to Arm Strength Cable Tricep Kickback: The Ultimate Exercise for Defined Arms Mastering the Lying Barbell Triceps Extension: Your Ultimate Guide to Sculpted Arms Mastering the Lever Triceps Dip: A Path to Peak Arm Strength Elevate Your Arm Strength with Cable Rope Overhead Triceps Extension Unlocking Arm Definition: One Arm Lying Triceps Extension Triceps Dips: The Ultimate Guide to Arm Sculpting Mastery Bench Dips: The Ultimate Exercise for Tricep Development Mastering the Push-Down: A Comprehensive Guide for Peak Arm Strength One Arm Reverse Pushdown: Your Ultimate Guide to Tricep Training Mastering the Dumbbell Kickback: A Comprehensive Guide One Arm Triceps Pushdown: The Ultimate Guide to Sculpting Your Arms Tricep Workout Routine Guide Triceps with one arm on a pulley: what it is for and how to do it 9 Best Triceps Exercises Tricep Dips: Proper Form and Technique Cable Tricep Pushdowns Tricep Extensions with Dumbbells Tricep Workouts for Sculpted Arms: Get Ready to Tone! Best 10 Triceps Workout
- Arm Mass Workout: Build Bigger Arms & Increase Strength (Hypertrophy)
Building mass in the arms is a common goal for fitness enthusiasts and those looking to enhance their physique. Whether it's for boosting overall strength, enhancing athletic performance, or simply achieving a more defined look, understanding how to gain mass in arms is crucial. In this comprehensive guide, we delve into targeted exercises, nutritional strategies, and smart training techniques designed to maximize your arm growth. The quest to gain arm mass is not just about lifting heavy; it involves a nuanced approach that balances intensity, technique, and recovery. We'll explore the anatomical components of the arm, including the biceps, triceps, and forearms, and the specific exercises that promote hypertrophy in these areas. By incorporating these methods into your routine, you'll be on your way to achieving the arm strength and size you desire. Finally, we'll address common challenges and misconceptions about arm training. From plateaus in growth to disproportional development, we'll provide solutions to help you overcome these hurdles. With our expert guidance, you'll learn how to gain mass in arms effectively and sustainably, leading to lasting results and improved confidence in your physical capabilities. Anatomy of the Arm Muscles Credits: Gravity Transformation - Fat Loss Experts Understanding the anatomy of the arm is the first step in developing an effective training program for mass gain. The arms are composed of several key muscle groups: the biceps brachii, the triceps brachii, and the forearms, which include a complex network of smaller muscles. Each group plays a critical role in arm movement and aesthetics. The biceps are the show muscles, responsible for the coveted arm bulge and flexion of the elbow. On the flip side, the triceps make up a significant portion of the arm's mass and are crucial for elbow extension. The forearms, although often overlooked, are essential for grip strength and complete the look of a powerful arm. To gain mass in each of these areas, it's important to engage them with specific, targeted movements. Compound exercises like pull-ups and push-ups can provide a solid foundation, while isolation exercises like bicep curls and tricep pushdowns can further refine and develop these muscles. Understanding the role each muscle plays can guide your training choices for balanced arm development. Optimal Training Techniques for Mass Credits: Gravity Transformation - Fat Loss Experts Training techniques for mass involve more than just picking up weights and performing repetitions. To truly optimize growth, you need to embrace a range of strategies including progressive overload, time under tension, and workout volume. Progressive overload is the gradual increase of stress placed upon the body during training. By consistently increasing the weights or changing the number of repetitions, you provide a challenge that stimulates muscle growth. Time under tension refers to how long a muscle is under strain during a set. Slow, controlled movements increase this time, promoting hypertrophy. Moreover, the volume of your workouts, which is the total number of reps multiplied by the number of sets, is crucial for building size. A higher volume approach, when paired with adequate recovery, can lead to significant gains in arm mass. However, it's vital to balance intensity and volume to prevent overtraining, which can halt progress and lead to injury. Essential Exercises to Gain Mass in Arms Credits: Gravity Transformation - Fat Loss Experts When it comes to gaining mass in the arms, certain exercises have stood the test of time due to their effectiveness. For the biceps, exercises like standing barbell curls, hammer curls, and preacher curls are excellent for targeting the different heads of the muscle and promoting growth. For the triceps, close-grip bench presses, skull crushers, and dip variations are key for hitting all three heads of the triceps muscle. Incorporating these into your routine ensures comprehensive development and can lead to significant size gains. Forearm mass is often best achieved through exercises that challenge grip strength and wrist stability. Wrist curls, reverse curls, and farmer's walks can all contribute to a firmer grip and a more pronounced forearm, completing the overall appearance of strength in the arms. The Role of Nutrition in Arm Development Nutrition plays a pivotal role in any muscle-building endeavor, and arm development is no exception. Consuming a diet rich in protein is essential for repairing and building muscle tissue. Sources like lean meats, eggs, dairy, and legumes should be staples in your diet. Carbohydrates are also important as they provide the energy needed for intense training sessions. Opt for complex carbohydrates like whole grains, fruits, and vegetables to fuel your workouts and assist in recovery. Additionally, healthy fats from sources like avocados, nuts, and fish can support hormone function, which is critical for muscle growth. Lastly, hydration and micronutrients are often overlooked in their importance for muscle development. Staying hydrated is crucial for optimal performance in the gym, while vitamins and minerals play numerous roles in muscle function and repair. Ensuring your diet is well-rounded with a variety of nutrients will support your goals to gain mass in arms. Recovery and Rest - The Unsung Heroes Recovery and rest are the unsung heroes in the quest for arm mass. Muscles need time to repair and grow after being broken down through exercise. Without proper rest, the risk of overtraining increases, which can lead to plateaued growth, or worse, injury. Sleep is a critical component of recovery. Aiming for 7-9 hours of quality sleep per night can significantly affect muscle recovery and growth due to the release of growth hormone during deep sleep cycles. Good sleep hygiene practices can help you achieve better rest and, subsequently, better gains. Active recovery techniques such as stretching, foam rolling, and light activity on rest days can also promote blood flow and aid in the reduction of muscle soreness. By incorporating these recovery strategies, you're setting the stage for continuous progress in your arm growth journey. Conclusion Gaining mass in your arms requires a holistic approach that encompasses dedicated training, targeted exercises, strategic nutrition, and ample recovery. Understanding the intricacies of arm anatomy, applying effective workout techniques, and eating to support muscle growth are all critical steps in this journey. Remember to listen to your body, prioritize rest, and be consistent with your efforts. With patience and perseverance, you'll be able to achieve the strong, muscular arms you're aiming for. To complete the article, I would continue with detailed content for each section, ensuring that each part is informative, engaging, and optimized for SEO with the targeted keyword "how to gain mass in arms" used strategically throughout the text.
- Dumbbell Upper Body Workout: Build Muscle & Increase Strength (Home Gym)
Elevate your fitness game with the definitive dumbbell upper body workout designed to build strength, enhance muscle tone, and improve overall endurance. Dumbbells, the versatile staples of strength training, are at the core of this effective workout regimen. With exercises tailored to target every major muscle group in the upper body, this comprehensive guide is your gateway to achieving the sculpted and balanced physique you've always wanted. Whether you're training at home or in the gym, this dumbbell workout is engineered to be accessible, scalable, and impactful for fitness enthusiasts of all levels. Get ready to transform your approach to upper body training with the strategic and powerful routines outlined in this article. What is a Dumbbell Upper Body Workout? Credits: Caroline Girvan A dumbbell upper body workout is a strength training protocol that uses dumbbells as the primary equipment to work the chest, shoulders, back, arms, and core. The versatility of dumbbells allows for a range of exercises that can be performed in various positions—standing, seated, or lying down. Dumbbell workouts offer the advantage of unilateral training, which helps to address and correct muscle imbalances. The independent movement of each arm ensures both sides of the body work equally, making it a highly effective approach to strength training. Whether you're a beginner or an advanced athlete, dumbbell upper body workouts can be tailored to your skill level. The wide range of weight options allows individuals to progress at their own pace, continuously challenging their muscles with increased resistance. The Purpose of Dumbbell Upper Body Workouts The primary goal of a dumbbell upper body workout is to comprehensively engage all the muscle groups in the upper body. This approach promotes balanced muscle development and can lead to improved muscular endurance and strength over time. Dumbbell workouts are not just about aesthetics; they also enhance functional strength. The movements performed mimic everyday activities, helping to better prepare your body for daily challenges while also sculpting a more toned and defined appearance. One of the greatest benefits of using dumbbells is the flexibility they offer. A dumbbell upper body workout can be done almost anywhere, from a fully equipped gym to the comfort of your own home, making it a convenient option for maintaining a consistent fitness routine. Muscles Worked in a Dumbbell Upper Body Workout Credits: Caroline Girvan A well-designed dumbbell upper body workout targets all the major muscle groups, including the pectorals (chest), deltoids (shoulders), latissimus dorsi (back), biceps, triceps, and the core. This comprehensive targeting ensures a balanced development of the upper body. While the primary focus is on the larger muscle groups, secondary muscles such as the trapezius, rhomboids, and rotator cuff muscles are also engaged. These muscles play a critical role in supporting the joints and enabling a full range of motion. Throughout each dumbbell exercise, the core is actively engaged to stabilize the body. This not only helps in performing each exercise effectively but also aids in strengthening the abdominal and lower back muscles, which are crucial for overall posture and stability. How to Perform a Dumbbell Upper Body Workout Begin with foundational exercises that target the larger muscle groups. Movements such as the dumbbell bench press, shoulder press, and rows are staples in an upper body routine. Starting with these allows you to build strength and confidence before moving on to more complex exercises. As you advance through your workout, include exercises that target the arms and core, such as bicep curls, tricep extensions, and dumbbell crunches. This progression ensures that you are evenly working all the muscle groups and maximizing the effectiveness of your workout. Throughout every exercise, it is essential to maintain proper form. This not only prevents injury but also ensures that the correct muscles are being engaged for maximum benefit. Take the time to learn each movement and perform them with control and precision. Variations of Dumbbell Upper Body Exercises Credits: BullyJuice Compound exercises, such as the dumbbell thruster, work multiple muscle groups simultaneously and offer an efficient way to increase the intensity of your workout. These movements can help improve coordination and burn more calories. Supersets involve performing two exercises back-to-back with no rest in between. This technique not only saves time but also increases the intensity of your workout, leading to enhanced endurance and strength gains. To push past plateaus, consider integrating drop sets into your routine. This involves performing an exercise until failure, then dropping to a lighter weight and continuing to work the same muscle group. It's a tactic that can lead to significant muscle hypertrophy and endurance. Conclusion The dumbbell upper body workout is a timeless and versatile approach to strength training that offers numerous benefits for both the novice and the seasoned athlete. By engaging all the major muscle groups in the upper body, this workout ensures a balanced and effective training session that can lead to impressive gains in muscle strength, endurance, and overall aesthetic. With the variety of exercises available and the flexibility to modify the workout to fit individual needs, the dumbbell upper body workout remains a cornerstone in the world of fitness. Dedication to this workout regimen, coupled with proper nutrition and rest, can lead to remarkable transformations and help you reach and surpass your fitness goals.
- Lying Barbell Triceps Extension: Build Bigger Arms & Prevent Elbow Pain
The quest for strong, sculpted arms is a timeless journey many fitness enthusiasts embark upon. Amidst a myriad of exercises claiming to offer the 'ultimate' solution, the Lying Barbell Triceps Extension emerges as a classic move with proven results. This comprehensive guide is dedicated to unraveling the intricacies of this powerful exercise, providing you with the knowledge and technique to enhance your triceps training effectively. What is the Lying Barbell Triceps Extension? Credits: Starting Strength The Essence of the Exercise The Lying Barbell Triceps Extension, often referred to as the 'Skull Crusher,' is a weightlifting exercise that targets the triceps muscles. This resistance training staple has stood the test of time, owing to its simplicity and effectiveness. Performed using a barbell, as the name suggests, it involves an overhead extension of the arms while lying supine on a bench. Its allure lies in its ability to isolate the triceps, allowing for a focused workout that can contribute to both muscle growth and increased arm strength. A Historical Perspective Tracing back to the golden era of bodybuilding, the Lying Barbell Triceps Extension has been a favorite among legends for carving out the coveted horseshoe shape of the triceps. Its historical significance is matched by its continued relevance in modern-day training programs. As fitness trends ebb and flow, the staying power of this exercise is a testament to its unmatched effectiveness for triceps development. The Technical Breakdown Understanding the mechanics of the Lying Barbell Triceps Extension is crucial for performance and safety. The exercise primarily revolves around the elbow joint, where the extension and contraction of the triceps occur. By lying down, you eliminate the potential support from other body parts, ensuring that the triceps do the heavy lifting. This isolation is what makes the exercise both challenging and rewarding for those seeking to enhance their upper arm physique. The Purpose of the Lying Barbell Triceps Extension Credits: Broser Built Strength and Hypertrophy The primary goal of the Lying Barbell Triceps Extension is to build strength and induce hypertrophy in the triceps. By overloading the muscle through progressive resistance, the exercise stimulates muscle fibers, prompting growth and increased muscular endurance. Whether you're an athlete looking to enhance your performance or a bodybuilder sculpting your arms, this exercise provides a direct route to your objectives. Functional Benefits Beyond aesthetics, the Lying Barbell Triceps Extension offers functional benefits. The triceps are vital for any pushing movements, and strengthening them can improve your proficiency in a wide array of activities, from opening a door to excelling in sports that require arm strength and stability. Enhancing your triceps can lead to noticeable improvements in both everyday tasks and athletic endeavors. Prehabilitation and Rehabilitation Incorporating the Lying Barbell Triceps Extension into your routine can also serve as a prehabilitative measure, fortifying your triceps against potential injuries. Moreover, under the guidance of a healthcare professional, it can be adapted for rehabilitative purposes, aiding in the recovery of arm injuries by rebuilding strength and flexibility within a controlled range of motion. Muscles Worked by the Lying Barbell Triceps Extension Primary Muscle Group: The Triceps Brachii The star of the show during the Lying Barbell Triceps Extension is the triceps brachii. This three-headed muscle, consisting of the long, lateral, and medial heads, is responsible for the extension of the elbow joint. Each head plays a role in the movement, and while you can't isolate them entirely, the exercise ensures comprehensive engagement across the entire muscle. Secondary Muscles: Stabilizers in Action While the triceps are the primary focus, secondary muscles act as stabilizers throughout the exercise. The wrists, shoulders, and core must engage to maintain form and control the weight, subtly contributing to the overall development of upper body strength and stability. These stabilizing muscles are essential for ensuring the movement is executed smoothly and safely. The Synergistic Effect The beauty of the Lying Barbell Triceps Extension lies in the synergistic effect it has on the arm muscles. While the triceps receive the bulk of the workload, the involvement of secondary muscles creates a compound effect. This not only enhances the efficiency of your workout but also promotes balanced muscle development and joint health. How to Perform the Lying Barbell Triceps Extension Credits: intosport Setting the Stage Begin by selecting an appropriate weight—enough to challenge your triceps but not so heavy that it compromises your form. Lie flat on a bench, gripping the barbell with hands shoulder-width apart. Start with the barbell held directly above you, arms fully extended, and wrists locked to provide a stable path for the bar. The Movement Inhale as you slowly lower the barbell towards your forehead, keeping your upper arms stationary and elbows pointed to the ceiling. The movement should be controlled and deliberate, focusing on the triceps doing the work. Once the bar is an inch or two above your forehead, exhale and extend your arms back to the starting position, contracting the triceps at the top of the movement. Form and Safety Tips Maintain a tight core throughout the exercise to protect your spine. Avoid flaring your elbows and ensure they remain in a fixed position to isolate the triceps effectively. Always prioritize form over weight to prevent injury and maximize the effectiveness of the exercise. Variations of the Exercise The Dumbbell Approach Substituting the barbell with dumbbells allows for a greater range of motion and can be easier on the wrists. The Dumbbell Lying Triceps Extension follows a similar pattern but can also involve movements such as the 'neutral grip press' that further challenge the triceps and increase joint stabilization. Incline and Decline Variations Performing the exercise on an incline bench shifts the focus slightly towards the long head of the triceps, while a decline bench places more emphasis on the lateral head. These variations can be incorporated to target different aspects of the triceps and keep your routine dynamic. Cable Triceps Extensions Using a cable machine provides constant tension on the triceps throughout the movement. The Cable Lying Triceps Extension can offer a unique stimulus for muscle growth and is especially beneficial for those looking to maintain tension at the peak contraction point. Conclusion The Lying Barbell Triceps Extension stands as a testament to the enduring pursuit of strength and muscular definition. Its ability to isolate and build the triceps is unmatched, making it a cornerstone exercise for anyone serious about arm development. By understanding its purpose, engaging the correct muscles, and executing it with impeccable form, you can harness the full potential of this timeless exercise. Remember, the key to success lies not only in the execution but also in the consistency and progression of your training. Incorporate the Lying Barbell Triceps Extension into your routine, explore its variations, and you'll be well on your way to achieving the strong, sculpted arms that are both a symbol of power and a badge of discipline. Final Note As with any exercise program, consult with a fitness professional to ensure the Lying Barbell Triceps Extension is appropriate for your fitness level and goals. Now, armed with knowledge and technique, it's time to embark on your journey towards peak triceps performance. Remember, the path to greatness lies in the lift of a bar – and in your hands, it's an art form. See Related Articles: ⤵ Seated One-Arm Dumbbell Triceps Extension: Your Ultimate Guide to Sculpted Arms Triceps Dips on Floor: The Ultimate Guide to Arm Strength Cable Tricep Kickback: The Ultimate Exercise for Defined Arms Mastering the Lying Barbell Triceps Extension: Your Ultimate Guide to Sculpted Arms Mastering the Lever Triceps Dip: A Path to Peak Arm Strength Elevate Your Arm Strength with Cable Rope Overhead Triceps Extension Unlocking Arm Definition: One Arm Lying Triceps Extension Triceps Dips: The Ultimate Guide to Arm Sculpting Mastery Bench Dips: The Ultimate Exercise for Tricep Development Mastering the Push-Down: A Comprehensive Guide for Peak Arm Strength One Arm Reverse Pushdown: Your Ultimate Guide to Tricep Training Mastering the Dumbbell Kickback: A Comprehensive Guide One Arm Triceps Pushdown: The Ultimate Guide to Sculpting Your Arms Tricep Workout Routine Guide Triceps with one arm on a pulley: what it is for and how to do it 9 Best Triceps Exercises Tricep Dips: Proper Form and Technique Cable Tricep Pushdowns Tricep Extensions with Dumbbells Tricep Workouts for Sculpted Arms: Get Ready to Tone! Best 10 Triceps Workout